Note:
• When removing, use caution not to break the latch. If the latch is
accidentally broken, remove all fragments of the part to prevent
any of them from getting caught in the gears and other parts.
• When reinstalling, push in the clutch until the latch settles in the
groove in the shaft.
• Make sure the snap ring of the clutch is settled in the groove in the
LCC paper transport unit.
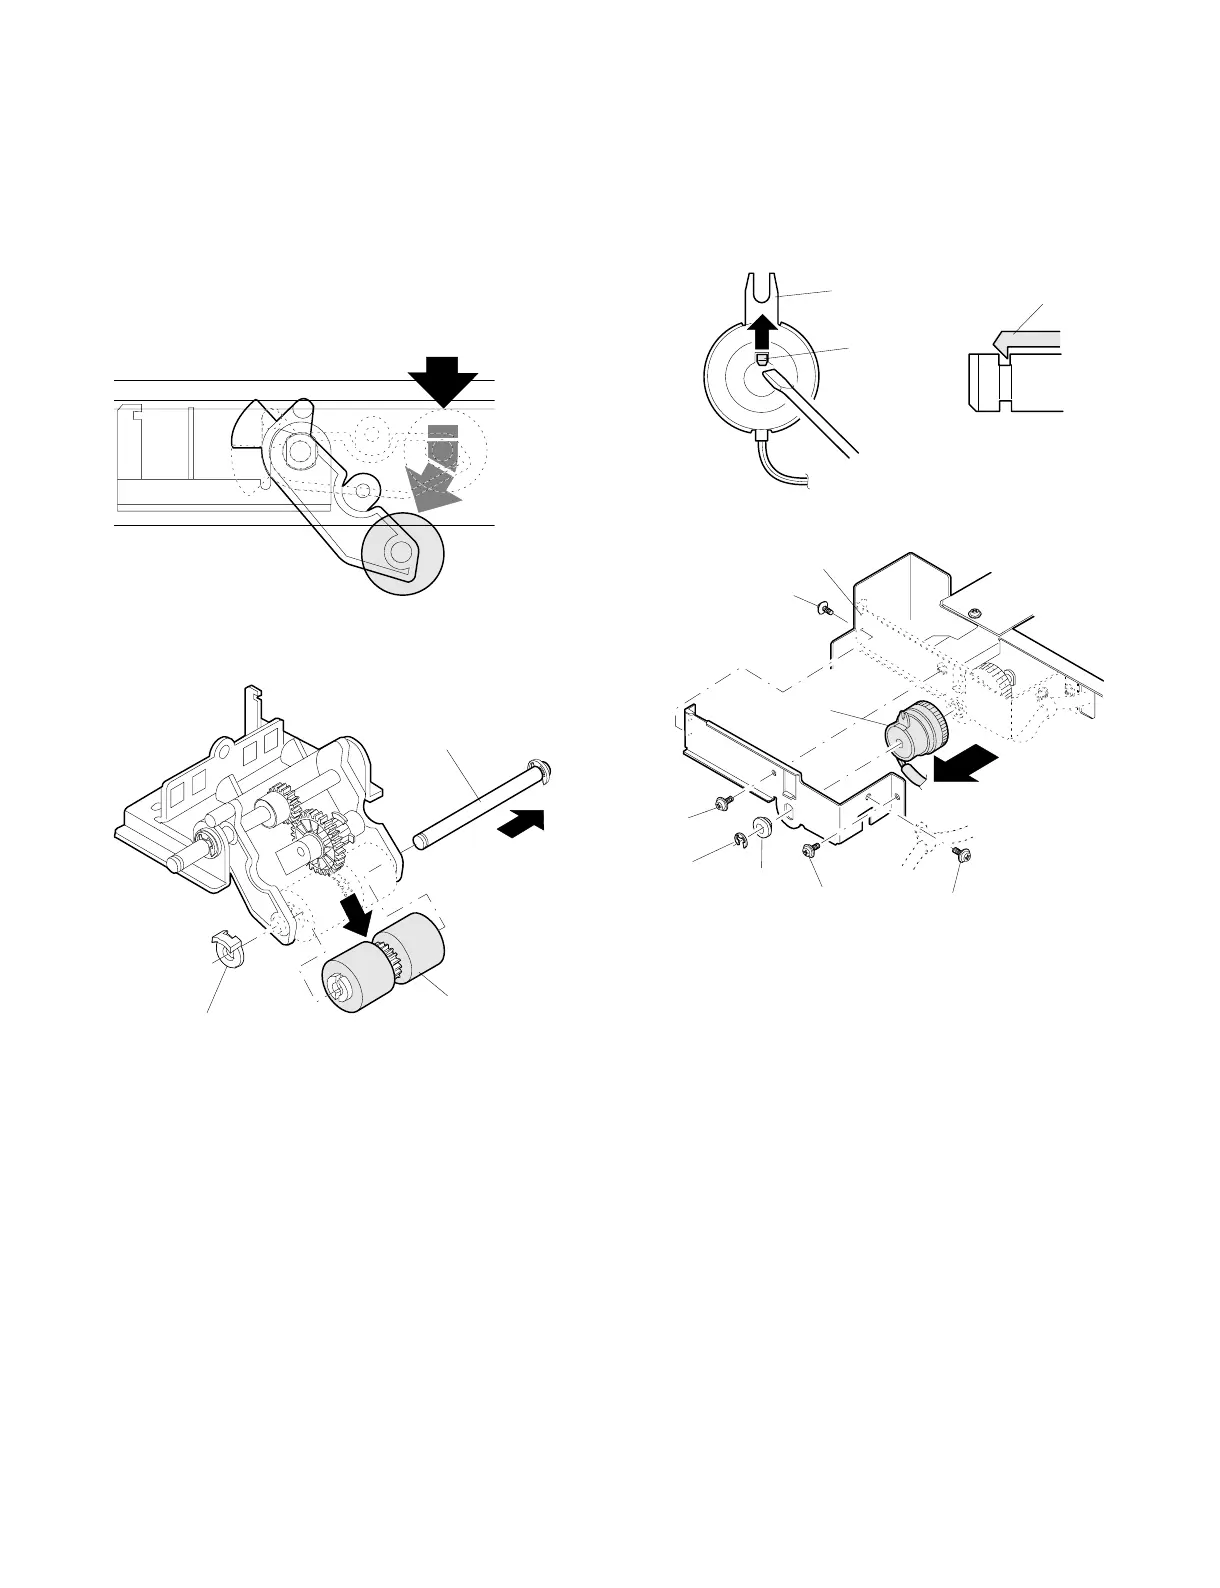
C. Pick-up roller
a. Remove the LCC paper transport unit.
b. Hold down the pick-up roller from upside, to make it in the state as
shown in the figure.
c. Remove the clip and detach the pick-up roller.
D. Separation roller clutch
a. Remove the LCC paper transport unit.
b. Remove the E-ring and detach the bearing.
c. Remove the connector.
d. Turn the shaft so that the latch shown in the figure be positioned
for easy removal. Push up the latch with the precise slotted
screwdriver in the direction indicated by the arrow, to remove the
clutch.
Note:
• When removing, use caution not to break the latch. When the latch
is accidentally broken, remove all fragments of the part to prevent
any of them from getting caught in the gears and other parts.
• When reinstalling, push in the clutch until the latch settles in the
groove in the shaft.
• Make sure the snap ring of the clutch is settled in the groove in the
LCC paper transport unit.
Hold down
Clip
Shaft
Roller
Lock
Side view of clutch
Latch
Latch
Bearing
E ring
Screw
Separation
clutch
Joggle
Screw
Screw
Screw
7 – 24