CD-MD3000H/CD-MD3000W
– 20 –
REMOVING AND REINSTALLING THE MAIN PARTS
MD MECHANISM SECTION
For details about the procedure to remove the MD mechanism
from the main unit, refer to the Disassembly Procedure, Steps
1-7 in the main unit and also the MD section.
(Referring to page18)
Caution:
After pulling out the optical pickup connector, wrap the end
of the connector in conductive aluminium foil to prevent the
optical pickup from being destroyed by static electricity.
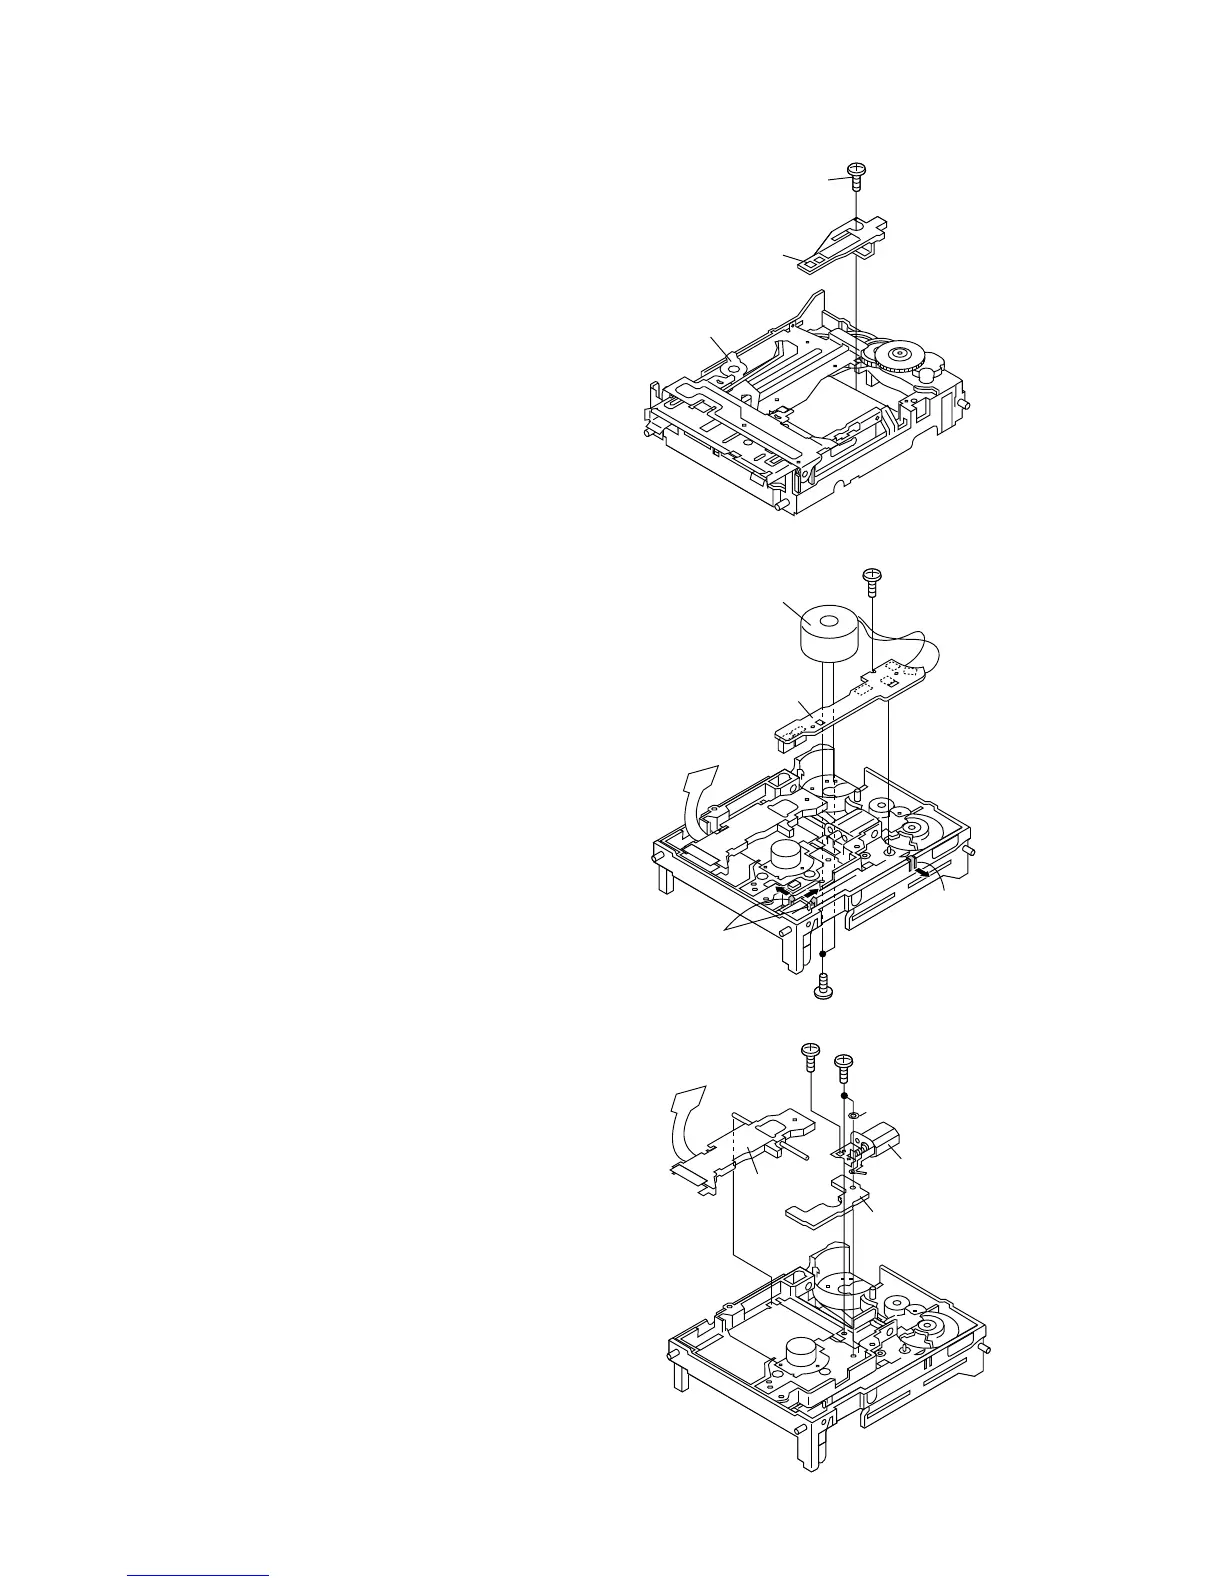
How to remove the magnetic head
(See Fig. 20-1)
1. Remove the screws (A1) x 1 pc.
Caution:
Take utmost care so that the magnetic head is not damaged
when it is mounted.
Figure 20-1
How to remove the MD loading motor PWB/MD
loading motor
(See Fig. 20-2)
1. Remove the screw (B1) x 1 pc.
2. Remove the Hoock (B2) x 3 pcs., and remove the MD
Loading PWB.
3. Remove the screw (B3) x 2 pcs., and remove the MD
Loading motor.
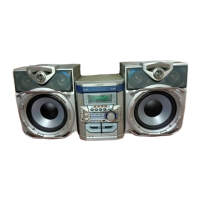
How to remove the MD sled motor/optical pickup
(See Fig. 20-3)
1. Remove the screws (C1) x 3 pcs., and remove the MD sled
motor.
2. Remove the optical pickup.
Caution:
Be careful so that the gear is not damaged.
(The damaged gear emits noise during searching.)
Figure 20-2
(A1)x1
ø1.7x5mm
MD Mechanism
Magnetic Head
(B3)x2
ø1.7x3mm
(B1)x1
ø1.7x6mm
(B2)x2
(B2)x1
MD Loading Motor
MD Loading Motor
PWB
(C1)x2
ø1.4x4.5mm
(C1)x1
ø1.4x5mm
Optical
Pickup
MD Sled Motor
Washer
MD Mechanism
Switch PWB
Figure 20-3