– 41 –
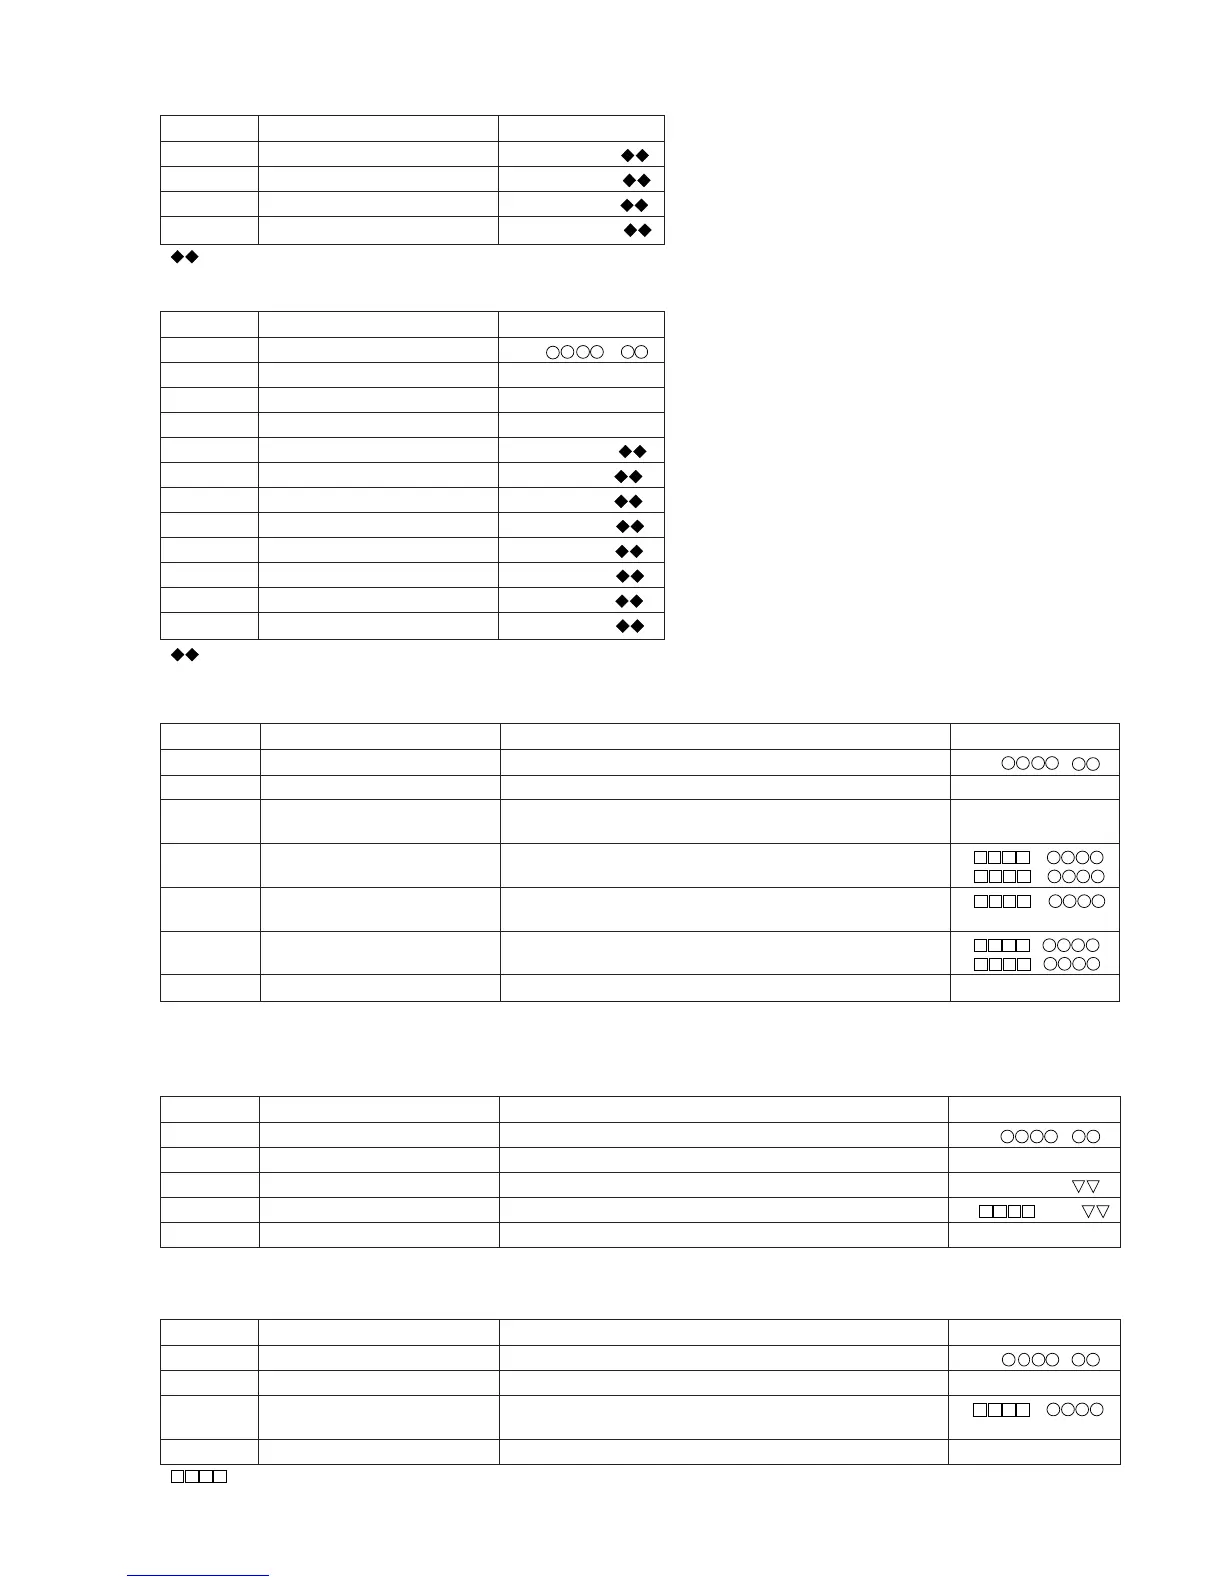
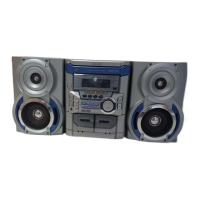
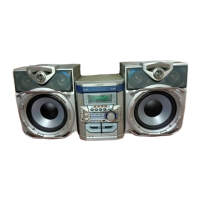
CD-MD3000H/CD-MD3000W
6. TEST-PLAY mode
Step 1 Test mode STOP state The AUTO preliminary adjustment should have been completed. [ t s m e ]
Step 2 Press the X-BASS button. TEST-PLAY menu [ T E S T _ P L A Y _ ]
Step 3
Press once the DISP/CHARACTER button.
ADDRESS setting (Target address initial value is indicated) [ A D R E S _ 0 0 3 2 ]
Press once the TAPE REC button.
Step 4 Continuous playback (pit section) (Address + C1 error indication) [s c ]
Continuous playback (groove section)
(Address + C1 error indication) [a c ]
Step 5
Press once the DISP/CHARACTER button.
(Address + ADIP error indication) [a a ]
Continuous playback (groove section)
(HIGH reflection STEP 6)
Step 6 Continuous playback (pit section) Address + Jitter [s j ]
Continuous playback (groove section)
[a j ]
Step 7
Press once the MD STOP button
. TEST-PLAY menu [ T E S T _ P L A Y _ ]
Step No.
Setting Method
7. TEST-REC mode
Step 1 Test mode STOP state The AUTO preliminary adjustment should have been completed. [ t s m e ]
Step 2 Press twice the X-BASS button. TEST-REC menu [ T E S T _ R E C _ _ ]
Step 3
Press once the DISP/CHARACTER button.
ADDERS setting (indication of address initial value) [ a 0 0 3 2 _ p w ]
Step 4
Press once the TAPE REC button.
Continuous recording [ a _ p w ]
Step 5
Press once the MD STOP button.
TEST-REC menu [ T E S T _ R E C _ _ ]
Step No.
Setting Method
Remarks Display
Remarks
Display
(For confirmation of the playback ability at the named address.)
With recording mini disk (For confirmation of the playback ability at the named address.)
8. INNER mode
Step 1 Test mode STOP state [ t s m e ]
Step 2 Press the MD PLAY button. INNER menu [ _ _ I N N E R _ _ ]
Step 3
Press once the TAPE REC button.
INNER switch position measurement [s c ]
(SUBQ address and C1 error are also indicated.)
Step 4
Press once the MD STOP button.
INNER menu [ _ _ I N N E R _ _ ]
Step No.
Setting Method
Remarks Display
• : Address
Step No.
Setting Method
Display
Step 16 Press the EQUALIZER button
.
[G A L S G _ _ _ ]
Step 17 Press the EQUALIZER button
.
[H A L S O F S _ ]
Step 18 Press the EQUALIZER button
.
[L A L S O F S _ ]
Step 19 Press the EQUALIZER button
.
[G A L S O F S _ ]
G) ADJUST setting
Step No.
Setting Method
Display
Step 1 Test mode STOP state [ t s m e ]
Step 2
Press the EQUALIZER button eight times.
[ E E P R O M_ S E T ]
Step 3
Press the TAPE REC button.
[ _ _ F o c u s _ _ _ ]
Step 4
Press the EQUALIZER button six times.
[A D J S E T _ _ _ _ ]
Step 5
Press the TAPE REC button.
[C O K _ _ _ _ _ ]
Step 6 Press the EQUALIZER button. [F A T _ _ _ _ _ ]
Step 7 Press the EQUALIZER button. [T A T _ _ _ _ _ ]
Step 8 Press the EQUALIZER button. [C A T _ _ _ _ _ ]
Step 9 Press the EQUALIZER button. [F A B _ _ _ _ _ ]
Step 10 Press the EQUALIZER button. [S T R _ _ _ _ _ ]
Step 11 Press the EQUALIZER button. [S F S _ _ _ _ _ ]
Step 12 Press the EQUALIZER button. [S T C _ _ _ _ _ ]
• : Setting value
• : Setting value
• Whenever the X-BASS button is pressed in the address setting mode, the address changes as follows.
0 0 3 2 → 0 3 C 0 → 0 7 0 0 → 0 8 A 0 → 0 9 5 0 → 0 0 3 2 →
…………
• Whenever the X-BASS button is pressed in the address setting mode, the address changes as follows.
0 0 3 2 → 0 3 C 0 → 0 7 0 0 → 0 8 A 0 → 0 9 5 0 → 0 0 3 2 →
…………