19
TU-GD10U-T
TU-45GAD/T
LC-45GX6U/D/T
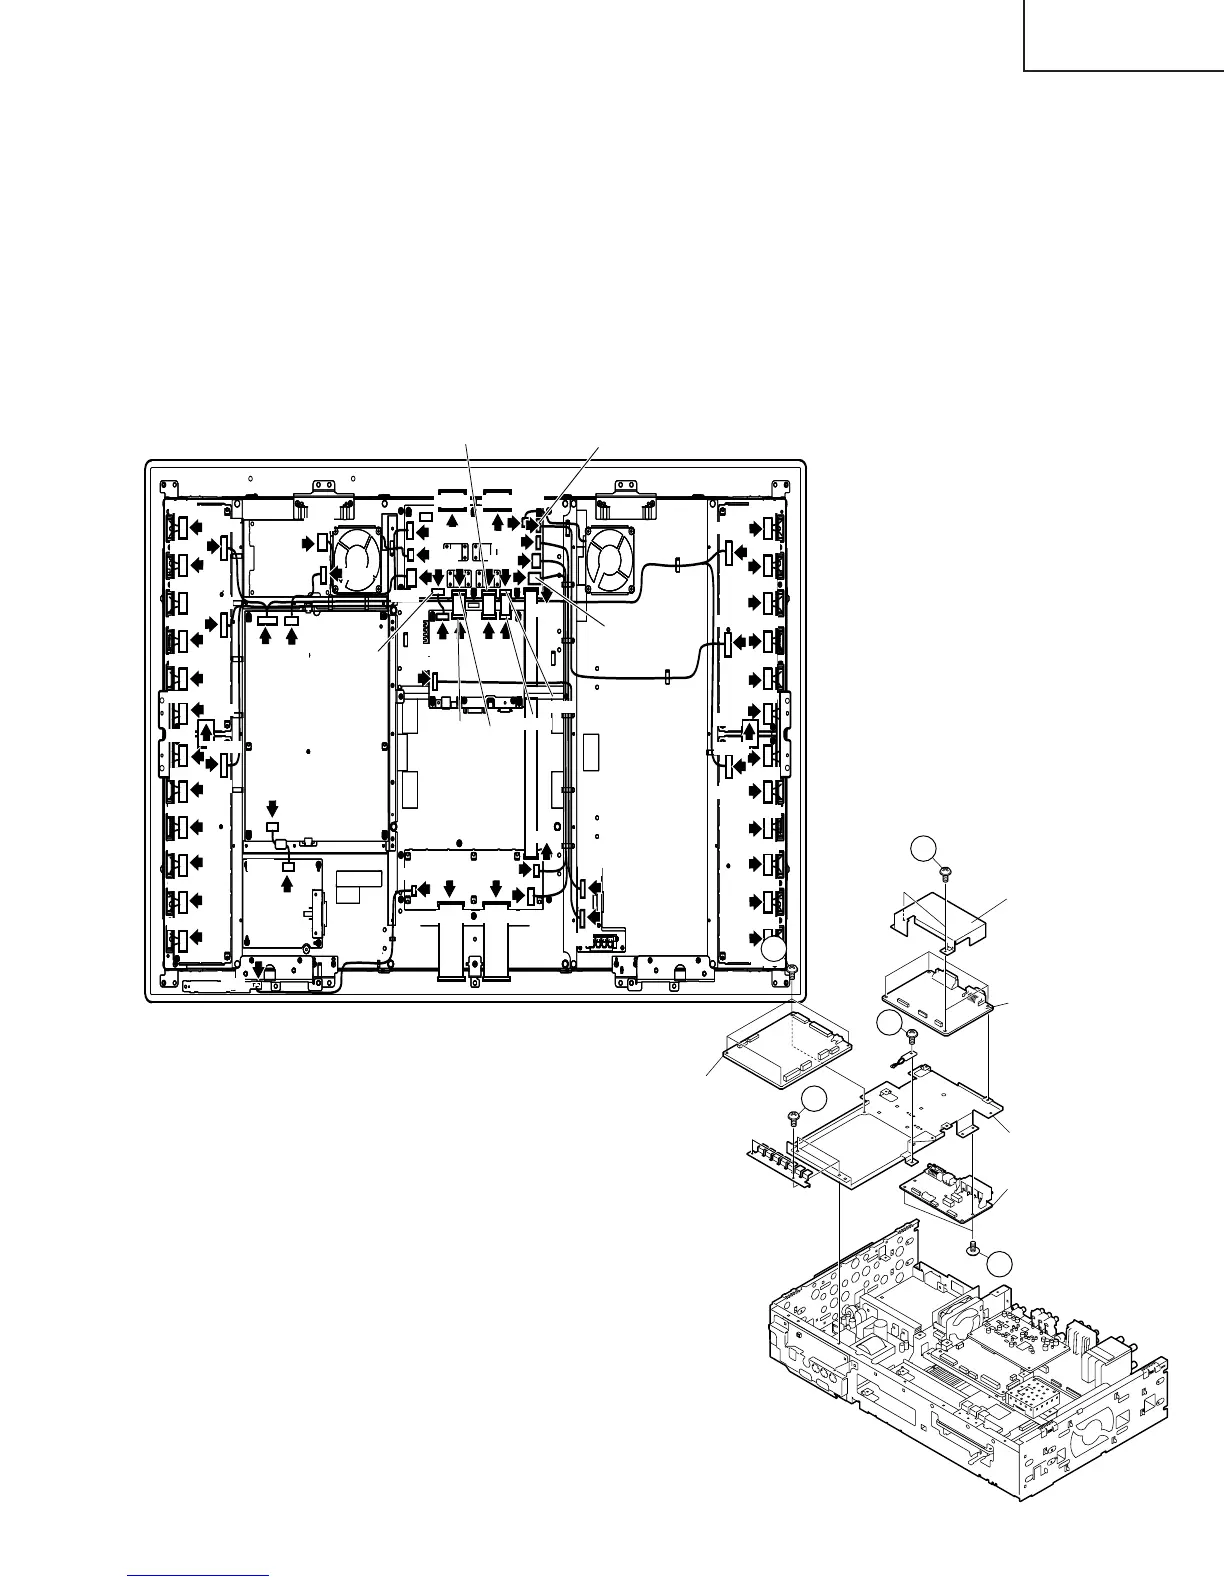
5. Remove the twenty one lock screws, four washers and six hexagon shaft screws from the Rear Panel, and
detach the Rear Panel.
6. Remove the DVI / HDMI PWB.
6-1. Remove the four lock screws from the DVI / HDMI PWB Angle.
6-2. Remove the four lock screws from the DVI / HDMI PWB.
7. Remove the DC/DC Converter PWB, TMDS-TX PWB and AUDIO I/F PWB.
7-1. Remove the three lock screws from the TMDS PWB Angle.
7-2. Remove the four lock screws from the DC/DC Converter PWB.
7-3. Remove the four lock screws from the TMDS-TX PWB.
7-4. Remove the two lock screws from the AUDIO I/F PWB.
P7307
P7301
P7302
P7303
P7304
P7309
P7306
P7401
P7402
P7403
P7404
P7405
P2006
P7501
P7502
P7503
P7504
P7505
P7506
P7601
P7402
P7403
P7404
P7405
P7406
P7507
P7509
P7609
P602
P601
SC6801SC6802
P6902
SC6401
P6901
P102
P7802
P6101
P5401
SC4201
SC5301
SC4001
SC4702
SC4701
P2204
P4804
P4805
P4803
P4806
P4801
P1701
P1702
P7901P7001
P2205
P2206
SC5502
P4801
SC5501
SC2201
SC4002
P7409
P7305
P7308
SC7401
P6903
P5301
P7508
SC7601
7-4
7-3
7-2
7-1
7-1
DC/DC
Converter
PWB
TMDS Shield
TMDS-TX PWB
TMDS PWB Angle
AUDIO I/F PWB
 Loading...