MX3500N ADJUSTMENTS 6 – 60
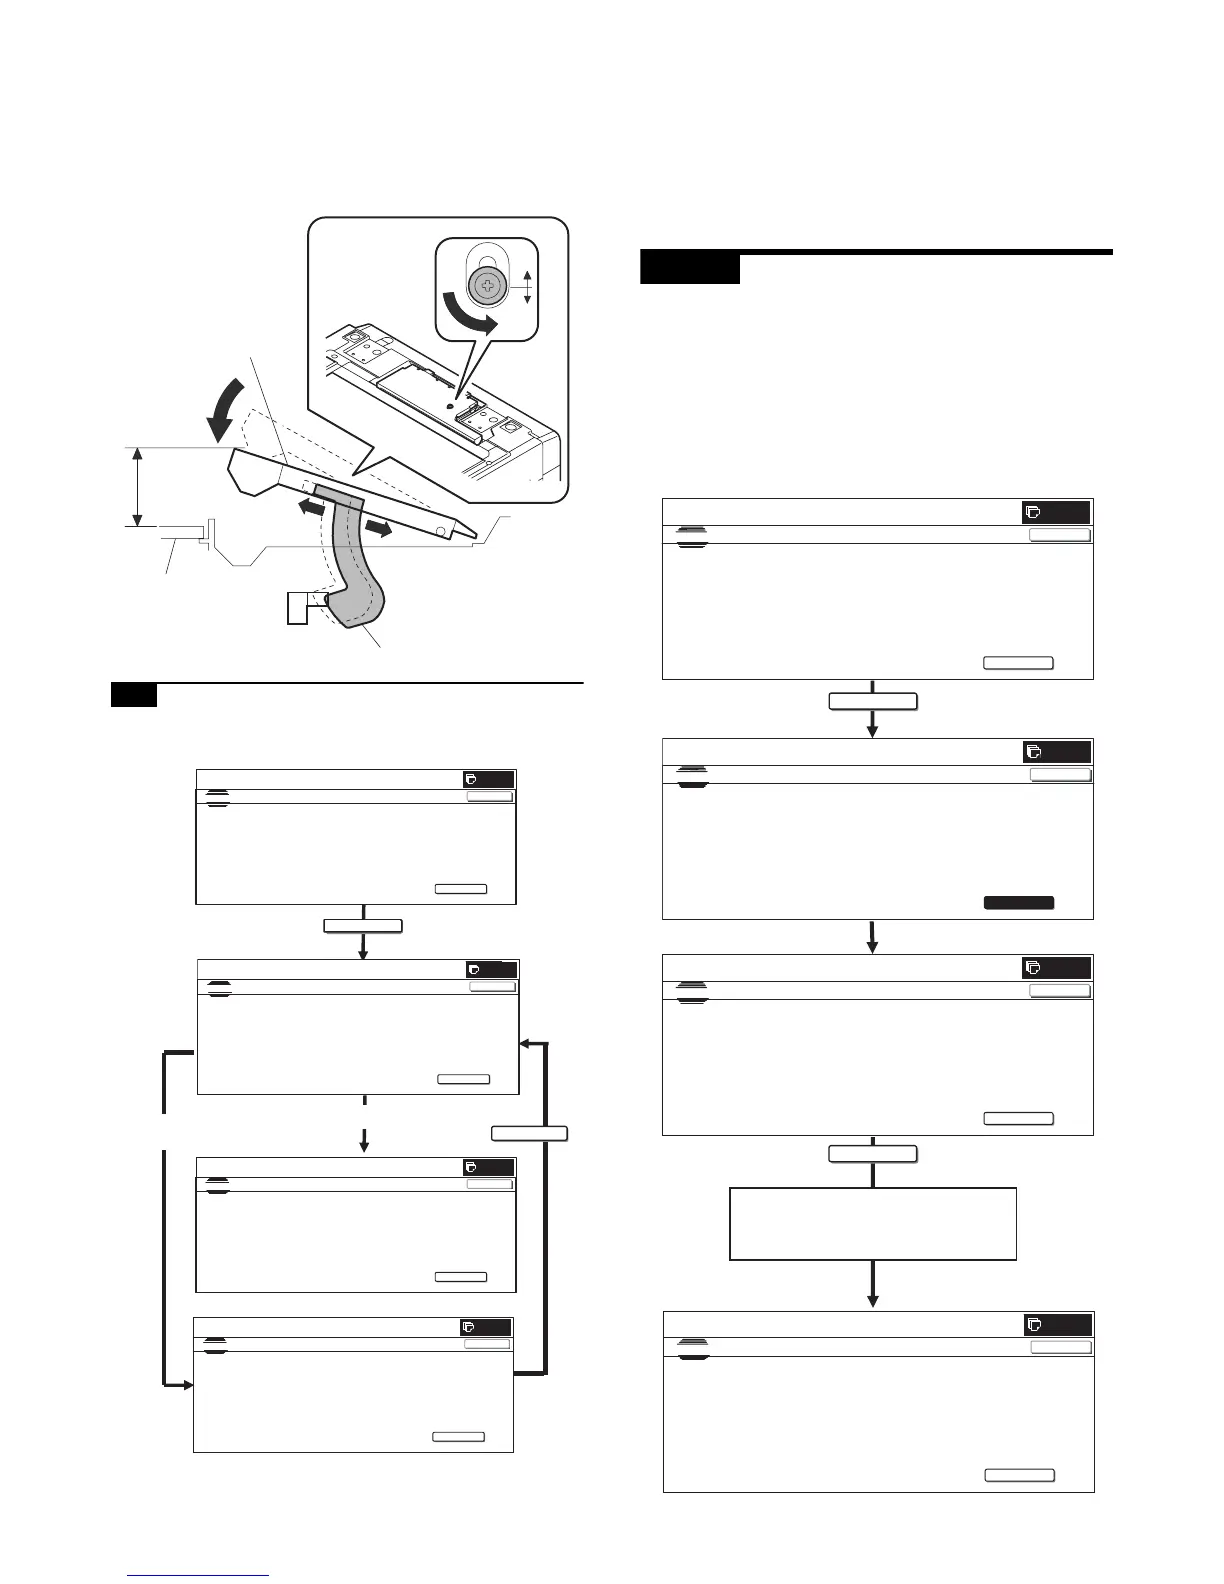
Slowly tilt the document detection arm unit in the arrow direc-
tion. Loosen the original cover switch actuator adjustment
screw so that the display OCSW is returned to the normal dis-
play when the height of the arm unit top from the table glass is
32 ± 0.5mm. Slide the actuator position and adjust. (If the ON
timing of the original cover switch is shifted, the document
detection function may malfunction.)
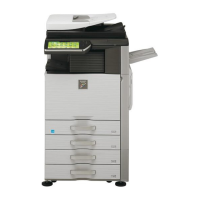
23-B Document size sensor sensitivity
adjustment
1) Enter the SIM41-2 mode.
2) Execute the sensor adjustment without document.
With the document cover open, without placing a document on
the table glass, press [EXECUTE] key.
3) Place A3 (11" x 17") paper on the document table and press
[EXECUTE] key.
If the adjustment is completed normally, "DOCUMENT PHOTO
SENSOR LEVEL IS ADJUESTED" is displayed.
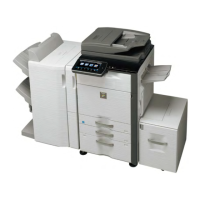
ADJ 24 Manual paper feed tray paper
size (width) sensor adjustment
This adjustment is required in the following cases:
* When the manual paper feed tray section is disassembled.
* When the manual paper feed tray unit is replaced.
* When a U2 trouble occurs.
* When the PCU PWB is replaced.
* When the EEPROM on the PCU PWB is replaced.
1) Enter the SIM 40-2 mode.
32 0.5mm
+
-
EXECUTE
SIMULATION
NO.41-02
TEST
DOCUMENT SIZE PHOTO-SENSOR SETUP
EXECUTE
0
CLOSE
WITH THE ORIGINAL COVEROPENED,TURN ON THE EXECUTE
KEY WITH THE ORIGINAL ON THE ORIGINAL TABLE.
SIMULATION
NO.41-02
TEST
DOCUMENT SIZE PHOTO-SENSOR SETUP
EXECUTE
0
CLOSE
SET AN A3- SIZE(11”
17”)COPY PA PER ON THE ORIGINAL TABLE,
AND WITH
THE OC OPEND,TURN ON THE EXECUTE KEY.
SIMULATION
NO.41-02
TEST
DOCUMENT SIZE PHOTO-SENSOR SETUP
EXECUTE
0
CLOSE
DOCUMENT SIZE PHOTO- SENSOR LEVEL IS ADJUSTED.
SIMULATION
NO.41-02
TEST
DOCUMENT SI ZE PHOTO-SENSOR SETUP
EXECUTE
0
CLOSE
PHOTO-SENSOR ERROR POSITION
PD1
,---,---,---,---,---,---,---
EXECUTE
Adjustment
failed
Adjustment completed
EXECUTE
EXECUTE
0
SIMULATION
NO.40-02
TEST
BYPASS TRAY ADJUSTMENT
CLOSE
EXECUTE
MAXPOSITION ADJUSTME NT.
PRESS [EXECUTE] TO START
0
SIMULATION
NO.40-02
TEST
BYPASS TRAY ADJUSTMENT
CLOSE
EXECUTE
MAXPOSITION AD JUSTMENTE.
EXECUTING…
0
SIMULATION
NO.40-02
TEST
BYPASS TRAY ADJUSTMENT
CLOSE
EXECUTE
P1(A4)POSITION ADJUSTMENT.
PRESS [EXECUTE] TO START
0
SIMULATION
NO.40-02
TEST
BYPASS TRAY ADJUSTMENT
CLOSE
EXECUTE
.COMPLETE
Repeat the above procedure to adjust
the A4R width MIN POSITION.