MX3500N ADJUSTMENTS 6 – 44
Normally individual adjustments are not required. This adjustment
is executed when there is a request from the user.
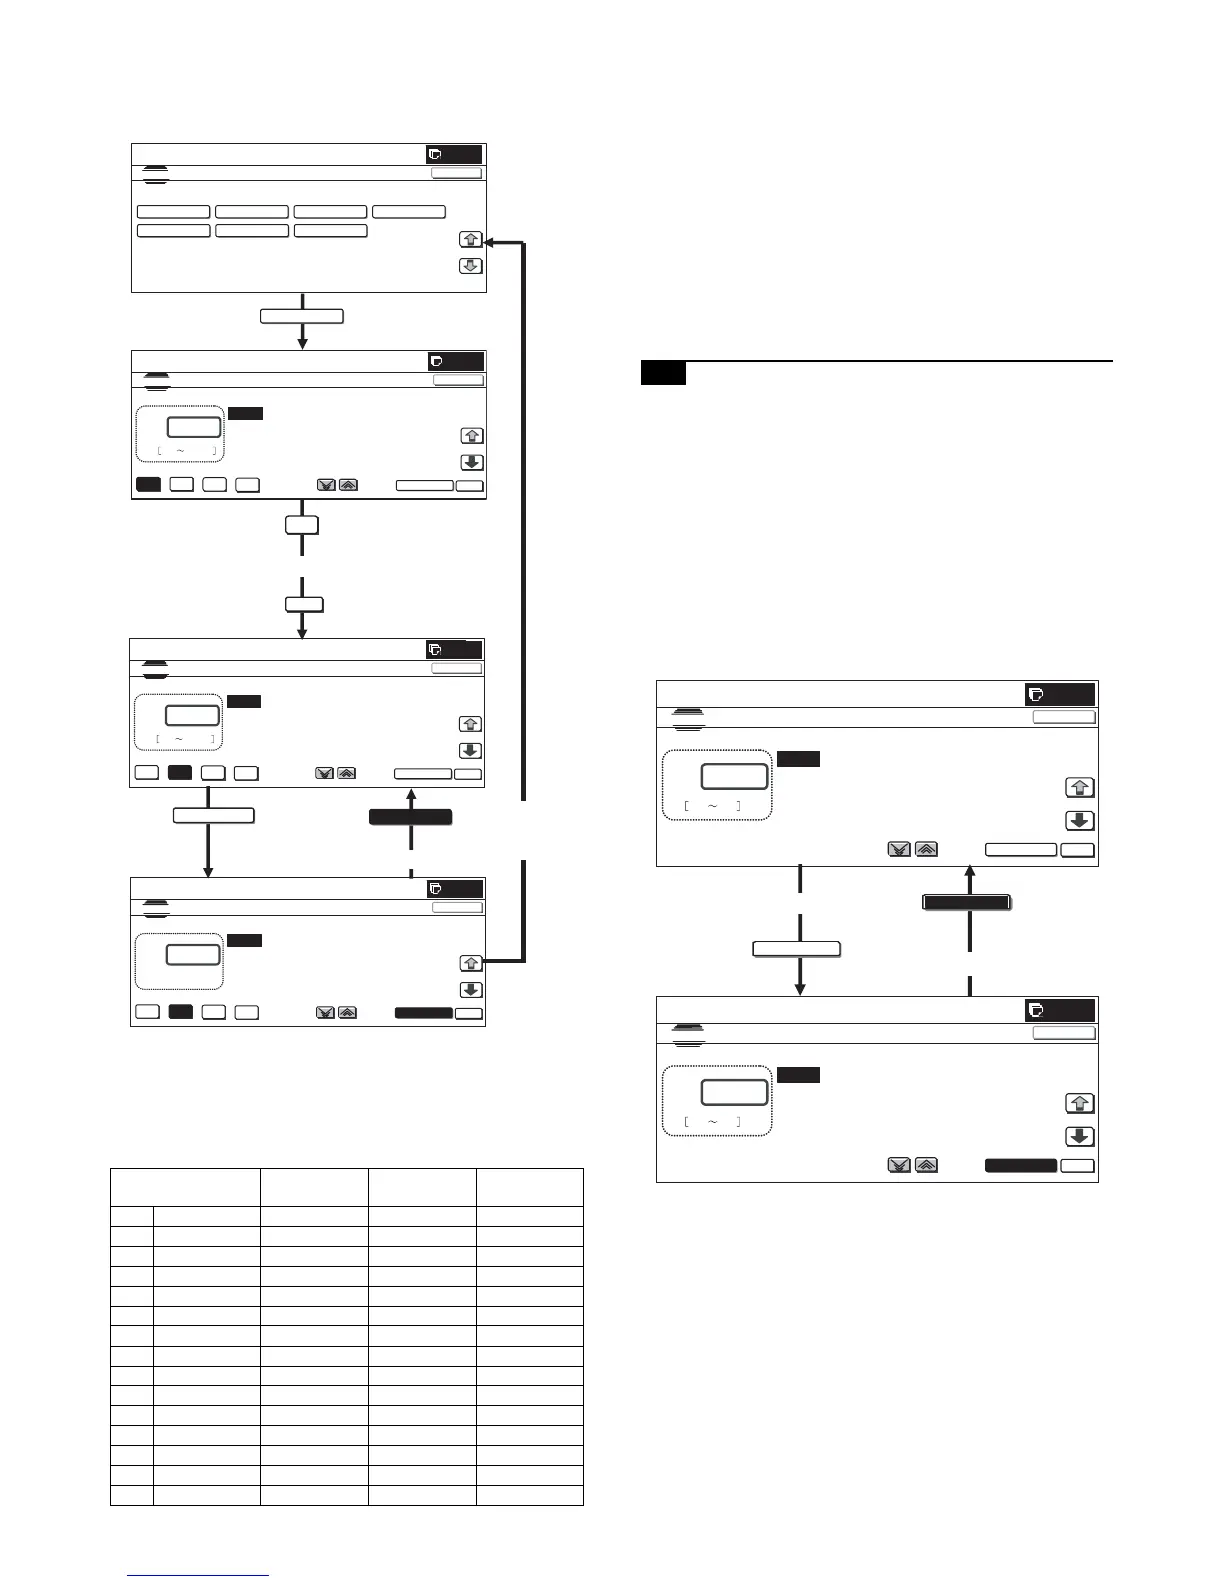
1) Enter the SIM 46-10 mode.
2) Select the copy mode to be adjusted with the mode key.
3) Select a color to change the adjustment value with the color
key.
4) Select the density level (point) to be adjusted with the scroll
key.
5) Enter the adjustment value with 10-key and press [OK] key.
When the adjustment value is increased, the density is
increased. When the adjustment value is decreased, the den-
sity is decreased.
When the arrow key is pressed, the color densities selected
with the color keys are collectively adjusted. That is, all the
density levels (points) from the low density point to the high
density point can be adjusted collectively.
When [EXECUTE] key is pressed, the adjustment pattern is
printed out.
The color balance at each density level (point) and the density
can be checked by referring to this printed adjustment pattern.
However, it is more practically to make a cop and check it.
20-G Monochrome copy density adjustment
(Density adjustment at each density level in
each monochrome copy mode) (Normally
not required)
This adjustment is required in the following cases.
* When a U2 trouble occurs.
* When the MFP PWB is replaced.
* When the EEPROM on the MFP PWB is replaced.
This is to adjust each density level in each monochrome copy
mode.
Normally individual adjustments are not required. This adjustment
is executed when there is a request from the user.
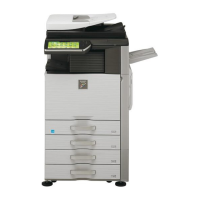
1) Enter the SIM 46-16 mode.
2) Select the density level (point) to be adjusted with the scroll
key.
3) Enter the adjustment value with 10-key and press [OK] key.
When the adjustment value is increased, the density is
increased. When the adjustment value is decreased, the den-
sity is decreased.
When the arrow key is pressed, the selected are collectively
adjusted. That is, all the density levels (points) from the low
density point to the high density point can be adjusted collec-
tively.
When [EXECUTE] key is pressed, the adjustment pattern is
printed out.
The density at each density level (point) can be checked by
referring to this printed adjustment pattern. However, it is more
practically to make a cop and check it.
Item/Display
Density level
(Point)
Adjustment
value range
Default value
A POINT1 Point 1 245 – 755 500
B POINT2 Point 2 245 – 755 500
C POINT3 Point 3 245 – 755 500
D POINT4 Point 4 245 – 755 500
E POINT5 Point 5 245 – 755 500
F POINT6 Point 6 245 – 755 500
G POINT7 Point 7 245 – 755 500
H POINT8 Point 8 245 – 755 500
I POINT9 Point 9 245 – 755 500
J POINT10 Point 10 245 – 755 500
K POINT11 Point 11 245 – 755 500
L POINT12 Point 12 245 – 755 500
M POINT13 Point 13 245 – 755 500
N POINT14 Point 14 245 – 755 500
O POINT15 Point 15 245 – 755 500
O