MX-C250 DISASSEMBLY AND ASSEMBLY 10 – 17
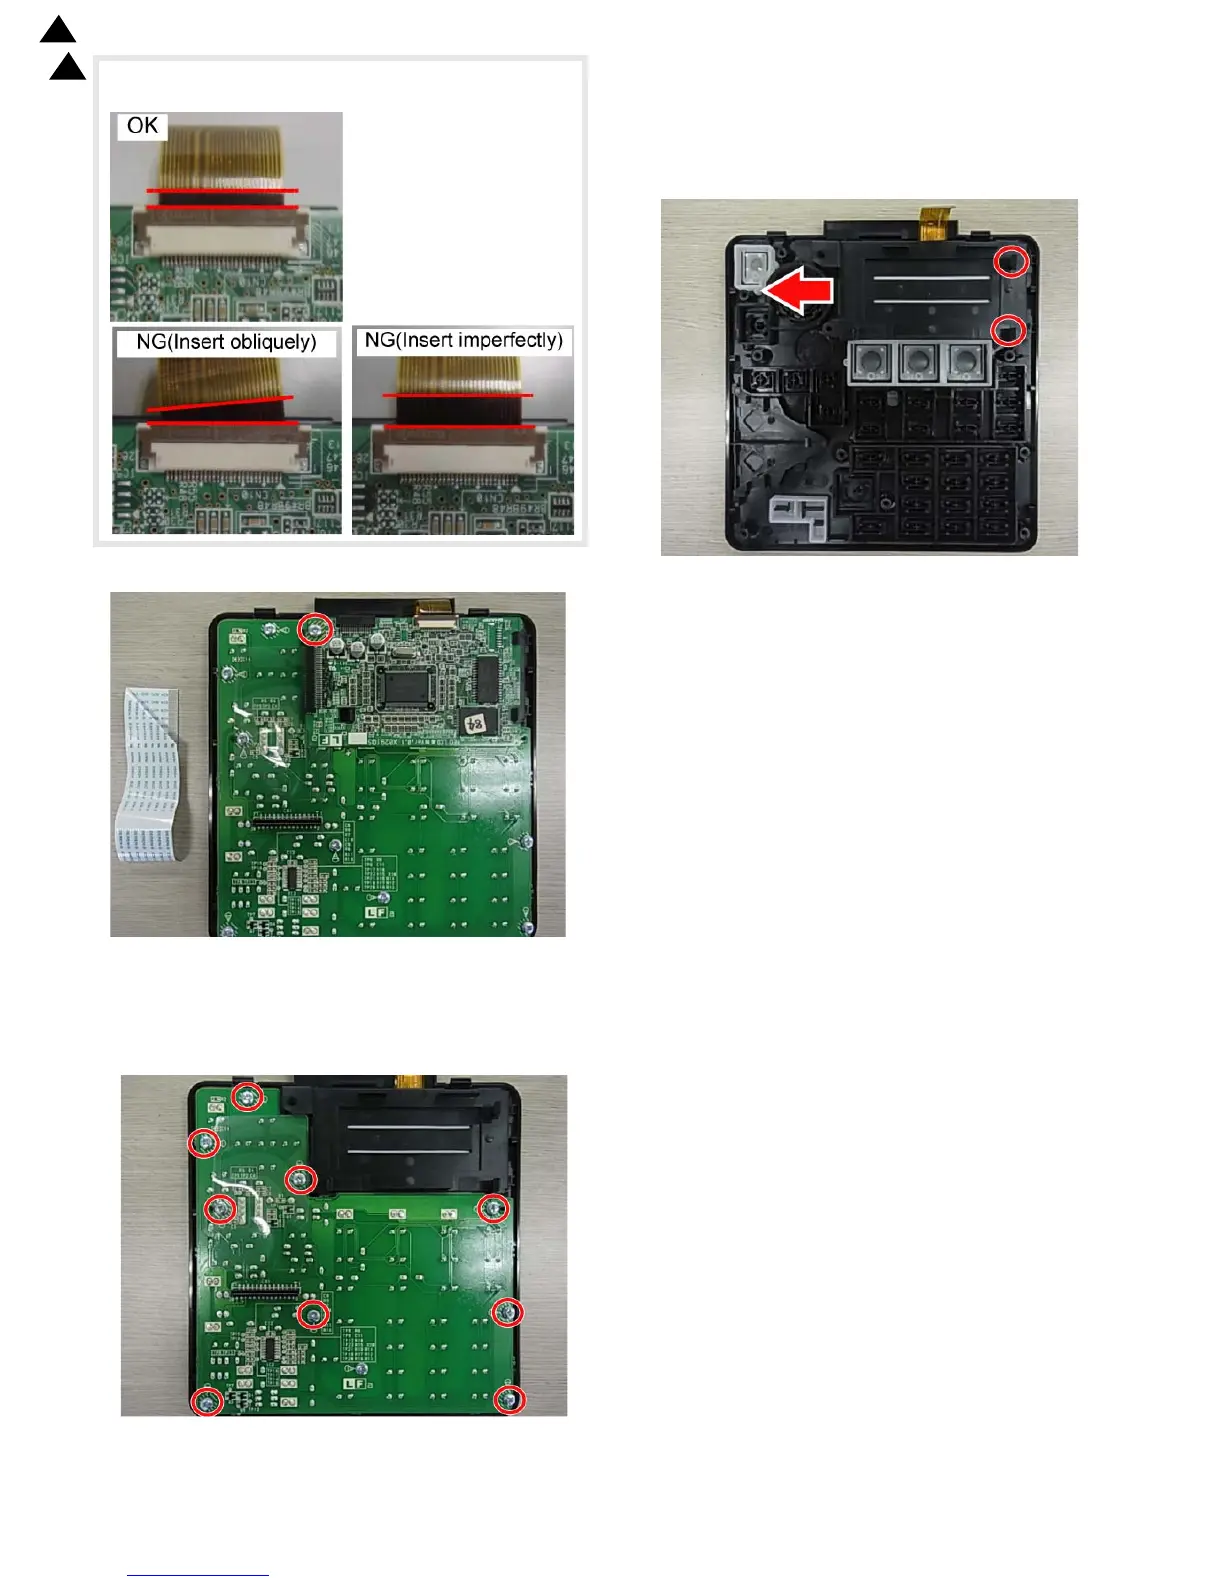
When connecting the FFC, connect the FFC correctly as the OK
state shown in the figure.
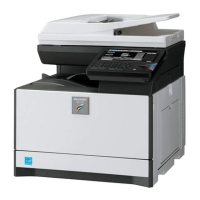
2) Remove the screws and remove the LCD PWB.
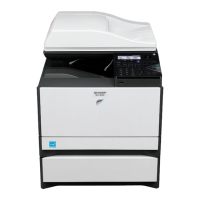
(2) KEY-LED PWB
1) Remove the KEY-LED PWB.
2) Remove the screws, remove the protection mylar and KEY-
LED PWB.
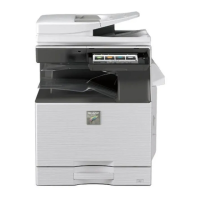
(3) LCD
1) Remove the KEY-LED PWB and the LCD PWB.
2) Open the pawls and remove the LCD unit.
NOTE: Use enough care not to put finger prints on the LCD sur-
face.
2
2
‘13
/Oct