6
E
Preparing the Remote Control Unit and the Touch Pen
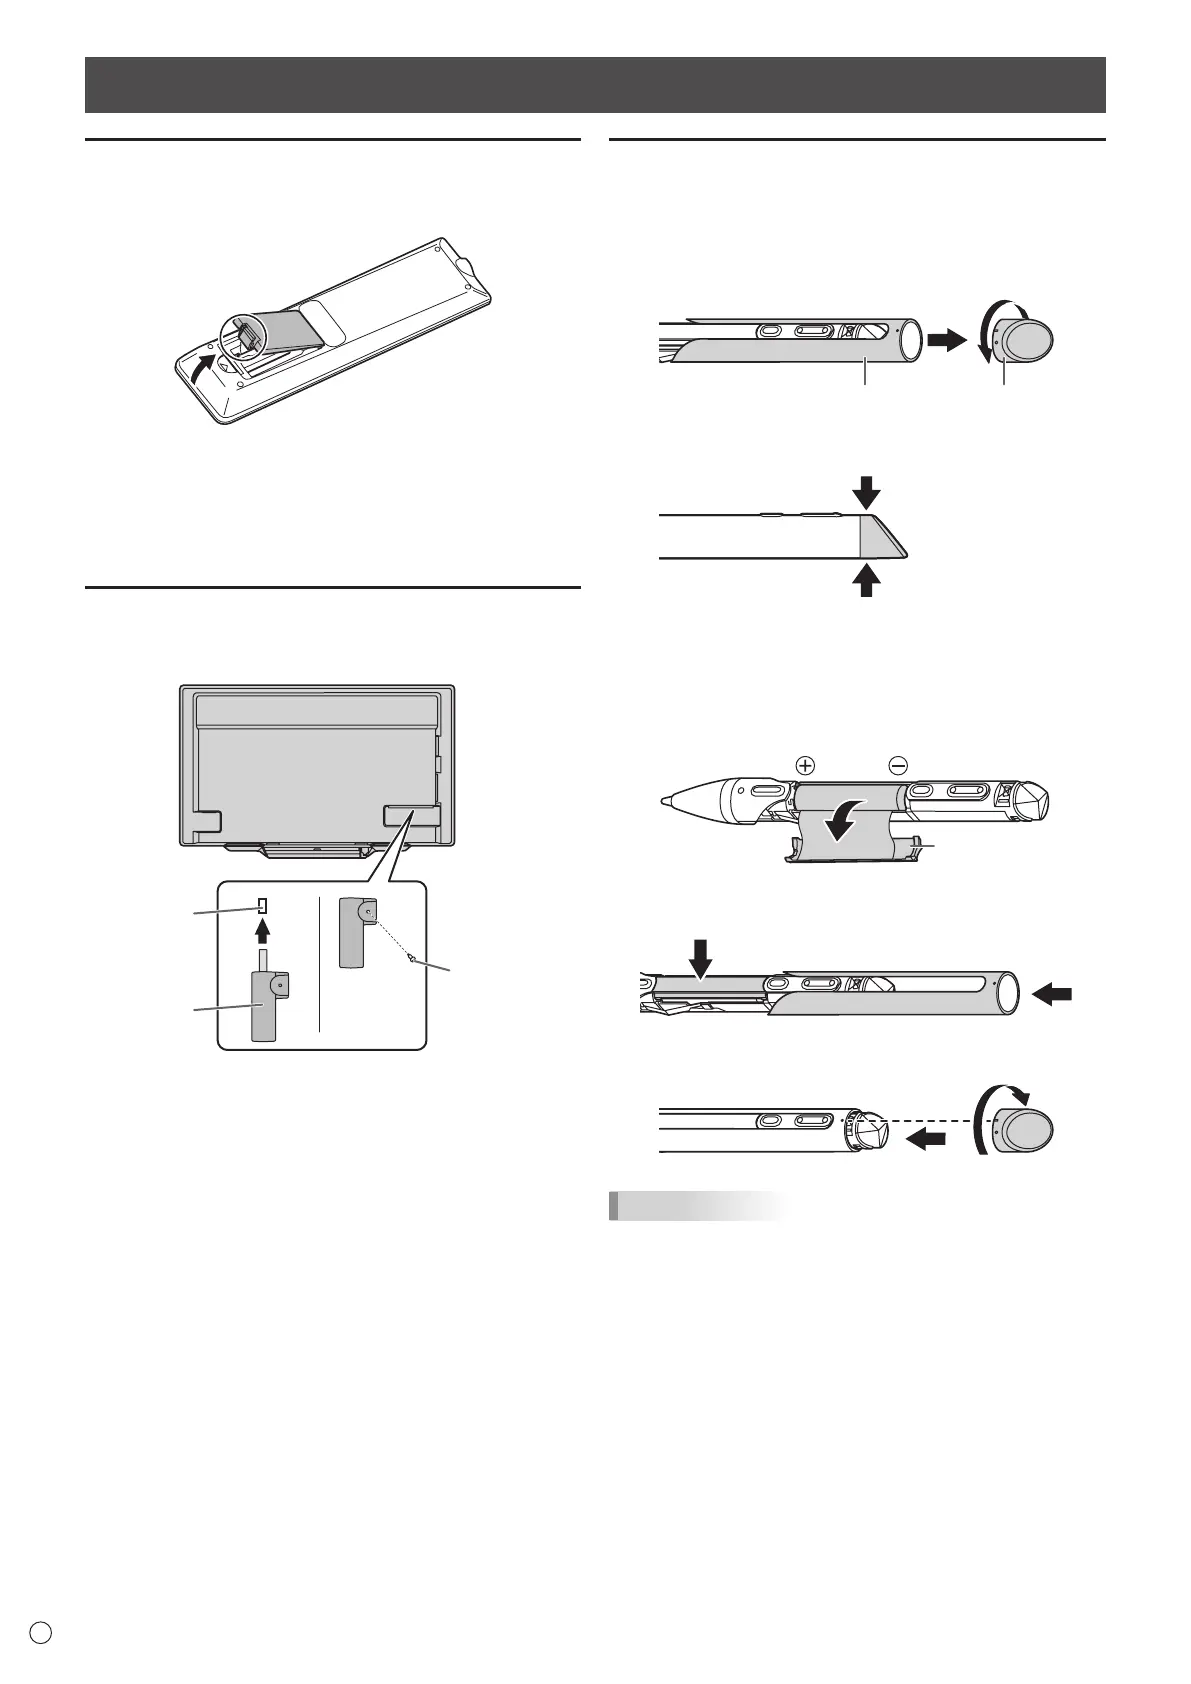
Installing the batteries
1. Place your nger on the part marked with the ▲, and
then pull the cover off.
2. See the instructions in the compartment and put in the
supplied batteries (LR03 (“AAA” size) x 2) with their
plus (+) and minus (-) sides oriented correctly.
3. Close the cover.
Connecting the touch pen adapter
To use the touch pen, insert the touch pen adapter into the
touch pen adapter port on the monitor.
Touch pen
adaptor
To
adapter scre
ouch pen
t
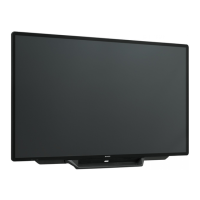
Inserting the battery
2 touch pens are supplied. Insert the batteries in the touch
pens.
1. Remove the battery cap and main cover.
Battery capMain cover
2
If the battery cap is difcult to turn, grasp the top and
bottom of the battery cap to turn.
2. Open the battery cover and insert the supplied battery
(LR03 (“AAA” size) x 1) into the touch pen.
Check the plus (+) and minus (-) markings on the inside
of the touch pen and insert the battery in the correct
orientation.
Battery cover
3. Replace the battery cover and main cover.
While pressing the battery cover, replace the main cover.
1
2
4. Replace the battery cap.
1
TIPS
• To use an optional touch pen with the monitor, the touch
pen must be registered in the touch pen adapter. (pairing)
For details, see the Touch pen Management Tool Operation
Manual.