ENGLISH
9
E
Mounting Precautions (For SHARP dealers and service engineers)
• Wheninstalling,removingormovingthemonitor,ensurethatthisiscarriedoutbyatleast4people.
• Besuretouseawall-mountbracketdesignedordesignatedformountingthemonitor.
• Thismonitorisdesignedtobeinstalledonaconcretewallorpillar.Reinforcedworkmightbenecessaryforsomematerials
suchasplaster/thinplasticboard/woodbeforestartinginstallation.
Thismonitorandbracketmustbeinstalledonawallwhichcanendureatleast4timesormoretheweightofthemonitor.
Installbythemostsuitablemethodforthematerialandthestructure.
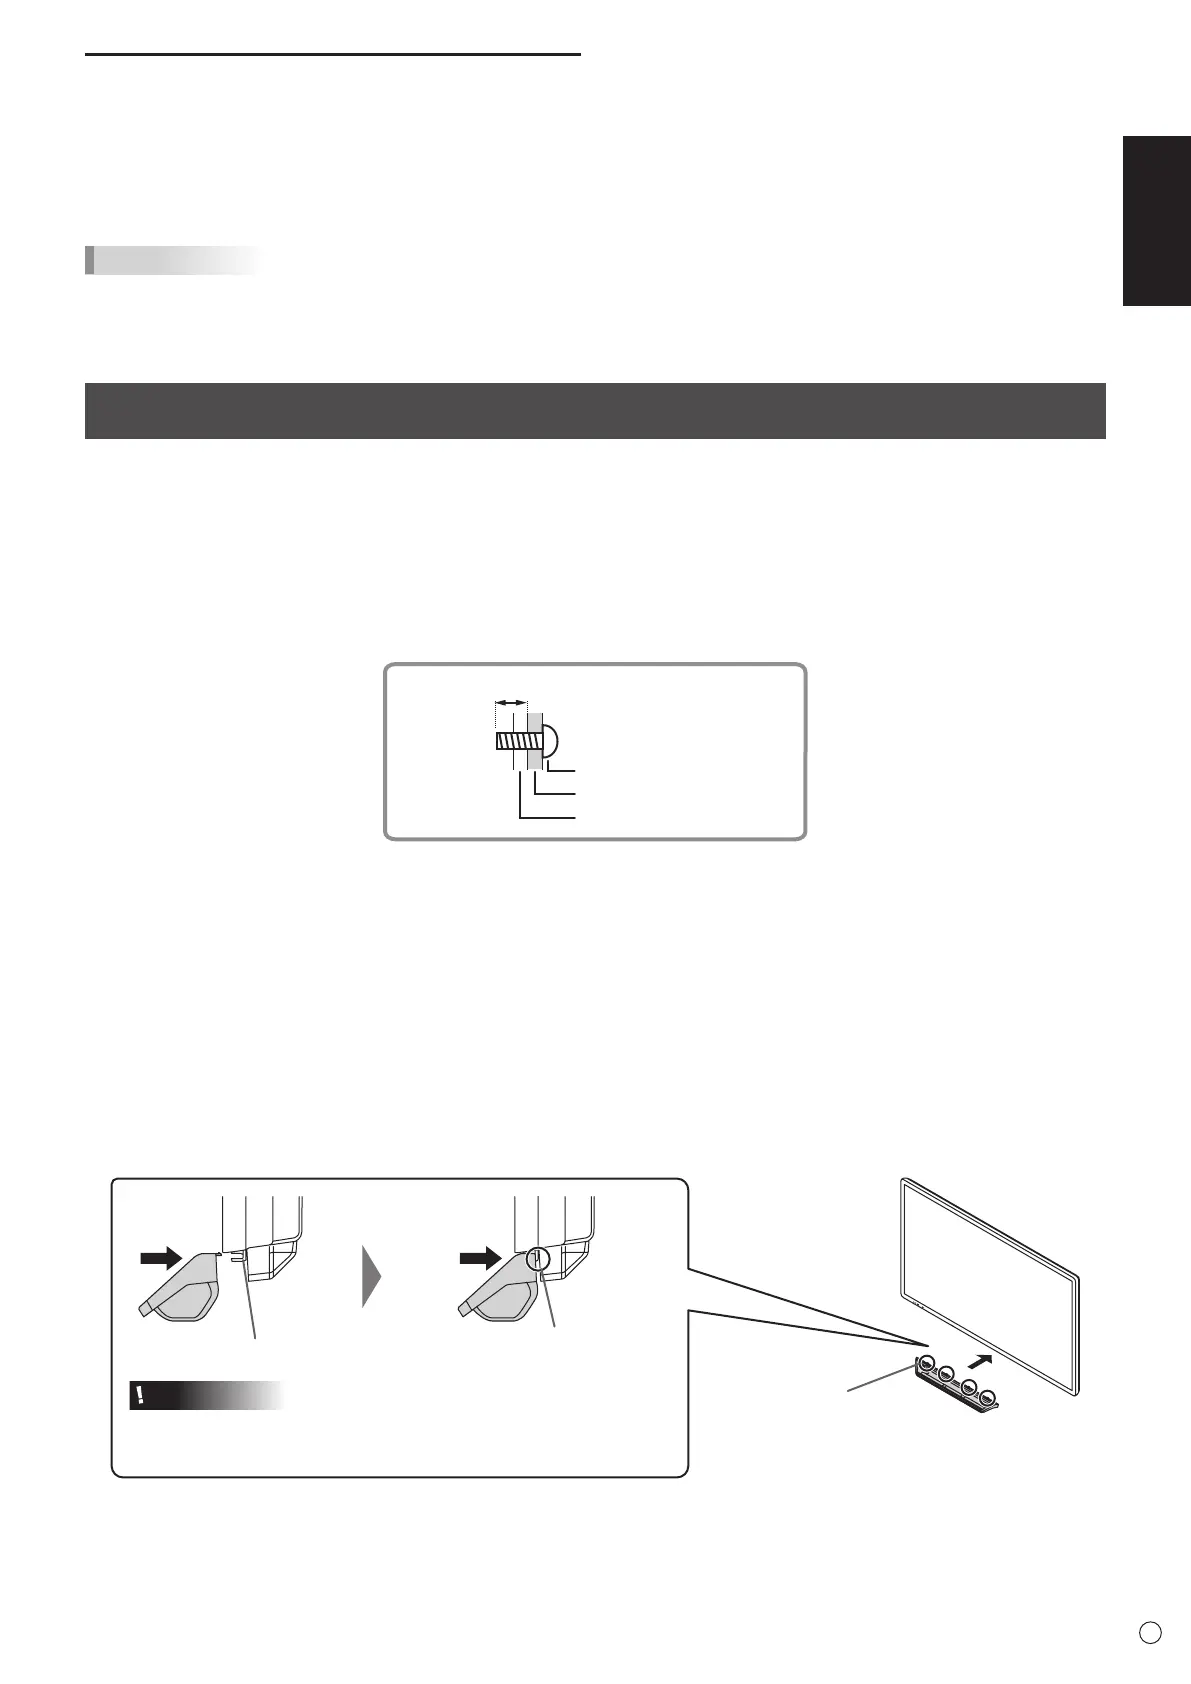
• ToattachaVESA-compliantmountingbracket,useM6screwsthatare5/16inch(8mm)to3/8inch(10mm)longerthanthe
thicknessofthemountingbracket.
Screws (M6)
Mounting bracket
Monitor mounting
5/16 - 3/8 inch (8-10 mm)
• Donotuseanimpactdriver.
• Aftermounting,pleasecarefullyensurethemonitorissecure,andnotabletocomeloosefromthewallormount.
• DonotuseanyscrewholesotherthanVESAholesforinstallation.
• Whenmovingthismonitor,besuretoholditwiththehandles,theunitsides,theunitbottomortheunittop.Donotgraspthe
screen,unitcorner,tray,speaker,orspeakercover.Thismaycauseproductdamage,failure,orinjury.
• Ifyouneedtotemporarilyplacethemonitoronatableorothersurfaceduringinstallation,spreadathicksoftclothonthe
tabletopreventdamagetothescreenandtable.
• Priortorepackingorremoval,removethetrayandspeakercovers.
• Thismonitorshouldnotbemountedflatorusedasatouchtabletypeinstallation.PleaseconsultanauthorizedSHARP
dealerbeforeconsideringanytypeofflatinstallation(whenthemonitoristiltedmorethan20degreesupwardfromthe
perpendicularinrelationtoalevelsurface),andfindoutaboutthemandatoryflatmountinginstructions.
n
Attaching the Tray
Push until the tabs lock
into place (4 places)
Tray mount fitting
Tabs (4 places)
Caution
• Whenattachingthetray,donotpinchtheUSBcableontheback
ofthetray.
Turning power off
Turning power off with monitor buttons
1. Touch the POWER button.
Therecognitionscreenappears.
2. Touch [OK].
Thepoweristurnedoff.(Standbymode)
TIPS
• Ifabout15secondselapseswhiletherecognitionscreen
appears,thepowerwillautomaticallyturnoff.
Turning power off with remote control unit
1. Press the POWER button or MONITOR OFF button.
Thepoweristurnedoff.(Standbymode)