X
xwalkerSep 23, 2025
What does error code E007 mean on my Sharp ViewcamZ VL-Z3H?
- AAnn RobinsonSep 23, 2025
If “E007” is displayed on the screen of your Sharp Camcorder, and you are unable to operate normally, the camcorder may be damaged.
What does error code E007 mean on my Sharp ViewcamZ VL-Z3H?
If “E007” is displayed on the screen of your Sharp Camcorder, and you are unable to operate normally, the camcorder may be damaged.
How to troubleshoot a Sharp ViewcamZ VL-Z3H Camcorder that has no power?
If your Sharp Camcorder is not getting power, ensure the power source is correctly connected and that the battery pack is sufficiently charged. If there is dew in the camcorder, wait until it dries. If a safety function is in effect, set the Power switch to OFF, remove the battery pack, wait for 2 seconds, then reinstall the battery pack and turn the power back on.
Why doesn't the auto focus work on my Sharp ViewcamZ VL-Z3H?
If the auto focus on your Sharp Camcorder isn't working, first check if Manual Focus mode is engaged and switch to Auto Focus mode. If you are zoomed in too closely on the subject, zoom out. If the subject has little contrast or has horizontal or vertical stripes, focus manually.
What to do if the cassette will not eject from my Sharp ViewcamZ VL-Z3H Camcorder?
If the cassette won't eject from your Sharp Camcorder, ensure the power source is properly connected and the battery pack is sufficiently charged. Also, make sure the camcorder is not currently recording; if it is, stop recording and try again.
Why doesn't the start/stop button work on my Sharp ViewcamZ VL-Z3H Camcorder?
If the start/stop button on your Sharp Camcorder does not work, check if the erasure-protect tab on the video cassette is open. If it is, close the tab or use a new cassette.
Why doesn't the remote control work with my Sharp ViewcamZ VL-Z3H?
If the remote control for your Sharp Camcorder does not function, ensure the REMOTE menu item is set to "ON". Also, check if the remote control battery has run down and replace it if necessary. Make sure you are using the remote control within its operating range, and that there are no obstacles between the remote control and the camcorder's remote sensor. Protect the remote sensor from intense daylight.
Why can't I delete images on the card of my Sharp ViewcamZ VL-Z3H?
If you cannot delete an image on the card in your Sharp Camcorder, the image may be delete-protected. Cancel the protection setting.
Why does the clock keep resetting on my Sharp ViewcamZ VL-Z3H Camcorder?
If the clock on your Sharp Camcorder has been reset, the lithium battery may not be properly installed or may be depleted. Install the lithium battery properly or replace it with a new one.
Why can't I rewind or fast forward tape on my Sharp ViewcamZ VL-Z3H?
If you can't rewind or fast forward tape on your Sharp Camcorder, you may be at the beginning or end of the tape. Rewind or fast forward to the desired point. If you are using a cleaning tape, it will automatically rewind after cleaning.
What to do if no image appears on Sharp ViewcamZ VL-Z3H screen from external source?
If no image from an external source appears on the Sharp Camcorder screen, ensure the DV cable or audio/video/S-video cable is properly connected. Also, verify that the cable connection matches the S-VIDEO IN menu setting.
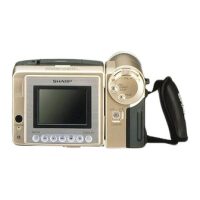
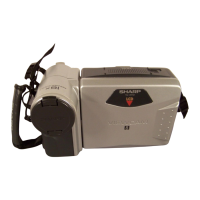
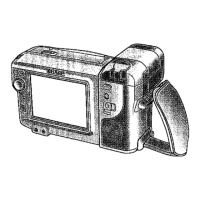
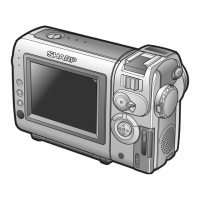
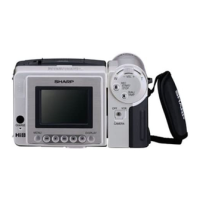
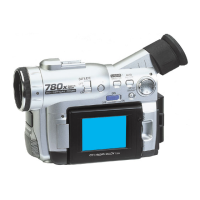
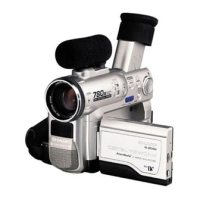
Identifies and locates camcorder components.
Explains screen warnings and troubleshooting steps.
Instructions for installing and removing the battery.
Steps for charging the camcorder battery.
How to power the device using the AC adapter.
Guide to loading and unloading video cassettes.
Instructions for SD/MultiMediaCard insertion/removal.
Procedure for installing memory backup battery.
Steps to configure the camcorder's date and time.
How to attach and use the lens cap.
Guide to adjusting the camcorder hand strap.
Instructions on rotating the camcorder grip.
How to remove the lens hood.
Instructions for using the electronic viewfinder.
Guide to opening and adjusting the LCD screen.
Advice on holding the camcorder for stable shots.
How to switch between Tape/Card and Record/Playback modes.
Simple guide to starting video recording.
How to use the optical and digital zoom.
Activating standby mode to prevent accidental operations.
Adjusting screen brightness for visibility.
How the camcorder automatically focuses.
Guide to shooting close-up subjects.
How to view remaining recording time.
How to check remaining battery level.
Instructions for playing back recorded tapes.
Adjusting audio volume during playback.
Finding specific scenes on the tape.
How to pause playback for still images.
Connecting and using stereo earphones.
How to control volume when using earphones.
Connecting the camcorder to a TV for playback.
Explains the function of main operational buttons.
Navigating and adjusting settings via mode screens.
Accessing and modifying camcorder settings.
Adjusting optical and digital zoom ranges.
Improving picture quality in backlit situations.
Enhancing brightness in low-light conditions.
Creating smooth scene transitions using fades.
Quickly returning to last recorded scene for immediate recording.
Locating tape points without switching modes.
Recording continuous still images on tape.
Reducing image shake during close-up shots.
Recording yourself using the camcorder.
Specific method for recording yourself.
Recording in a cinematic 16:9 aspect ratio.
Enabling Long Play mode for extended recording.
Reducing wind noise during outdoor recording.
Choosing higher quality audio recording mode.
How to use the remote control for camcorder operations.
Using remote control for slow, frame advance, reverse playback.
Configuring the display of recording date and time.
Applying visual effects during playback.
Playing back images rotated by 180 degrees.
Saving still frames from tape to memory card.
Advanced manual controls for camera recording.
Manually controlling focus for specific shots.
Switching back to automatic focus mode.
Accessing the screen for manual adjustments.
Fixing white balance for consistent color under changing light.
Adjusting aperture for exposure control.
Adjusting light sensitivity for image brightness.
Resetting all manual settings to automatic.
Selecting pre-set shooting modes for different scenes.
Advanced playback functionalities and controls.
Displaying and using time codes for precise location.
Adding narration to existing recordings.
Choosing how audio channels are played back.
Refining recorded videos by cutting sequences.
Capturing video from other devices.
Using the camcorder as a digital video editor.
Converting analog signals to digital.
Settings and procedures for still image capture.
How to take and save still images on a card.
Adjusting image resolution and file size.
Using the self-timer for delayed image capture.
Preparing a memory card for use with the camcorder.
Configuring how image files are numbered.
Viewing and managing still images on the card.
Displaying and navigating recorded still images.
Magnifying and shifting images during playback.
Preventing accidental deletion of images.
Removing individual unwanted still images.
Erasing all images from the memory card.
Setting print preferences for DPOF compatible printing.
Copying still images from card to PC via USB.
Steps to install the necessary software for data transfer.
Automatically playing back images in sequence.
Fine-tuning display settings for better viewing.
Disabling operational sounds for quiet use.
Resetting the camcorder to default settings.
Viewing a showcase of camcorder features.
Tips for better shooting and product information.
Solutions for common camcorder problems.
Technical details and features of the camcorder.
Visual guide to on-screen indicators and menus.