9
VL-AD260U
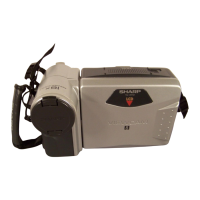
Wire fixing tape
Pull out
AV unit wire
AV unit FPC
(b)
(b)
<3. Removal of the AV unit and AV unit cover>
<4. Disassembly of the LCD holder>
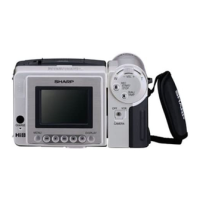
Tripod angle
(b)
(b)
(b)
(1) Peel the wire fixing tape.
(2) Remove the AV unit wire.
(3) Remove the AV unit FPC.
(4) Remove two screws ((b)LX-HZ0018TAFF) fixing the AV unit
and LCD holder.
(d)
(d)
(1) Remove three screws ((d)XiPSF20P04000) pull out the
tripod angle.
(2) Remove three screws ((b)LX-HZ0018TAFF) on the tilt frame V.
Move the tilt frame V by a looseness of the tilt FPC.
(d)
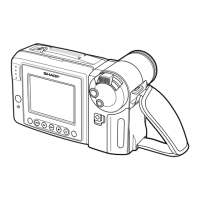
Inverter transformer
LCD unit
(b)
Connector
(3) Remove two screws ((b)LX-HZ0018TAFF) and two connec-
tors, and remove the LCD unit (with inverter) from the main
body.
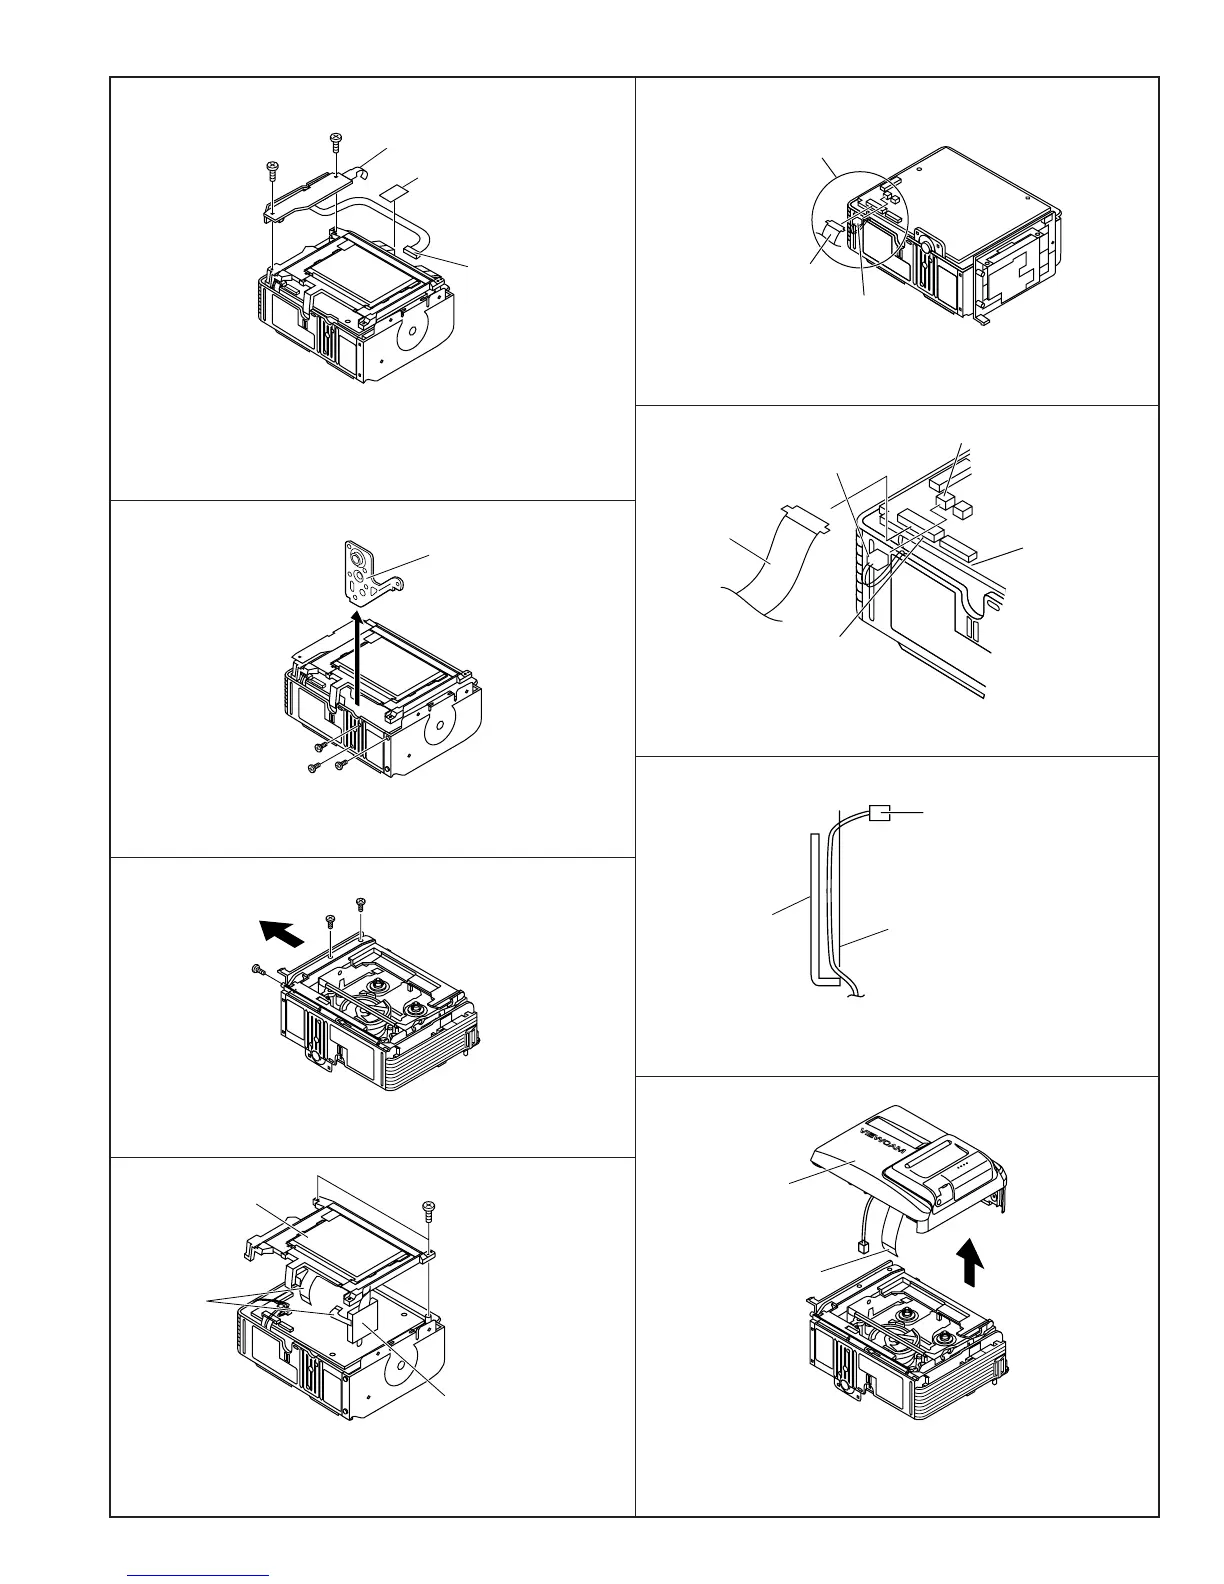
<5. Removal of the VCR lid>
Microphone wire spacer
Microphone connector
<Detail of area B>
<Detail of area B>
Microphone connector
Microphone connector
Microphone wire
spacer
VCR lid
(2) Remove the connector cable from the hole of the microphone
wire spacer.
(1) Disconnect the microphone connector.
(3) Remove the microphone wire spacer from the frame V.
(4) Pull out the microphone wire cable with care to prevent it from
interfering with the mechanical parts, and remove the VCR
lid.
Area B
Microphone connector
Card FPC connector
Card FPC
Frame V
Card FPC
Card FPC