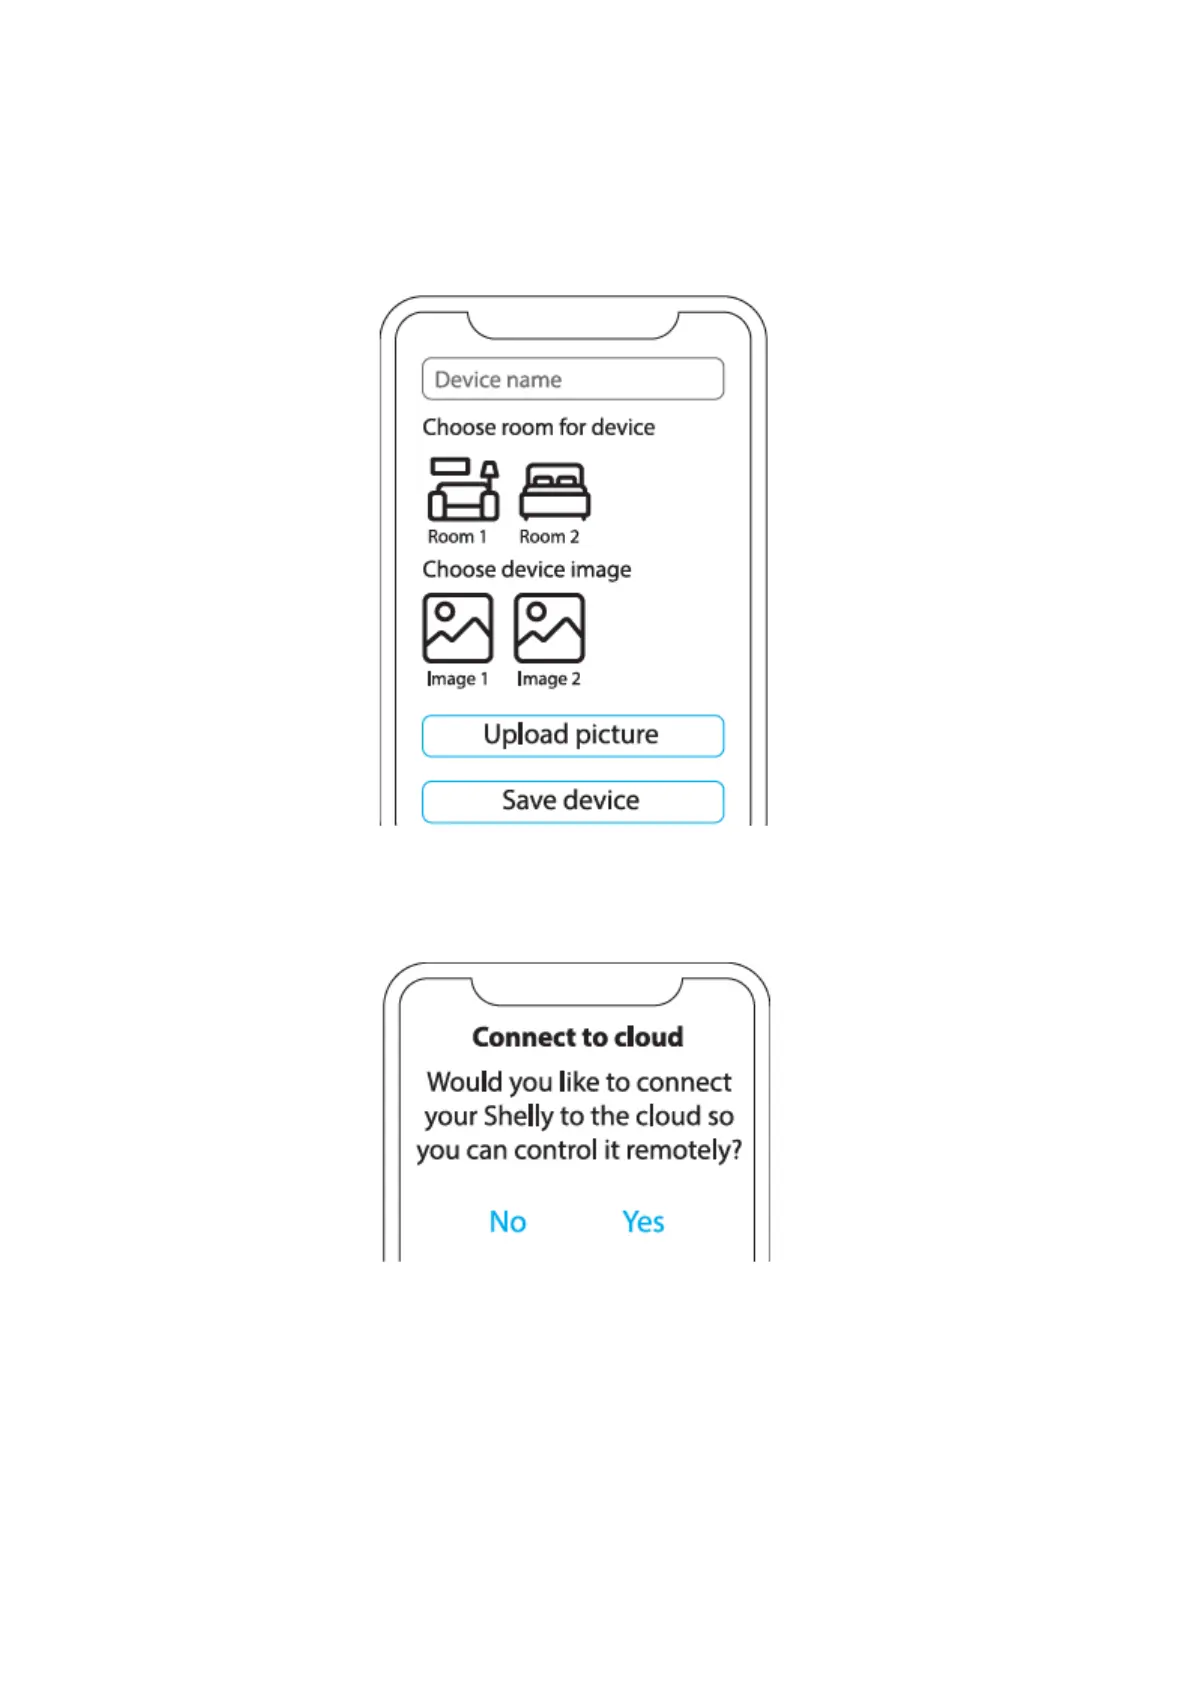
Step 5
Enter a name for the device (in the “Device Name” field). Choose a “Room” where
the device will be positioned and controlled from. You can choose an icon or add
a picture to make it easier to recognize. Press “Save device”.
Step 6
To control Shelly devices only through the local network, press “No”.
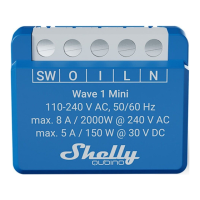
Device settings
After your Shelly device is added in the application, you can control it, change its
settings, and automate the way it works. To switch the device on and off, use the
ON/OFF button. For device management, simply click on the device’s name. From
there you may control the device, as well as edit its appearance and settings.