LUBRICATION AND MAINTENANCE
37
5. Loosen the injector line fittings at the injectors.
6. Move the hand throttle control lever to its wide
open position.
7. Crank the engine until air-free fuel flows from
each connection, then tighten the fittings to 24
-29 Nm (18 - 22 lbs. ft.).
IMPORTANT:
::
:Do not crank the engine continu-
ously for more than 30 seconds. Doing so may
cause starting motor failure. If air is not purged
from the system, repeat the procedure.
AIR CLEANER
Checking element:
::
:Check the air cleaner primary
element for cleanliness, daily or every 10 hours,
Figure 54.
Clean the air cleaner primary (outer) element every
100 hours of service.
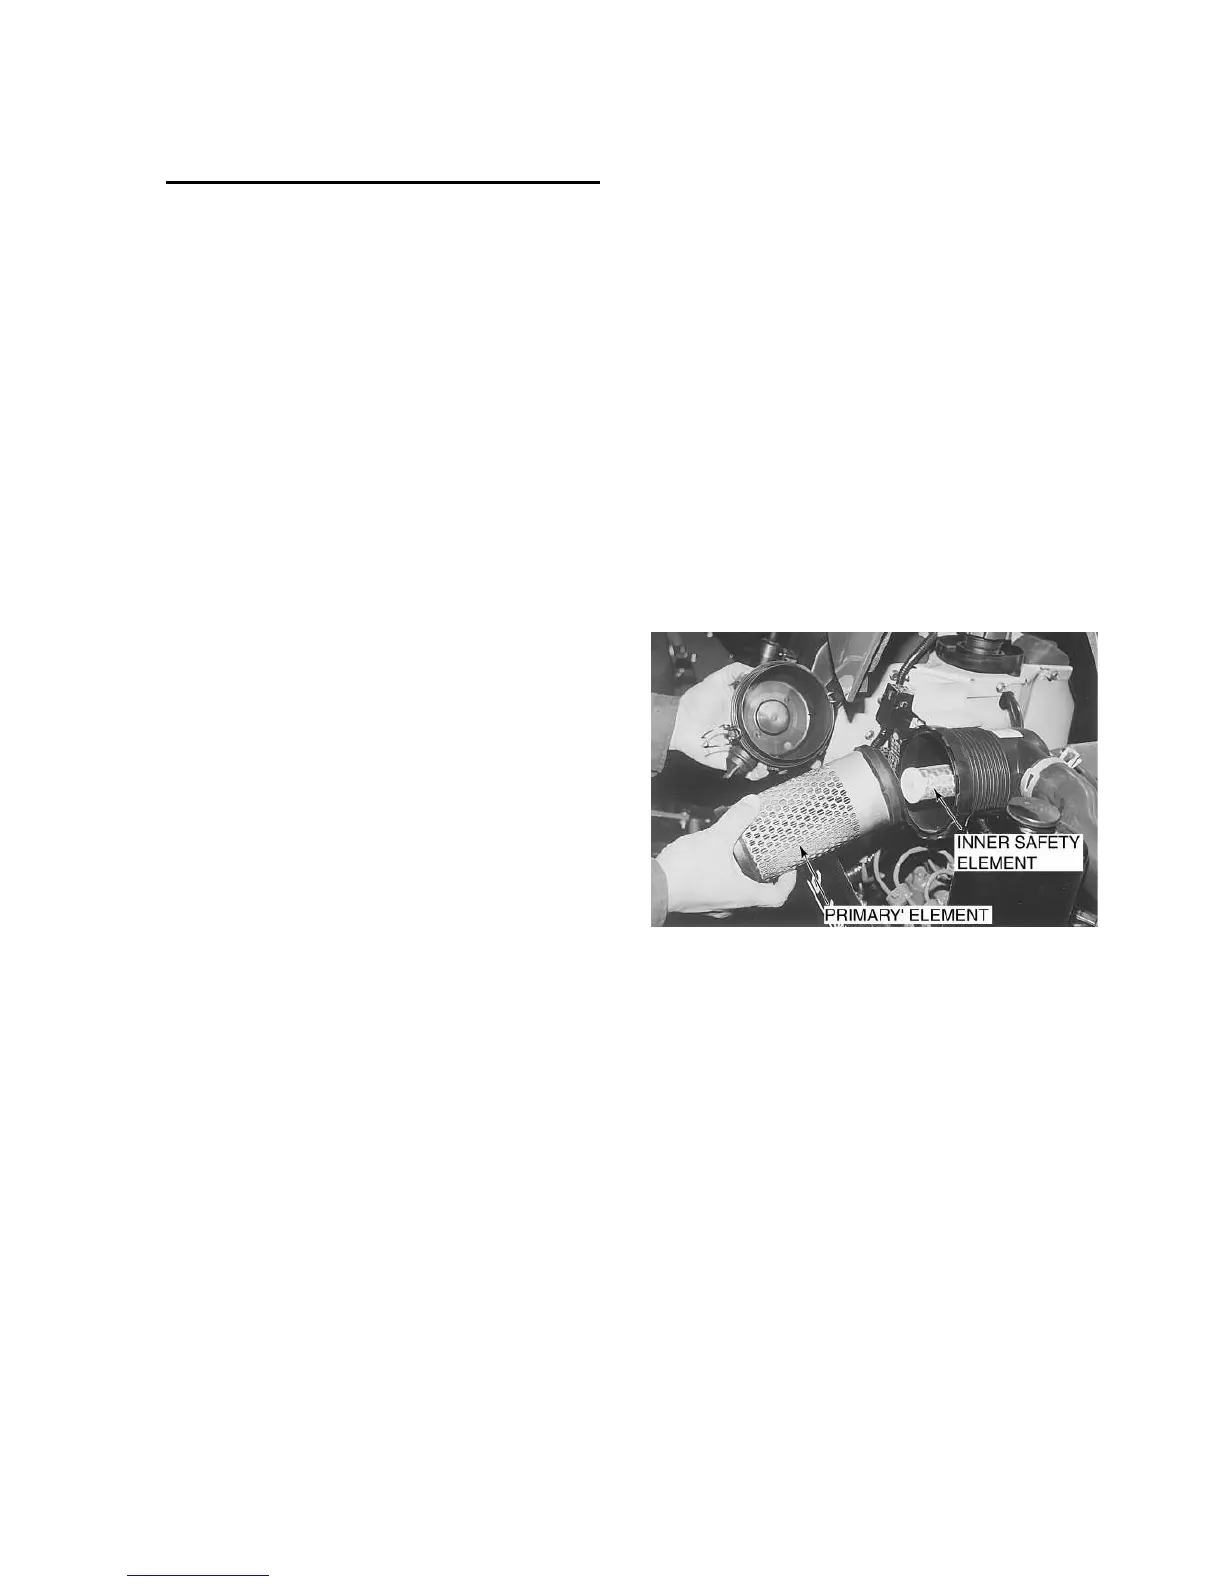
The air cleaner contains two elements: an outer
primary element and an inner safety element. To
remove the primary element, push in on the end of
the end cap and rotate counterclockwise. Remove
the end cap from the air cleaner body to expose
the primary element, Figure 54.
1. Pull the primary element, Figure 54 , from the
canister. Clean any loose dirt from the canister
and inspect the end of the canister for dirt which
may prevent the new element from sealing
properly.
2. Clean the primary element using low air pres-
sure (2 bar - 30 psi or less). Blow dust from the
inside to the outside of the element (opposite to
normal air flow through element).
IMPORTANT:
::
:Be careful not to rupture the filter
element. Maintain a reasonable distance be-
tween the air nozzle and the filter element when
directing air up and down the clean air side of
the element pleats.
3. after cleaning the element, check the inner di-
ameter seals for damage. If damage is present,
replace the primary element.
4. Re-install the primary element by inserting it into
the canister and pushing on the end of the ele-
ment until it is seated against the canister.
NOTE: Place a light inside the element to check
for paper leaks or for bonding of the paper to the
end plate. If any leaks are found, replace the
element.
5. Place the end cap onto the canister body, push
in on end cap, and rotate clockwise. Make sure
the end cap is locked in place and not loose.
Figure 54 - Air Cleaner-
--
-Disassembled
IMPORTANT :
::
:Never tap the element with hard
objects or against a hand surface. This may dent or
break the element end cap seals.
IMPORTANT:
::
:Failure to obtain a good seal be-
tween elements and the container may cause ma-
jor engine damage.
Change the element:
At the start of the each season, change the air
cleaner primary (outer) element.
NOTE: For maximum engine protection and air
cleaner service life, install a new inner safety ele-
ment, Figure 54, every third primary element
change or after every 1000 hours of operation,
whichever comes first.