Do you have a question about the Shimadzu Nexera CL Series and is the answer not in the manual?
Key safety and handling notes for the manual. Ensure manual stays with product, request replacement if lost/damaged.
Information subject to change, correction of errors, reserved rights, and trademark acknowledgments.
Lists the documents comprising the instruction manuals for the product.
Explains the meaning of precaution symbols and common symbols used in the manual.
Describes the intended use, calibration, and quality control of the Nexera CL system.
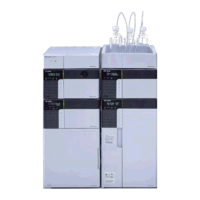
Highlights key intelligence, efficiency, and design advancements of the Nexera CL series.
Details the specifications and capabilities of the solvent delivery units.
Describes the features and capabilities of the autosamplers, including low carryover and throughput.
Explains the function and features of the column oven for precise temperature control.
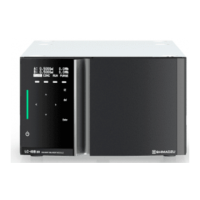
Details the specifications and functions of the UV-VIS detector, including dual wavelength and scanning.
Lists and describes available optional parts for system configuration and enhancement.
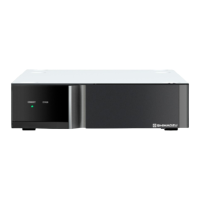
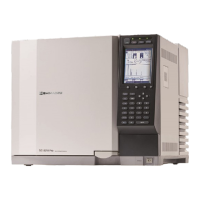
Lists compatible units that can be connected to the Shimadzu Nexera CL series.
Step-by-step guide to powering on the system and launching the LabSolutions analysis software.
Instructions on setting up and editing analytical parameters for experiments, including methods.
Procedures for preparing and loading mobile phases and rinse solutions into the system.
Steps for physically connecting the analytical column to the column oven.
Procedures for preparing and loading sample vials or plates into the autosampler.
Detailed steps for executing a single analysis run using a specified method.
Guide for setting up and running sequential batch analyses for multiple samples.
Procedures for safely stopping analysis and powering down the system components.
Important considerations and precautions for optimal analysis performance.
Explains automated startup and shutdown processes for system readiness and efficiency.
Details how to automate system startup procedures, including purging and warming.
Explains how to automate system shutdown and cool-down processes.
Describes automatic system checks and recovery mechanisms for solvent delivery problems.
Covers various pretreatment and injection functions of the autosampler.
Defines actions to take based on batch analysis test results, like stopping or resuming.
Features for transferring and optimizing analytical conditions between systems.
Introduces helpful tools for data analysis within the LabSolutions software.
Explains how to manage columns, track usage, and register them for analysis.
Provides an overview of the hardware validation process and its importance.
Outlines when hardware validation procedures, including periodic inspections, should be performed.
Details important precautions to follow during periodic hardware inspections.
Lists the necessary parts, reagents, and supplies for performing hardware validation.
Specific inspection procedures for verifying the performance of solvent delivery pumps.
Specific inspection procedures for verifying the performance of autosamplers.
Specific inspection procedures for verifying the performance of plate changers.
Specific inspection procedures for verifying the performance of column ovens.
Specific inspection procedures for verifying the performance of UV absorbance detectors.
Procedures for validating the performance of the entire LC system.
Actions to take if component or system validation criteria are not met.
General overview of system errors and operating problems encountered during use.
Step-by-step guidance for diagnosing and resolving common system problems.
Detailed troubleshooting based on symptoms, main causes, and corrective actions.
Comprehensive list of error codes, their main causes, and recommended countermeasures.
Guidance on choosing appropriate system configurations based on analysis purpose.
Diagram and list of components for a typical high-pressure gradient system layout.
Details on available tubing kits and their part numbers for system configurations.
Recommendations for selecting components and optimizing parameters for ultra high-speed analysis.
Guidance on selecting an appropriate mixer based on system configuration and mobile phase.
Recommendations for choosing a flow cell based on column type and analysis purpose.
General instructions for safely installing the entire LC system.
Steps to remove shipping restraints from system components before installation.
Instructions for safely and correctly installing the autosampler unit.
Procedures for installing the solvent delivery pump module into the system.
Steps for installing the SPD-40 CL UV-VIS detector onto the system.
Instructions for installing the degassing unit for mobile phase preparation.
Steps for installing the reservoir tray to hold solvent bottles.
Procedures for installing the column oven module into the system.
Instructions for connecting various system cables, including power and optical cables.
Steps for safely connecting the power cords to each instrument.
Guide for connecting optical communication cables between system components.
Instructions for connecting the degassing unit to the solvent delivery pump.
General guidance and precautions for connecting various tubing lines in the system.
Procedures for setting up drainage tubes and waste bottles for leakage management.
Instructions for connecting low-pressure tubing, including to the degassing unit.
Details on connecting high-pressure flow channels and the types of tubing kits available.
Specific tubing connection procedures for high-pressure gradient systems.
Specific tubing connection procedures for high-pressure isocratic systems.
Steps for verifying network and system controller connections for computer control.
Guide to configuring the computer's IP address for network connectivity.
Instructions for configuring web browser settings for accessing the system controller.
How to configure system controller network and group settings.
Covers additional installation steps and optional device setup.
Instructions for connecting the system to the LabSolutions software.
Steps for establishing the computer to system controller network connection.
Details on installing the optional Column Management Device for column tracking.
Lists properties of common mobile phases used in LC systems, including physical and chemical characteristics.
| Column Oven | Yes |
|---|---|
| Software | LabSolutions |
| Pump Type | Binary Pump |
| Flow Rate Range | 0.001 to 10.000 mL/min |
| Pressure Range | 0 to 100 MPa |
| Detector Types | UV-Vis, PDA, Fluorescence, Refractive Index, Conductivity |
| Column Oven Temperature Range | 4 to 85 °C |

