-14-
Model D4902 (For Machines Mfd. Since 11/18)
SETUP
Adjusting Side Support
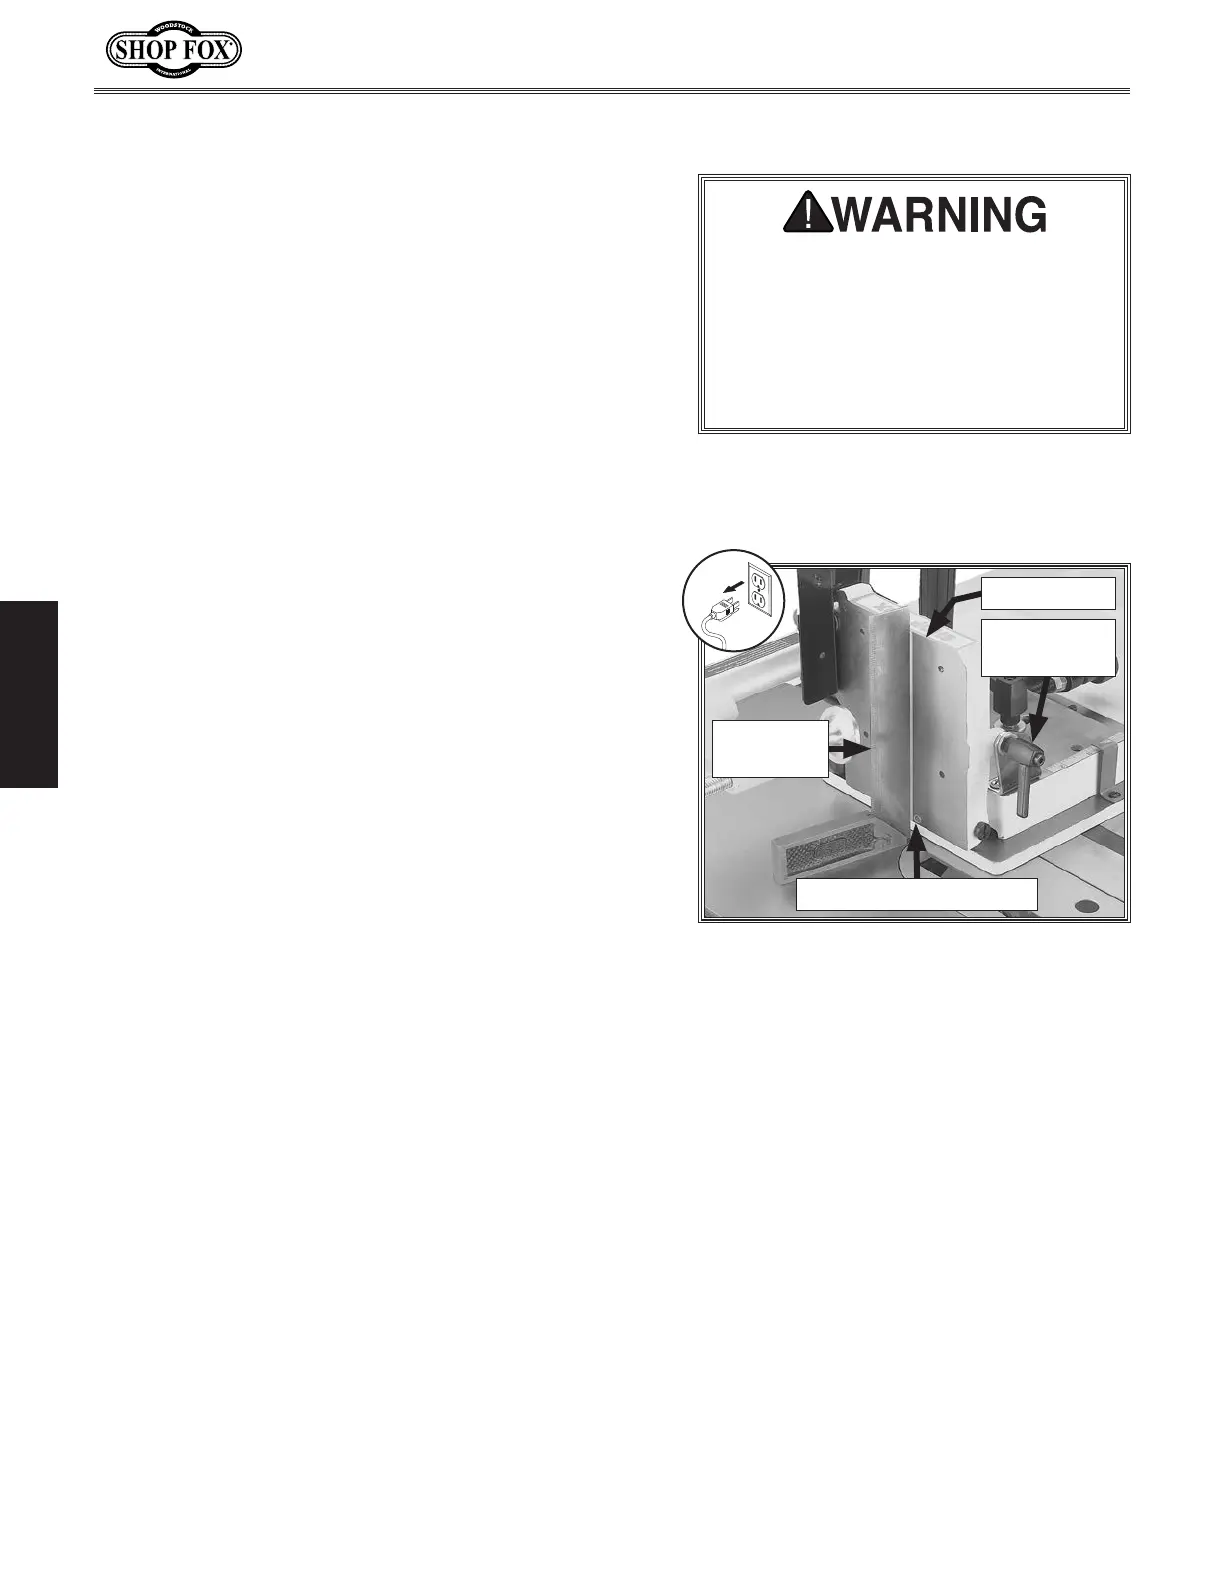
In this procedure, you will adjust the side support
perpendicular to the saw table. Then you will set the 90°
positive stop so the support can be quickly returned to
the perpendicular position after an angle cut.
To adjust side support, do these steps:
1. DISCONNECT TABLE SAW FROM POWER!
2. Make sure saw blade is perpendicular to table miter
slot (refer to your table saw owner's manual for
instructions).
3. Completely lower saw blade so it will not interfere
with measurements.
4. Clean away any debris from table or tenoning jig
that could affect measurements, then insert jig all
the way into miter slot.
5. Thread positive stop set screw far enough into side
support (see Figure 12) so that it will not interfere
with the next step.
6. Position machinist's square flat on table and up
against tenoning jig side support, as shown in
Figure 12.
7. Loosen support lock lever, position side support flat
against machinist's square, then, without moving
support, re-tighten lock lever (see Figure 12).
8. Remove square and re-tighten positive stop set screw
until it just meets resistance. The 90° positive stop
is now set for quick perpendicular positioning of side
support.
DO NOT remove the T-slot washers
from the ends of the tenoning jig guide
bar. Removal of these washers could
allow the jig to come loose from the
table during a cutting operation, which
could cause serious personal injury or
property damage.
Figure 12. Adjusting side support
perpendicular to the saw table.
Machinist's
Square
Positive Stop Set Screw
Side Support
Lock Lever
Side Support
 Loading...