ADM-860C 04/14/084
3.0 EXTERNAL FEATURES
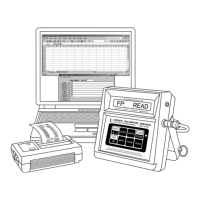
3.1 KEYPAD
The meter keypad has eight keys, each of which may include multiple functions. Functions are activated by
pressing a function key once, twice or in sequence with other keys. This Instruction Manual will often refer to a
key by only one of the functions shown on the key.
A. Upper half of keys SILVER - active only after pressing SHIFT key.
Control name Function
SHIFT Shifts control from lower to upper half of keys.
CLEAR Clears memory, TREND and STORE functions.
OFF Turns the meter off after SHIFT key is pressed.
B. Lower half of keys (or all-black keys) BLACK - always active except following SHIFT.
Control Name Function
MODE Sequential action for all measurement modes (air flow, velocity, pressure and
temperature). Also used to erase, replace and print readings in STORE mode.
UNITS Alternate action for English or metric units.
STORE Activates memory mode, then alternate action for display of the average, total,
minimum and maximum readings.
ON Turns the meter on. Turns light on and off after meter has been turned on.
= RCL Recalls stored readings in reverse order.
RCL
< Recalls stored readings in entry order.
READ Initiate measurement or halt TREND readings.
3.2 FEATURES ON SIDES AND BACK OF METER
BATTERY CHARGER JACK
When viewed from the front, the battery charger jack is on the right side of the meter toward the top. The
battery charger plug is to be connected here.
EXTERNAL READ JACK
When viewed from the front, the external read jack is on the left side of the meter toward the top. The
plug for the external thumbswitch is connected here. This feature allows the operator to trigger
measurements from the FlowHood or VelGrid handgrip while working overhead or in awkward
circumstances. The thumbswitch performs the same function as the READ key.
FLAPS JACK
The flaps jack is on the back of the meter, in the upper right hand corner. The flaps plug on the FlowHood
is inserted here.
TEMPERATURE INPUT JACK
The temperature input jack is centered on the back of the meter, slightly toward the top. The flexible
TemProbe sensor must be connected to this receptacle whenever temperature density correction is
 Loading...