8
SystemSetup
Scan and Sync
Usethisproceduretosetareceiverandtransmittertothesameopenchannel.
Important!Beforeyoubegin:
• TurnofftheRFonthetransmittersforthesystemsyouaresettingup.(This
preventsthemfrominterferingwiththefrequencyscan.)
• Turnonpotentialsourcesofinterferencesuchasotherwirelesssystemsor
devices,computers,CDplayers,largeLEDpanels,effectsprocessors,and
digitalrackequipmentsotheyareoperatingastheywouldbeduringthe
presentationorperformance(sothescanwilldetectandavoidanyinterference
theygenerate).
1. Performagroupscanonthereceiverbypressingandholdingthescanbutton
fortwo(2)seconds.GROUP SCANappearswhilethereceiverscansforthebest
groupoffrequenciesinyourRFenvironment.
2. Afterthescancompletes,thereceiverdisplaysthebestavailablefrequencyand
highlightstheSET FREQmenuitem.Pressentertoacceptthefrequencyand
returntothehomescreen.
3. Fromthereceiverhomescreen,pressentertogotothemainmenuandhigh-
lightSYNC.
4.
PowerontheselectedUHF-Rtransmitter,aligntheIRwindows,andpressenter
onthereceivertobeginthesync.
5. SYNCING…appearsontheLCD.Whencomplete,SUCCESSappearsandthe
LEDsonthereceiverflash.Thetransmitterandreceiverarenowtunedtothe
samefrequency.
Multiple System Setup
Whensettingupmultiplesystems,beginbysettingupthefirstsystemasfollows:
1. Conductagroupscanonthereceiverbypressingandholdingthescanbutton
fortwoseconds.
Notethegroupnumberandnumberofcompatiblefrequencies.
Pressentertoaccepttheselectedfrequency.
group
numberoffrequencies
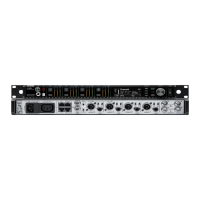
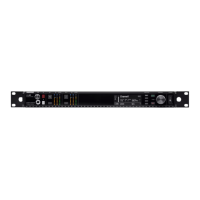
Radio Frequency (RF) Settings
Transmitter Compatibility
ThereceiveriscompatiblewithbothUHF-RandAxienttransmitters,butmustbe
settothecorrectsystemmode.Selectthetransmittertypefromthesystemmode
menu(SYS MODE).Thisconfiguresthereceiverwithacompatibletonekey,au-
diocompanding,andIRsyncprotocol.TheUR5doesnothaveAxientShowLink
capabilities.
Note:ChangingmodesremovesallentriesintheMTxlist.Youwillbepromptedwith
thefollowingwarning:MTx MODE LIST WLL BE ERASED?.
System Mode Menu
SYST CONF > SYS MODE
UHF-R - CompatiblewithUHF-Rtransmitters.
Axient - CompatiblewithAxienttransmitters.
RF Pad
AccesstheRFpadmenu(RADIO>RF PAD)toattenuateantennasignallevelin1
dBincrements.
Scanning for an Open Channel
Ifyouexperienceinterference,useoneofthefollowingfrequencyscanstoanalyze
theRFenvironmentandidentifyanavailablefrequency.
• ChannelScan:Pressthescanbuttononthereceiver.Findsthefirstavailable
channel.
•
GroupScan:Pressandholdthescanbuttonfortwoseconds.Findsthegroup
withthegreatestnumberofavailablechannels.(Eachgroupcontainsasetof
frequenciesthatarecompatiblewhenoperatingmultiplesystemsinthesame
environment.)
•
FullScan:ScansthefullRFbandandallowsyoutoviewtheresultsina
graphicaldisplay.
Full Scan
ThisfeaturescanstheRFbandin25kHzincrementsforallavailablefrequencies,
firstwithantennaA,thenwithantennaB.Youcanthenviewagraphicaldisplayof
theresults.
1. Navigatetothefullscanmenu(RADIO>FULL SCAN)
2.
SelectRUN SCANandpressentertoinitiatethefullscan.
3. Oncethescaniscompleted,selectSPECTRUMfromthefullscanmenutoview
theresults.
Note:Ifthefullscanisinterrupted,nodataisstored,andNO DATAdisplaysonthe
screen.
Viewing Full Scan Results
Usethespectrummenutodisplayfullscanresults(RADIO>FULL SCAN>
SPECTRUM).
•
Acursorappearsasasmallarrowonthetopleftsideofthegraph.
• Usethe▼▲tomovethecursorleftorright
• PressthescanbuttontoviewthefrequencyanddBmatthecursorlocation.The
dBminformationisaccuratewithin+5dBbetween-100to-5dBm.
• Zoominandoutusingtheenterandexitbuttons.Thereareviews60MHz,9
MHz,or1MHzwide.
Toreturntothehomesreen,presstheexitbuttonrepeatedly.
Note:Thefullscanresultsareretainedinmemoryevenafterthereceiverispow-
eredoff.Foraccurateresults,performanewfullscaniftherearechangesinloca-
tionorRFenvironment.
2. Syncthereceiverwiththetransmitter.Leavethetransmitteron.
Repeatthefollowingstepsforeachadditionalsystem:
1. Manuallysetthereceivertothedesignatedgroup.
2. Pressscanoncetofindthenextcompatiblefrequency.
3. Syncwithtransmitterandleavetransmitteronwhilesettingupadditional
systems.