7
Power
TheUR5canbepoweredbyAAbatteries,aShureSB900rechargeablebattery,or
throughtheShureAFP522DCcameramount.
Standard AA Batteries
UsetheAAadapter(installedinthebatterycompartmentasshipped)whenusing
AAbatteries.
Forthebatteryicontoaccuratlydisplaybatterylife,selectthebatterytypefromthe
batterymenu(SYST CONF>BATTERY).
Note:Batterytypeissettoalkalinebydefault.
SB900 Rechargeable Battery Information
WhenusinganSB900rechargeablebattery,batterylifeisdisplayedinhours
andminutesonthehomescreen.Thebatterymenudisplaysbatterystatus:
SYST CONF > BATTERY
Hrs: Min Left:
Thenumberofhoursandminutesofbatterylifeleft(accurate
towithin15mins)
Health
Batteryhealthdisplayedasapercentage
Status
DisplayedaspercentagefullandmAh
Temperature
DisplayedinCelsiusandFahrenheit
Cycle Count
Displaysthenumberoftimesbatteryhasbeencharged
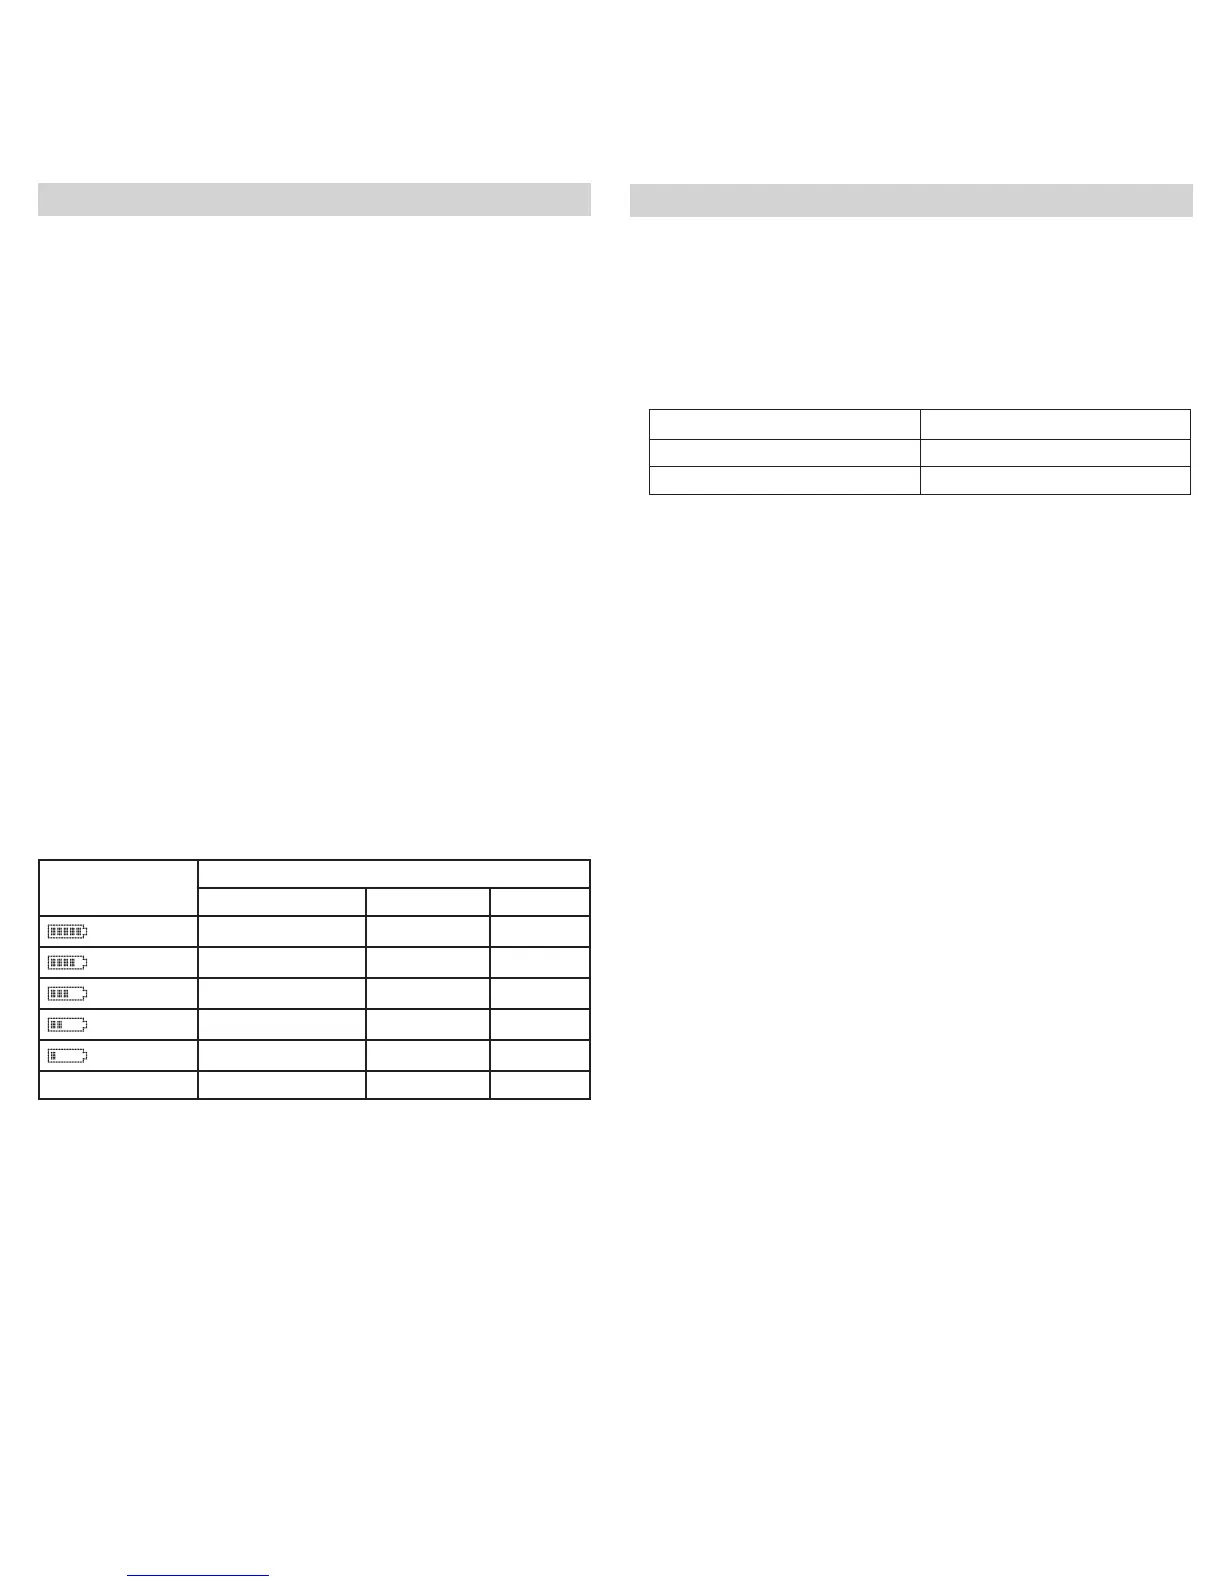
Battery Life
Battery Indicator Approximate Hours Remaining
LED Alkaline Li-ION
Green 2½–5 7–13
Green 2–2½ 5–7
Green 1½–2 3–5
Green 1–1½ 2–3
Amber ½–1 1–2
Red <½ <1
Note:Usinglower-impedanceearphones,differentbatterytypes,andhighergain
settingsmaycausethereceiverbatterylifetobedifferentthanspecified.
Audio
Audio Setup
Usethefollowingstepstoconnectthereceivertoacamera.Thesestepscanalso
beusedtoconnecttootherdevices,suchasfieldrecorders.
1. Adjustthetransmitteroutputlevelsothattheaudiolevelmeterbarsonthere-
ceiverarecloseto,butnotat,thepeaklevel(5thsegmentontheaudiobar).
2. Checktheinputsettingonthedevicetowhichyouareconnectingthere-
ceiver.Setthecameraoutputvolumeonthereceiveraccordingly(AUDIO>
CAMERA VOL).
Input Setting on the Camera UR5 Camera Output Volume
AUXlevel -5dB-+10dB)
MIClevel -36dB--5dB
3. AttachthesuppliedTA3Faudiocabletothereceivercameraoutput.
4. Mountthereceiveronthecamera.
5. Connectthecabletotheaudioinputonthecamera.
6. Adjustthecamerainputtothedesiredlevel.
Audio Settings
Usetheaudiomenu(AUDIO)toadjustcameraoutputlevelandheadphonevolume.
CAMERA VOL
Adjustscameraoutputleveltomatchtheinputlevelofthedevicetowhichyou
connectthereceiver.
HP VOLUME
Adjustsheadphonevolume.
HPO MODE
Disablescameraoutputandincreasesheadphontoutputgain.Assigns
▼▲buttonstoadjusttheoutputofheadphonevolume.ReturntoAUDIO
menutoexitHPOMODE.
Quick Access Volume Adjustment
Thereceivercanbeconfiguredsothatthe▼▲buttonsadjusttheoutputorhead-
phonevolume.Thisallowsyoueasilyadjustvolumewhilethereceiverismounted,
withouthavingtoentertheaudiomenu.
Note:ThissettingdoesnotapplywheninMTxmode.
UTILITIES > VOL. ASSIGN
CAMERA OUT
The▼▲buttonsadjustcameraoutputvolume.
HEADPHONE
The▼▲buttonsadjustheadphonevolume.
NONE(default)
The▼▲buttonsdonotaffectvolume.
Tone Generator
Accessthetonegeneratormenutosendatonetothecameraoutput(UTILITIES>
TONE GEN).Usethe▼▲buttonstoselecttonesof100Hz,1kHz,or5kHz.Exiting
turnsoffthetonegenerator.
Note:Audiofromthetransmitterisinterruptedwhileinthismenu.