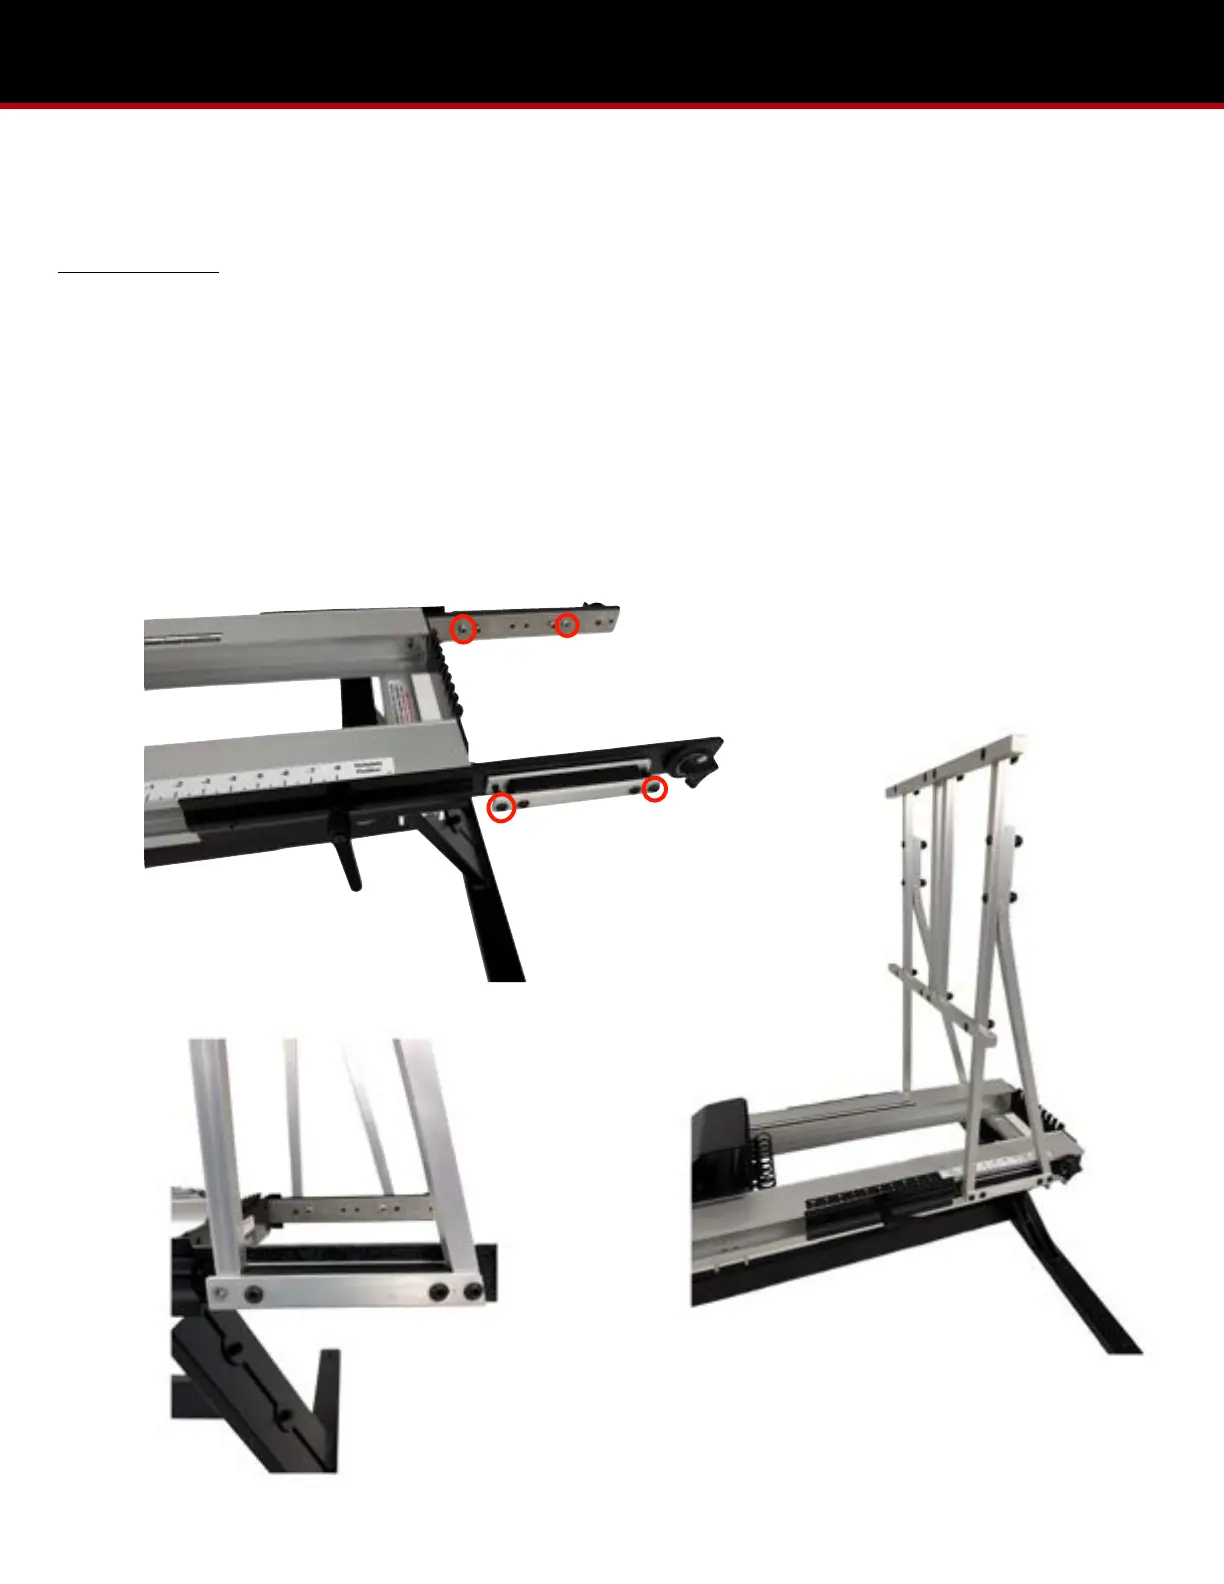
MOUNTING THE KICKPLATE STRUCTURE
STEP 3
ITEMS REQUIRED
Kickplate Structure
1. Release the slider bars with the torque handles. Partially slide the clamp plates out of the head-end of the rails and
remove the outer four bolts to make room for the kickplate structure. (Pic 3.1)
2. Align the bolt holes on the kickplate structure with the bolt holes on the clamp plate and tighten with the hardware that
was just removed. (Pic 3.2)
3. Slide the clamp plates back into the head-end of the rails and secure the slider bars with the torque handles. (Pic 3.3)