Located inside the 2000-1 carriage are 8 elasticords at the foot-end of the machine with handles. Once the elasticords are
attached to the slotted plate at the foot-end of the carriage they engage resistance.
Always detach the Elasticords when the machine is not in use. This prevents premature stretching of the Elasticords
and greatly extends their life.
Attaching Elasticords: To increase the resistance, attach elasticords one-by-one at the foot-end of the machine to the
slotted plate on the rails.
Detaching Elasticords: To decrease resistance, detach Elasticords from the slotted plate and gently retract them back to the
carriage.
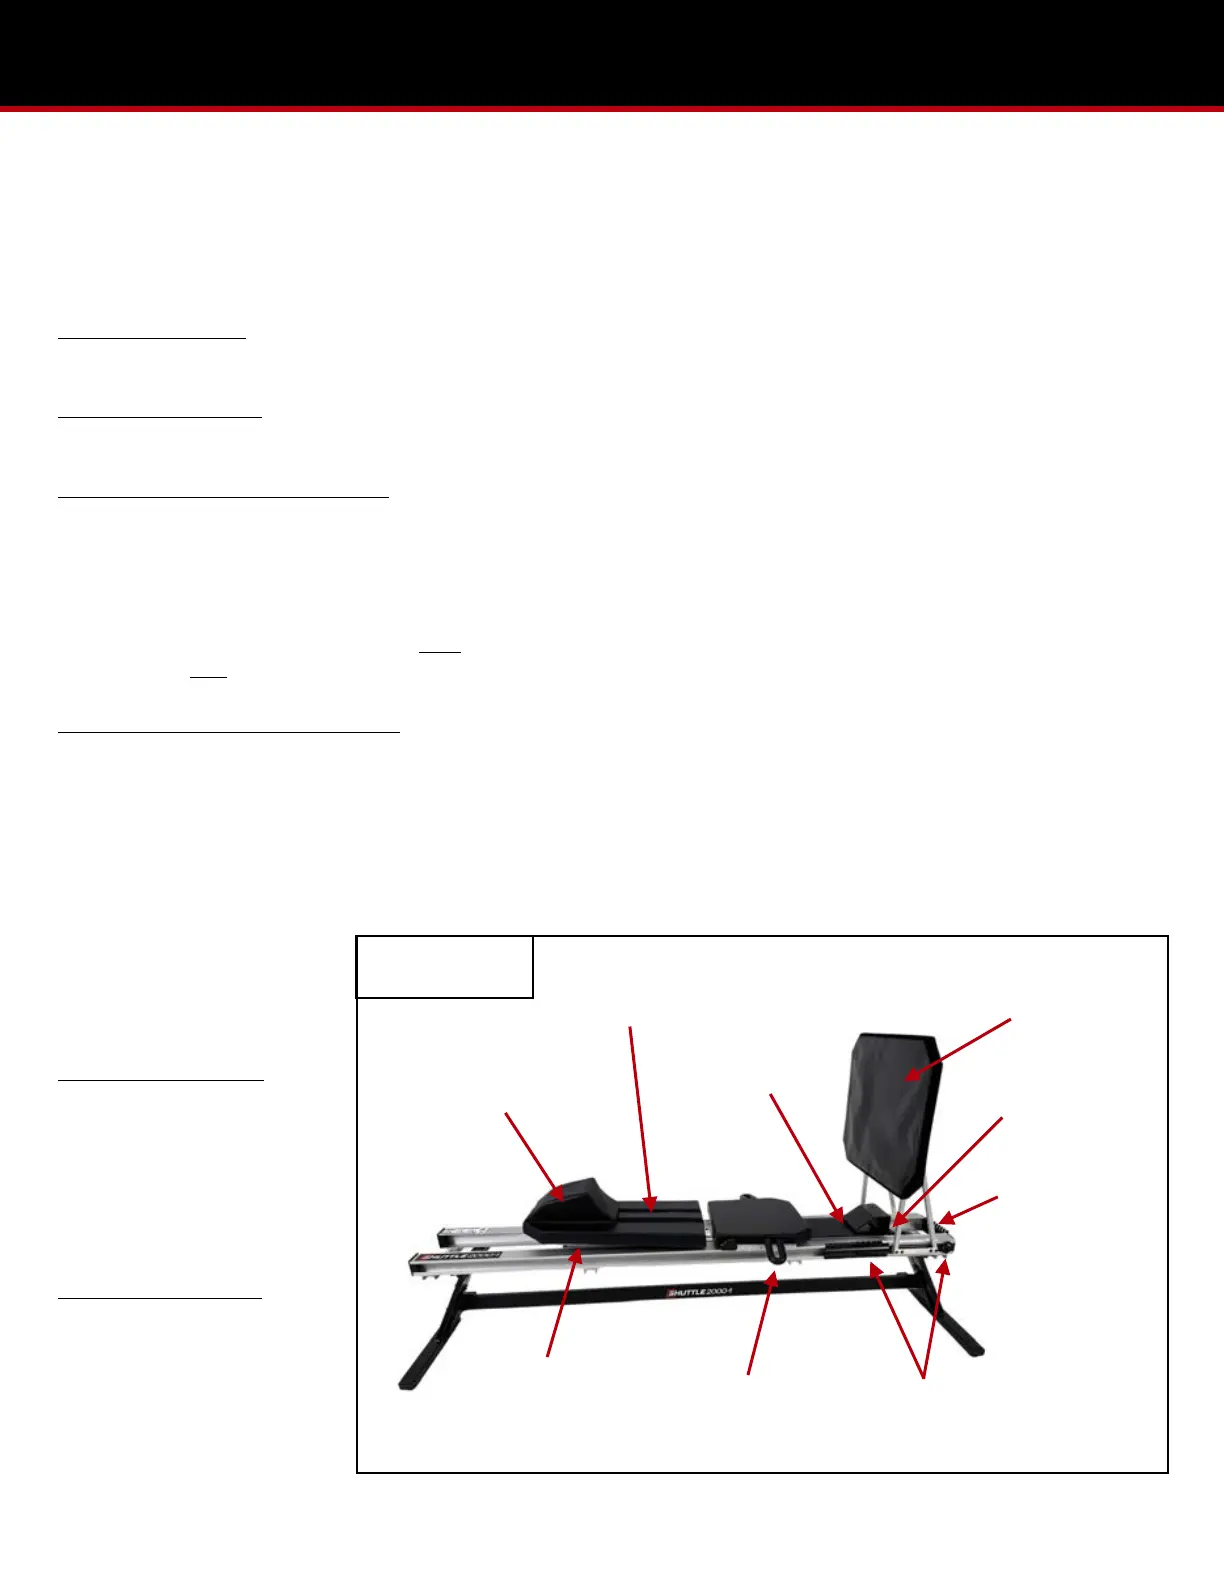
Adjusting the Height of the Kickplate: The kickplate board can be adjusted by turning the torque handle and T-handle on
the back side of the kickplate a few times to the left. Utilizing the T-handle, pull or drop the kickplate into it’s desired
position. Once the kickplate board is at the desired height, tighten the torque handle while continuing to hold the T-handle
that way the kickplate board can be held at the desired height. Then re-tighten the T-handle to fully lock the kickplate
board into the chosen position.
When the kickplate board is positioned: High- This is the best position for 90° flexion of taller individuals and unsupported
heel activities. Low- This position is best for direct body alignment activities.
Adjusting the Position of the Kickplate: The kickplate may be adjusted closer/further from the carriage. This can be done by
releasing the slider bars with the tri-knobs and torque handles found on each side of the rails. Make sure when loosening
the torque handles and tri-knobs that they're not turned more than one or two turns to the left. Once both knobs and
handles are loose, push or pull the kickplate structure to the desired position in the rails. Once the kickplate structure is in
the desired position, re-tighten the torque handles and tri-knobs on both sides of the rails.
Warning! Never attempt to adjust the height and position of the kickplate structure when the machine is in use. This could
cause serious damage to the machine as well as the persons.
Positioning the kickplate closer
to the head-end of the rails
will shorten the distance the
carriage travels.
Adjusting the Headrest: The
headrest is easily adjusted
depending on patient size and
desired exercise type. This can
be done by pulling the headrest
up and away from the backrest.
Adjusting the Handles: The
handlebars can easily be
adjusted by lifting up and
securing into any of the five
holes drilled next to the rope
cleat.