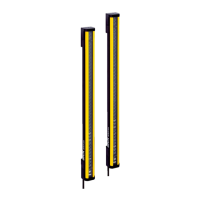
Receiver indicators
P
osition of LEDs:
B
Position LED color Function Labeling
1
Red/yellow/green Field indicator
1)
;
sho
ws the status of
the protective field
and additional infor‐
mation about the sta‐
tus display
–
2
Blue/red/yellow/white Diagnostics 1, 2, 3, 4, 5, 6, 7, 8
3
Red/green OSSD status OSSD
4
Red/yellow/green End cap with inte‐
g
rated LED (optional)
–
1)
Safety light curtains with protective field height > 300 mm have several light emitting diodes for the field
indic
ator.
Diagnostic LEDs 1 to 4 also display the alignment quality.
NOTE
If dia
gnostic LED 6 lights up white, reduced resolution has been configured. The effec‐
tive resolution must then be marked on the device and on the machine by taking suit‐
able measures (e.g. a mark or an information label).
5 Mounting the system plug
System plug:
C
NOTICE
D
amage to the device
If the system plug is not mounted, dirt, dust, or moisture may enter the device and
cause damage.
If the system plug is not mounted, electrostatic discharge at the contacts may damage
the device.
b
Prevent the entry of dirt, dust, and moisture.
b
Prevent electrostatic discharge at the contacts.
1. Make sure that the safety light curtain and system plug are disconnected from the
po
wer supply while the system plug is being mounted.
2. Unpack the system plug.
3. If necessary, set the DIP switch, see information on the system plug.
4. Remove the protective film from the terminal compartment of the safety light cur‐
tain.
5. Carefully mount the system plug on the terminal compartment of the safety light
curtain.
6. Use the two captive screws to screw the system plug onto the safety light curtain.
Torque 0.5 Nm ± 0.1 Nm.
MOUNTING INSTRUCTIONS
8022020/ZYO3/2018-05-15 | SICK M O U N T I N G I N S T R U C T I O N S | deTec4
13
Subject to change without notice