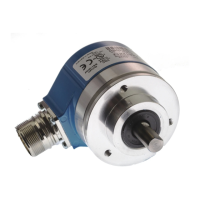
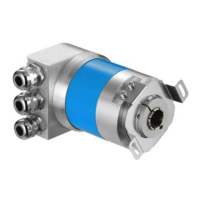
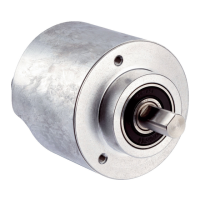
DGS66 blind hollow shaft
Mounting instructions
Hollow-shaft incremental encoders are
measuring instruments produced in accor-
dance with recognized industrial regulations.
• The installation of the encoder is
to be carried out by trained
personnel with knowledge of
electrical engineering and
instrumentation.
• An incremental encoder must be
used only for the purpose
appropriate to its design.
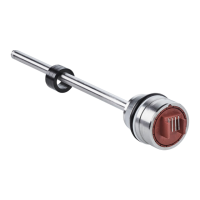
Tool required for the fixing to the shaft
- Adjusting tool (SICK)
Part no. 20 29 942
alternatively
- tubular box spanner 8 mm A/F
and hexagon socket key 4 mm A/F
The following must be observed
• These installation instructions are
a supplement to the data sheet
• The shaft length of the motor must
lie within the specified tolerance:
see (11)
• Diameter tolerance of the shaft: h
7
• The end of the shaft must be burr-free,
chamfered and grease-free
• Space requirement for adjusting tool,
measured from the rear of the encoder,
about 80 mm
The following must be avoided
• Blows and shocks to the collet (1)
• Stress on the torque support (9)
• Operating the encoder without the
threaded blanking plug (6) screwed in
• Connecting or plugging in the
encoder with a voltage present
Preparing for installation
• Remove threaded blanking plug (6)
• Insert collet (1) into encoder and screw
in screw (3) so that the collet does
not yet close
Installation
• With the collet open, push the encoder
onto the locked shaft (11) until torque
support (9) rests on the motor
• Hold encoder firmly and mark the 4
fixing holes (7)
• Pull off encoder once more, centre-punch
and drill marked holes
Tap a thread for M3 screw
• With the collet open, push the encoder
onto the locked shaft (11) until torque
support (9) rests on the motor
• Fix encoder with 4 M3 screws (8)
• Secure screws against coming loose
• Place adjusting tool onto expanding
shaft
• If the zero pulse is to be adjusted, this
can be carried out by rotation at the
lever (4) or hexagon (2)
(collet still loose)
• To clamp the collet, hold lever (4) firmly
in the desired position and, using the
lever (5), tighten the screw (3),
recommended tightening torque
2,2 Nm
• While clamping the collet, do not exert
any axial pressure on the adjusting tool,
in order not to stress the torque
support (9)
• If the torque support (9) is stressed,
loosen collet and re-clamp
• Screw in threaded blanking plug
• Make electrical connection
Issue 05 / 10 • Subject to change without notice 8013427
GB