Operating Instructions
LMS1xx Laser Measurement Sensors
Mounting
8012471/ZN27/2017-06-09 © SICK AG · Germany · All rights reserved · Subject to change without notice 61
Chapter 5
How to mount the weather protection hood on the LMS11x/LMS13x/LMS14x/LMS15x/
LMS182:
1. Put the weather protection hood 190° or 270° over the LMS11x/LMS13x/LMS14x/
LMS15x/LMS182.
2. Mount the weather protection hood on the LMS11x/LMS13x/LMS14x/LMS15x/
LMS182 using three M5
× 15 countersunk head screws (included with the delivery of
the weather protection hood.
For this purpose you will find on the weather protection hood two holes with 90°
countersink on the rear and one hole with 90° countersink on the right.
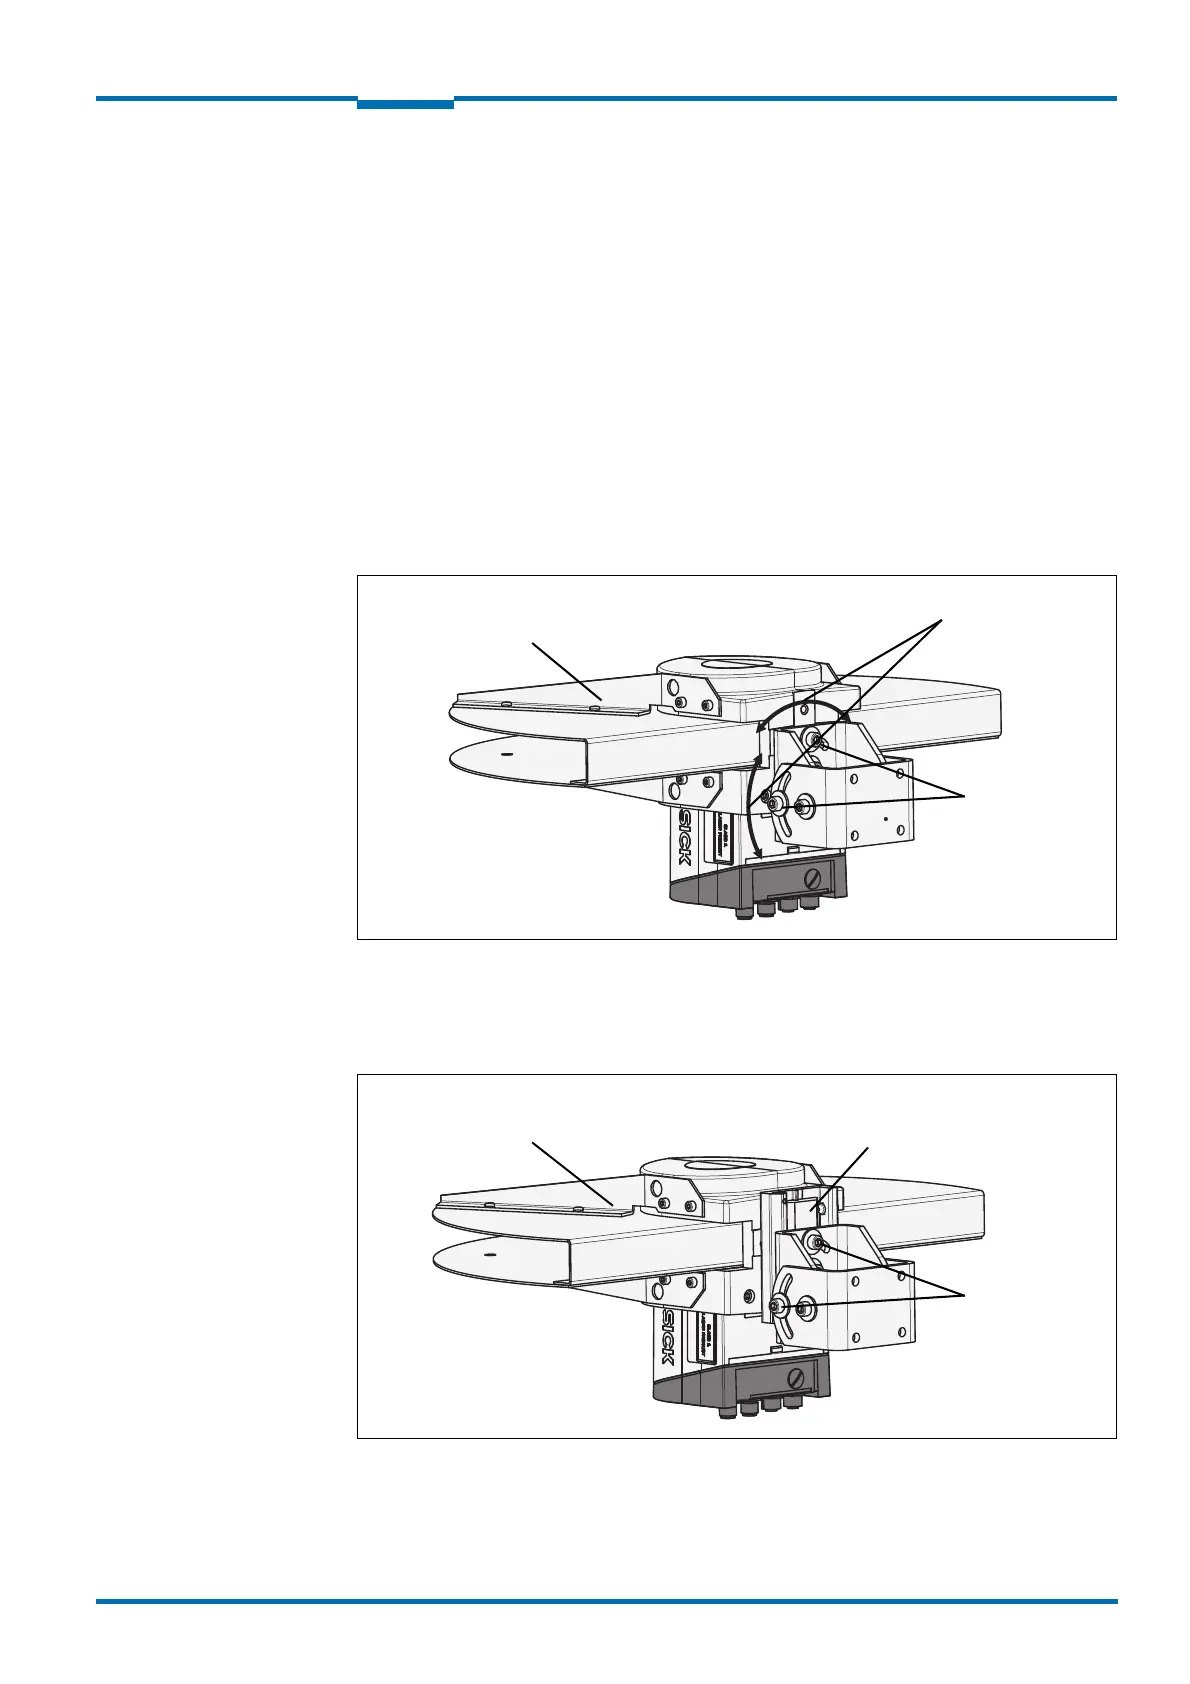
Mounting kits for the weather protection hood
Using the mounting kits for the weather protection hood you can align the LMS11x/
LMS13x/LMS14x/LMS15x/LMS182 in two planes. The maximum adjustment angle is
±22.5° in both planes.
Fig. 36: Standard mounting kit (part no. 2046025) for the weather protection hood
The quick-action mounting kit for the weather protection hood permits the quick replace-
ment of the LMS11x/LMS13x/LMS14x/LMS15x/LMS182, without the need to adjust the
new device.
Fig. 37: Quick-action mounting kit (part no. 2046989) for the weather protection hood
Weather protection hood
Adjusting screws
Adjustments
Weather protection hood
Adjusting screws
Quick-action clamp