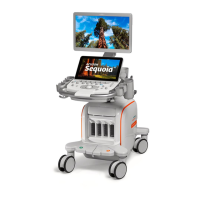
This document outlines the procedure for replacing the elastomer of a User Interface (UI) Assembly on the ACUSON Sequoia™ ultrasound system. The primary function of this replacement is to address issues of sticky or unresponsive keys on the ultrasound UI keyboard, thereby restoring optimal functionality to the system's input interface.
Function Description:
The ACUSON Sequoia is an ultrasound system, and this manual specifically addresses the maintenance of its user interface. The UI assembly includes a keyboard with various keys that rely on an elastomer for proper tactile feedback and electrical contact. Over time, this elastomer can degrade, leading to keys that either stick when pressed or fail to register input reliably. The replacement process involves disassembling the UI, removing the old elastomer, cleaning the console area, installing a new elastomer, and then reassembling and testing the UI. The elastomer itself is a critical component that provides the spring-back action for the keys and ensures consistent contact with the underlying circuitry when a key is pressed. The repair kit includes three distinct elastomer sections: L/R, U/D Elastomer, Main Elastomer, and TEQ Elastomer, indicating that the keyboard layout is segmented, and each section requires a specific elastomer part for comprehensive coverage.
Important Technical Specifications:
While the document does not list detailed technical specifications for the entire ACUSON Sequoia system, it provides crucial information regarding the elastomer replacement process.
- Part Numbers: The Service Elastomer Repair Kit for Sequoia has a Part No. 08270240. The individual components within this kit are not assigned separate part numbers in the provided table but are listed by description.
- Elastomer Components: The kit contains three types of elastomers:
- L/R, U/D Elastomer: 1 unit
- Main Elastomer: 1 unit
- TEQ Elastomer: 1 unit
- Tooling: A standard CSE Toolkit is required for the procedure.
- Connectors: The FPP (Front Panel Processor) and switch assembly are joined by four 80-pin connectors. Various ribbon cables (UIP UDC, J5, UPD UDQ) and power cables are involved in the UI assembly.
- Encoder Mounting: Encoders are secured with mounting nuts, which require a 1/2-inch or 13 mm hollow shaft socket for removal and installation. A critical caution is provided against over-torquing these nuts, as it can crack the glass encoder wheel.
- ESD Precautions: The procedure explicitly warns about observing Electrostatic Discharge (ESD) procedures to prevent damage to the assembly and avoid additional service calls.
- Grounding Straps: Grounding straps are present within the UI assembly and must be handled carefully during removal to prevent tearing.
Usage Features:
The ACUSON Sequoia system, with its functional UI, is designed for medical ultrasound imaging. The user interface, once properly maintained, allows for precise control and input during diagnostic procedures.
- Keyboard Input: The primary usage feature addressed by this maintenance is reliable keyboard input, essential for navigating menus, entering patient data, and controlling imaging parameters.
- Knobs and Buttons: The UI includes a CINE knob, DGC caps, DGC bezel, and seven plastic encoder knobs, all of which are part of the user interaction. The replacement ensures these components function correctly, providing accurate control over the ultrasound system.
- Display Integration: The UI assembly integrates with an LCD and LED indicators, which are part of the post-maintenance diagnostic checks to ensure full system functionality.
- Modular Design: The UI assembly appears to have a modular design, allowing for the removal of the keyboard bezel, separation of FPP and switch assembly, and individual replacement of components like the elastomer.
Maintenance Features:
The document itself is a maintenance guide, detailing a specific repair procedure.
- Step-by-Step Instructions: The manual provides a clear, sequential guide for elastomer replacement, from initial system shutdown to final configuration and testing.
- Estimated Time: The elastomer replacement is estimated to take approximately 1 hour, providing a clear expectation for service personnel.
- Required Tools and Parts: A comprehensive list of necessary tools (Standard CSE Toolkit) and parts (Service Elastomer Repair Kit) is provided, ensuring technicians have everything needed before starting the procedure.
- Visual Aids: Figures are included to illustrate key steps and component locations, such as kidney pad wirings, keyboard bezel removal, trackball cables, FPP connections, UI board descriptions, and elastomer alignment markers.
- Critical Cautions and Notes: Important warnings regarding ESD, potential damage to grounding straps, and the risk of cracking encoder wheels are highlighted, emphasizing best practices and potential pitfalls.
- Cleaning Protocol: The procedure includes a step to thoroughly clean the UI console area with a soft cloth, noting that "Excess debris is one cause of sticking keys," which is a crucial preventative maintenance step.
- Post-Maintenance Verification: After reassembly, the system requires booting to SUI (Siemens User Interface) and running UI diagnostics to verify that the keyboard, LCD, and LED pass their respective tests, ensuring the repair was successful and the UI is fully operational.
- Documentation: The final step involves completing all required paperwork, emphasizing the administrative aspect of maintenance.