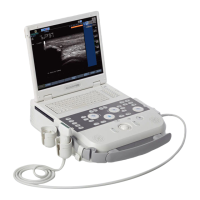
The ACUSON P300™ Ultrasound System is a medical imaging device designed for various diagnostic applications, offering a comprehensive set of features for 2D, M-mode, and Doppler examinations. The control panel is intuitively laid out, featuring a trackball and an "eSie Wheel" (softkey control) for navigation and adjustments.
Function Description:
The system provides a wide range of imaging modes and optimization tools. It supports 2D imaging, M-mode, Color Doppler, Pulsed Wave (PW) Doppler, and Continuous Wave (CW) Doppler. Key functions include:
- Power On/Off: Initiates or terminates system operation.
- TGC Controls: Time Gain Compensation controls for adjusting image brightness at different depths.
- Mouse Clicks (Left/Right) and Action Button: Used for navigation, selection, and confirming actions within the user interface.
- Trackball and Pointer: For precise cursor movement and data field navigation.
- Freeze: Pauses the live image for review or measurement.
- Start/End: Initiates or concludes an exam, allowing for patient data entry and selection of application, preset, and probe.
- Probe/Preset: Allows selection of the transducer and imaging preset.
- Configuration Menu: Accesses system settings and configurations.
- Archive Review/Exam Review: Enables viewing of stored patient data, images, and clips.
- Doppler Modes (Color, CW, PW): Activates and optimizes various Doppler imaging techniques for blood flow analysis.
- Color Doppler: Displays blood flow information in color.
- Dual (Left/Right): Activates dual-screen display for side-by-side imaging.
- Auto Optimization/2D, M-mode Gain: Automatically adjusts gain levels for 2D and M-mode imaging, and provides one-button TGC optimization for 2D.
- Record/Print: Captures and prints on-screen images.
- Clip/Image Store: Saves static images or dynamic clips to the local archive.
- 2D/M-mode: Activates 2D or M-mode imaging.
- ECG/Transmit Power/Edit ID: Controls ECG display, transmit power, and allows editing of patient ID.
- Tools/VPan (Panoramic): Accesses additional tools, including panoramic imaging.
- Pictogram: Allows insertion of pictograms onto images.
- Report: Generates calculation reports based on measurements.
- Start/Stop VPan: Initiates or terminates panoramic scanning.
- Depth/Zoom: Adjusts imaging depth and zoom levels.
- Update/Line/Doppler Gain: Controls gain levels for CW, PW, and Color Doppler, and manages cursor/update functions.
- Audio (Decrease/Increase): Adjusts the volume of Doppler audio.
- eSie Wheel (Softkey control): A multi-functional rotary control for navigating softkey options, changing values, and scrolling through pages.
- Measure (Label/Generic): Activates labeled or generic measurement functions on frozen images.
Important Technical Specifications and Usage Features:
The ACUSON P300 system is designed for ease of use and efficient workflow.
- Power Source: Can run on internal battery for 80 minutes (scanning) or 120 minutes (standby).
- Patient Data Management: Allows entry and modification of patient data during an open exam or from the patient archive. Editing patient data renames all previously stored images/clips within the study.
- Application/Preset/Probe Selection: Users can easily modify the application, preset, and probe during an exam.
- Image Storage: Images and clips can be saved to the local archive. Static images are saved when frozen, and clips are acquired when live. Saved data appears in a thumbnail panel.
- Image Printing: On-screen images can be printed, with peripherals configurable via the menu.
- Image Review: Stored images can be reviewed during an active exam, with options to view thumbnails, delete images, and activate review of previous exams from the archive.
- 2D System Optimization:
- Depth/Zoom: Adjusted via a dedicated wheel. Trackball is used for position, wheel for size of ROI.
- Focus: Trackball moves focal zones; ACTION button anchors them.
- TEI (Harmonic Imaging): S wheel selects TEI, then S button. Harmonic frequencies (PEN, GEN, RES) are adjusted via S wheel and S button.
- Orient (Up/down invert): S wheel selects ORIENT, then S button.
- Frequency: S wheel selects FREQUENCY, then S button to adjust. Range varies by transducer/application.
- Size (2D Sector Width): S wheel selects SIZE, then S button to decrease sector size. CONCURR feature for phased array transducers reduces 2D image width for Color Doppler ROI and allows panning.
- Dynamic Range: S wheel selects DYN RANGE, then S button to adjust grayscale levels.
- Focal Zones: S wheel selects FOCUSES, then S button for additional foci. ACTION locks focus. Range: 1-4; ALTERNATE.
- Reverse (Left/right invert): S wheel selects REVERSE, then S button.
- TPVIEW (Trapezoid): S wheel selects TPVIEW, then S button (linear transducers only).
- Gray Maps: S wheel selects GRAY MAP, then S button to adjust post-processing curve. Range: 1-5.
- Colorize (Tint): S wheel selects COLORIZE, then S button to adjust chromatic scale. Range: Off(-), Orange, Indigo, Magenta, Blue, Yellow, RGB.
- Sharpness: S wheel selects SHARPNESS, then S button to adjust edge accentuation. Range: 1-5.
- Density: S wheel selects DENSITY, then S button to adjust line density. Range: LOW, HIGH.
- Persistence: S wheel selects PERSIST, then S button to adjust weighted average of frames. Range: Off(-), 1-6; AVERAGE.
- Clip Duration: S wheel selects CLIPS DUR, then S button to set clip length. Range (seconds): 1, 2, 3, 4, 5, 7, 10, 20, 30, 60, UNLIMITED.
- MVIEW (Spatial Compounding): S wheel selects MVIEW, then S button to adjust. Range: Off(-), 1-10.
- XVIEW (Speckle Reduction/Contrast Enhancement): S wheel selects XVIEW, then S button to adjust. Range: Off(-), 1, 2, C. XVIEW level C options: X SMOOTH 1-5, X DETAIL 1-8, X ENHAN 1-12.
- One-button Image Optimization: AUTO button automatically adjusts general gain and TGC.
- Dual Mode: Left/Right DUAL buttons activate dual-screen display. For live dual, S wheel selects NEXT/PREVIOUS, then SIMULT, then S button.
- QUAD Imaging: In DUAL function, S wheel selects NEXT/PREVIOUS, then QUAD, then S button. Right DUAL button advances.
- 2D-CFM (Live Dual 2D and Color Doppler): S wheel selects 2D-CFM, then S button.
- VPAN (Panoramic Imaging): TOOLS button, select VPAN, then OK. ACQUIRE button activates ROI box, then ACQUIRE to begin/end scanning. MEASURE button for labeled measurement, GENERIC MEASUREMENTS for generic.
- Steer Image (Linear Transducers Only): MVIEW must be deactivated. S wheel selects B-STEER, then S button to steer image.
- Biopsy: S wheel selects BIOPSY, then S button to activate/deactivate biopsy display.
- Color, PW, CW Doppler and M-mode Optimization:
- UPDATE/LINE/GAIN: Controls gain levels (rotate) and cursor/update (press).
- Color Doppler: C button engages.
- Color Gain: UPDATE/LINE/GAIN wheel.
- ROI Size and Position: Trackball for position, ACTION for size, then ACTION to set.
- PWR D (Power Doppler): S wheel selects PWR D, then S button.
- PRF (Scale/Velocity): S wheel selects PRF, then S button to change.
- Baseline: S wheel selects BASEL, then S button to change.
- D-Steer (Linear Transducers Only): S wheel selects D-STEER, then S button to adjust steering angle.
- Color Doppler Frequency: S wheel selects FREQUENCY, then S button to adjust.
- Sensitivity: S wheel selects SENSIT, then S button to adjust. Range: 1, 2, 3.
- Density: S wheel selects DENSITY, then S button to adjust. Range: LOW, HIGH.
- Persistence: S wheel selects PERSIST, then S button.
- Color Map: S wheel selects COLOR MAP, then S button to adjust. Range: V1-V6, VV1, VV2.
- Filter: S wheel selects FILTER, then S button to adjust. Range: LOW, MEDIUM, HIGH, ARTEF SUP.
- Smooth: S wheel selects SMOOTH, then S button to adjust. Range: LOW, HIGH.
- PW Doppler: PW button engages. Audio volume adjusted by dedicated buttons.
- Auto-Doppler Optimization: AUTO button.
- ADM (Automatic Doppler Trace): S wheel selects ADM, then S button. Calculations not sent to report.
- B-Ref (Split/Full Screen): S wheel selects B-REF, then S button.
- Velocity (PRF/Scale): S wheel selects VELOCITY, then S button to adjust.
- Baseline: S wheel selects BASEL, then S button.
- SV Size (Gate): S wheel selects SV SIZE, then S button to adjust.
- θ Angle: S wheel selects θ ANGLE, then S button to adjust.
- Triplex (PLEX): S wheel selects PLEX, then S button.
- Format: S wheel selects B FORMAT, then S button to adjust. Range: SMALL, MEDIUM, LARGE, DUAL.
- Reject: S wheel selects REJECT, then S button to adjust.
- Sweep: S wheel selects SWEEP, then S button to adjust.
- CW Doppler (Phased Array Transducers Only): CW button engages. Audio volume adjusted by dedicated buttons.
- Auto-Doppler Optimization: AUTO button.
- B-Ref (Split/Full Screen): S wheel selects B-REF, then S button.
- Velocity (PRF/Scale): S wheel selects VELOCITY, then S button to adjust.
- Baseline: S wheel selects BASEL, then S button to change.
- Invert (Reverse): S wheel selects REVERSE, then S button.
- Frequency: S wheel selects FREQUENCY, then S button to adjust.
- Format: S wheel selects B FORMAT, then S button to adjust. Range: SMALL, MEDIUM, LARGE, DUAL.
- M-mode: M-MODE button engages.
- Overall Gain: AUTO/GAIN wheel.
- B-Ref (Split/Full Screen): S wheel selects B-REF, then S button.
- Gray Maps: S wheel selects GRAY MAP, then S button to adjust.
- Colorize (Tint): S wheel selects COLORIZE, then S button to adjust.
- Sharpness: S wheel selects SHARPNESS, then S button to adjust.
- Sweep: S wheel selects SWEEP, then S button to adjust.
- Measurements and Calculations:
- Labeled/Generic Measurements: Activated via MEASURE (Label) or generic measurement buttons on frozen 2D, Color, PW, or M-mode images.
- Caliper Placement: Right Select button places first and second calipers.
- Active Caliper Navigation: ACTION button moves between active (yellow) calipers.
- Measurement Options: S wheel and S button for ADD TO RP (add to report), CLEAR, CLEAR ALL.
- Selective Deletion: POINTER button, position arrow on caliper, S wheel to CLEAR, then S button.
- Calculation Reports: REPORT button activates. Worksheets and reports offered per preset. Options include PREVIEW, PAGE, MEASURE (within page), CONFIG.
- Image Import/Export:
- Import to Report: EXAM/REV button, scroll to thumbnails, Right Select, S wheel to ATTACH, then S button.
- Delete from Report: REPORT button, S wheel to PAGE, then S button, scroll to image, Right Select, S wheel to DELETE, then S button.
- Transferring Exams: START/END button, select image archive/transfer/export, then OK. Format options: ACUSON P300 (native), BMP, PNG, JPEG, AVI, DICOM.
- Transferring Exams/Images from Exam Review (USB only): EXAM/REV button, insert USB, select images, checkmark to export. Scroll to EXPORT, Right Select, then OK. USB icon confirms completion.
- Transferring Exams/Images from Archive Review (CD/DVD or USB): ARCHIVE/REV button, insert media, highlight patient(s). For multiple, Shift or Ctrl.
- Transferring Exam to PACS: ARCHIVE/REV button, highlight patient(s), select DICOM, DESTINATION, then OK.
- Import Exams from CD/DVD or USB to Local Database: ARCHIVE/REV button, insert media, select USB ARCHIVE or CD/DVD Archive icon, highlight patient(s), S wheel to COPY, then S button, then OK. Only native ACUSON P300 format studies are importable.
- Text and Pictograms:
- Enter Text: Alphanumeric key on QWERTY keyboard. Right Select sets text (white), Enter auto-completes. OPTIONS selects ANNOTATIONS for pre-defined sets.
- Move Text: Alphanumeric key activates cursor. Trackball places cursor, Right Select. ACTION frames text (yellow). Trackball moves, Right Select sets.
- Delete Text: Alphanumeric key activates cursor. Trackball places cursor, Right Select (within annotation). S wheel to CLEAR or CLEAR ALL, then S button.
- Place Arrow/s: Alphanumeric key activates text menu. S wheel to ARROW, then S button to rotate. Trackball moves, Right Select anchors (green).
- Delete Arrow/s: S wheel to CLEAR ALL, then S button.
- Add Pictogram/s: MARK button. Arrow active on trackball. S wheel to ARROW, then S button to rotate. S wheel to MARK, then S button to select different pictogram. S wheel displays desired pictogram.
- Delete Pictogram: MARK button. S wheel to CLEAR, then S button.
Maintenance Features:
The manual outlines procedures for managing stored data, including deleting images from active exams and deleting exams from the local archive.
- Delete Images from an Active Exam: EXAM/REV button, select images, checkmark, S wheel to DELETE, then S button, then YES.
- Delete Exams from Local Archive: ARCHIVE/REV button, highlight patient(s), S wheel to DELETE, then S button, then YES.
The ACUSON P300 system is designed to be a versatile and user-friendly ultrasound platform, providing comprehensive imaging capabilities and robust data management tools for various clinical applications.