Siemens AG SPR2-310.814.05.02.02 ARCADIS
01.05 CS SD 24
Installation and settings 7
Page 7 of 12
Medical Solutions
1. Remove the rear and side covers of the monitor trolley (already performed in
(Fig.2/p.6) and (Fig.3/p.7)).
2. Check if the space of 4 mounting holes (1/Fig.2/p.6) is available at the slot. If not, dis-
place the panel because the space is necessary for the video splitter.
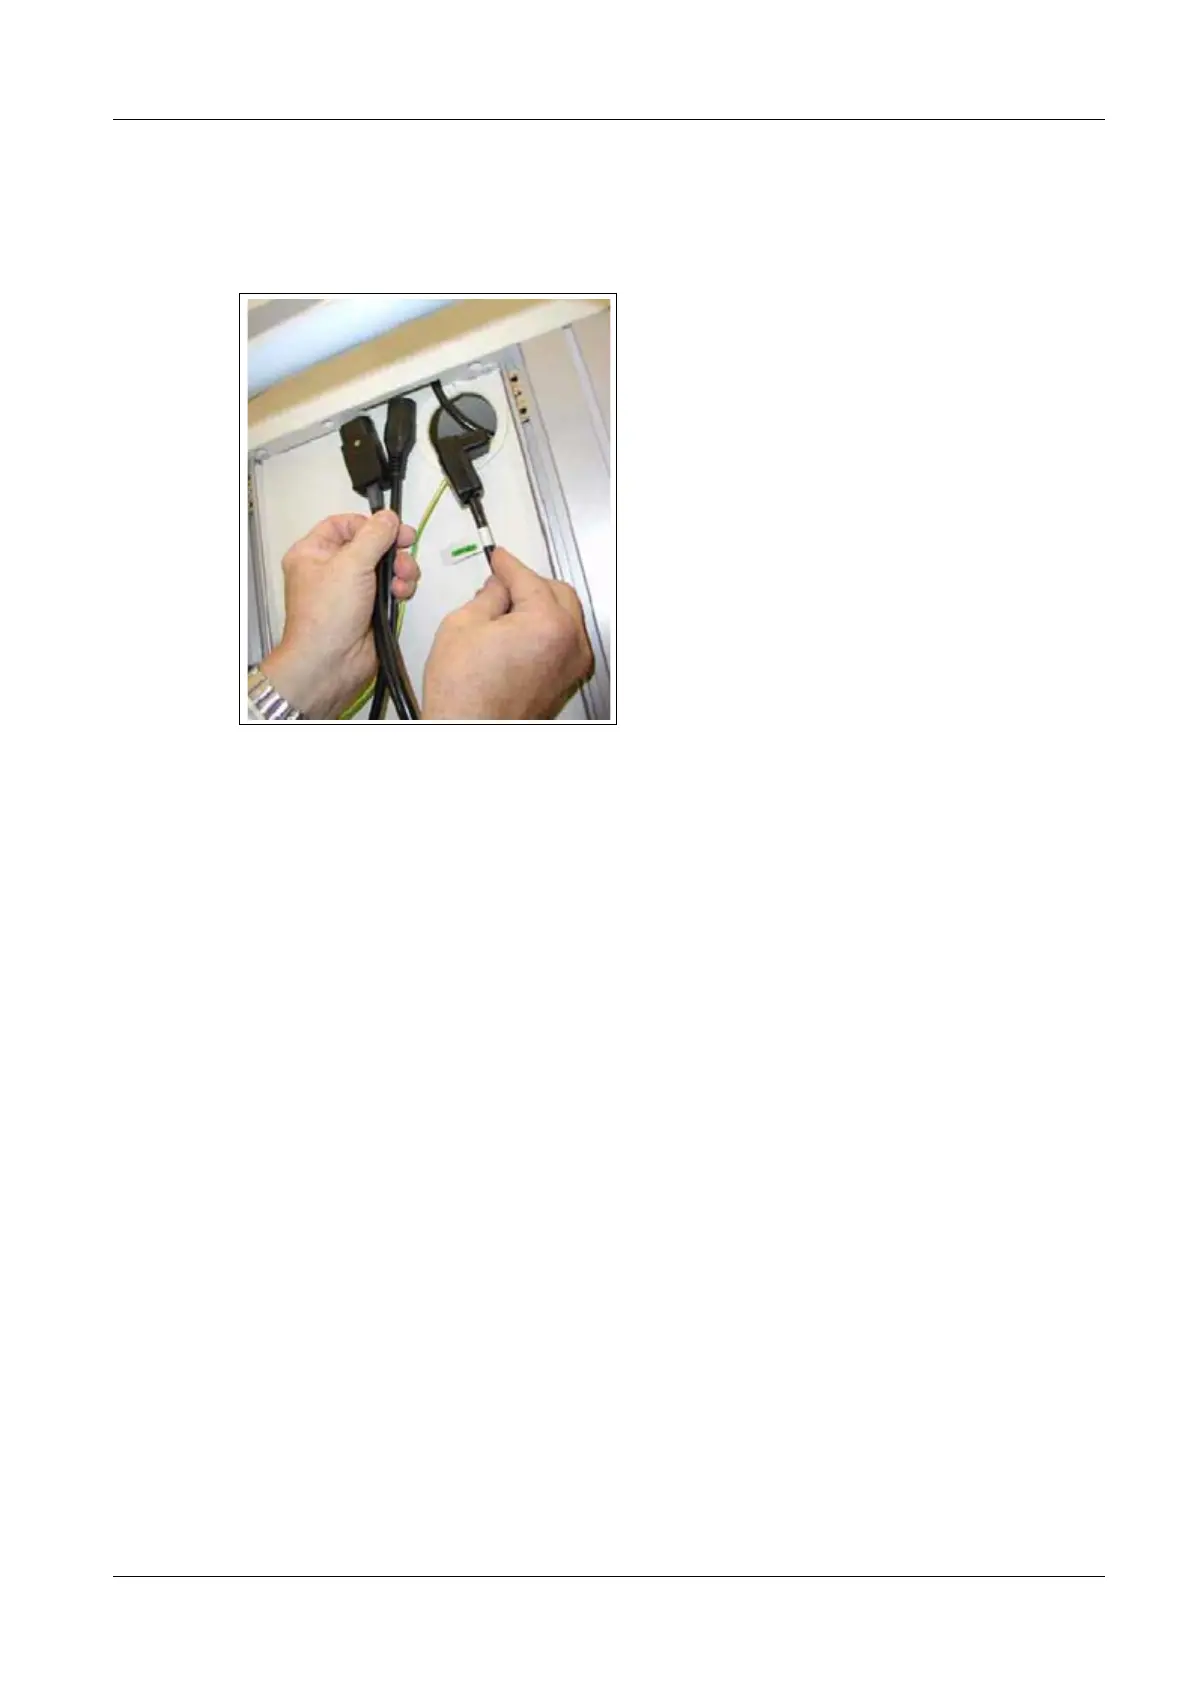
Fig. 3: Power cable
3. Disconnect the power cable from the live monitor and reference monitor (if option is
available) and pull this cable back to the location shown in (2/Fig.2/p.6).
4. Use the supplied kit to run the power cables as shown in ((4/Fig.2/p.6) and
(Fig.3/p.7)).The angle plug must be inserted into the round cable duct inlet as shown
in (Fig.3/p.7).
5. Pull the angle cable plug of each distributor cable to location (3/Fig.2/p.6).
6. Connect the distributor cable (straight plug) to the disconnected power cable of the
monitors (2/Fig.2/p.6).
7. Connect the 2nd piece of the distributor cable (straight plug) to the corresponding moni-
tor as shown in (Fig.2/p.6).

 Loading...