MICROMASTER 440 FX
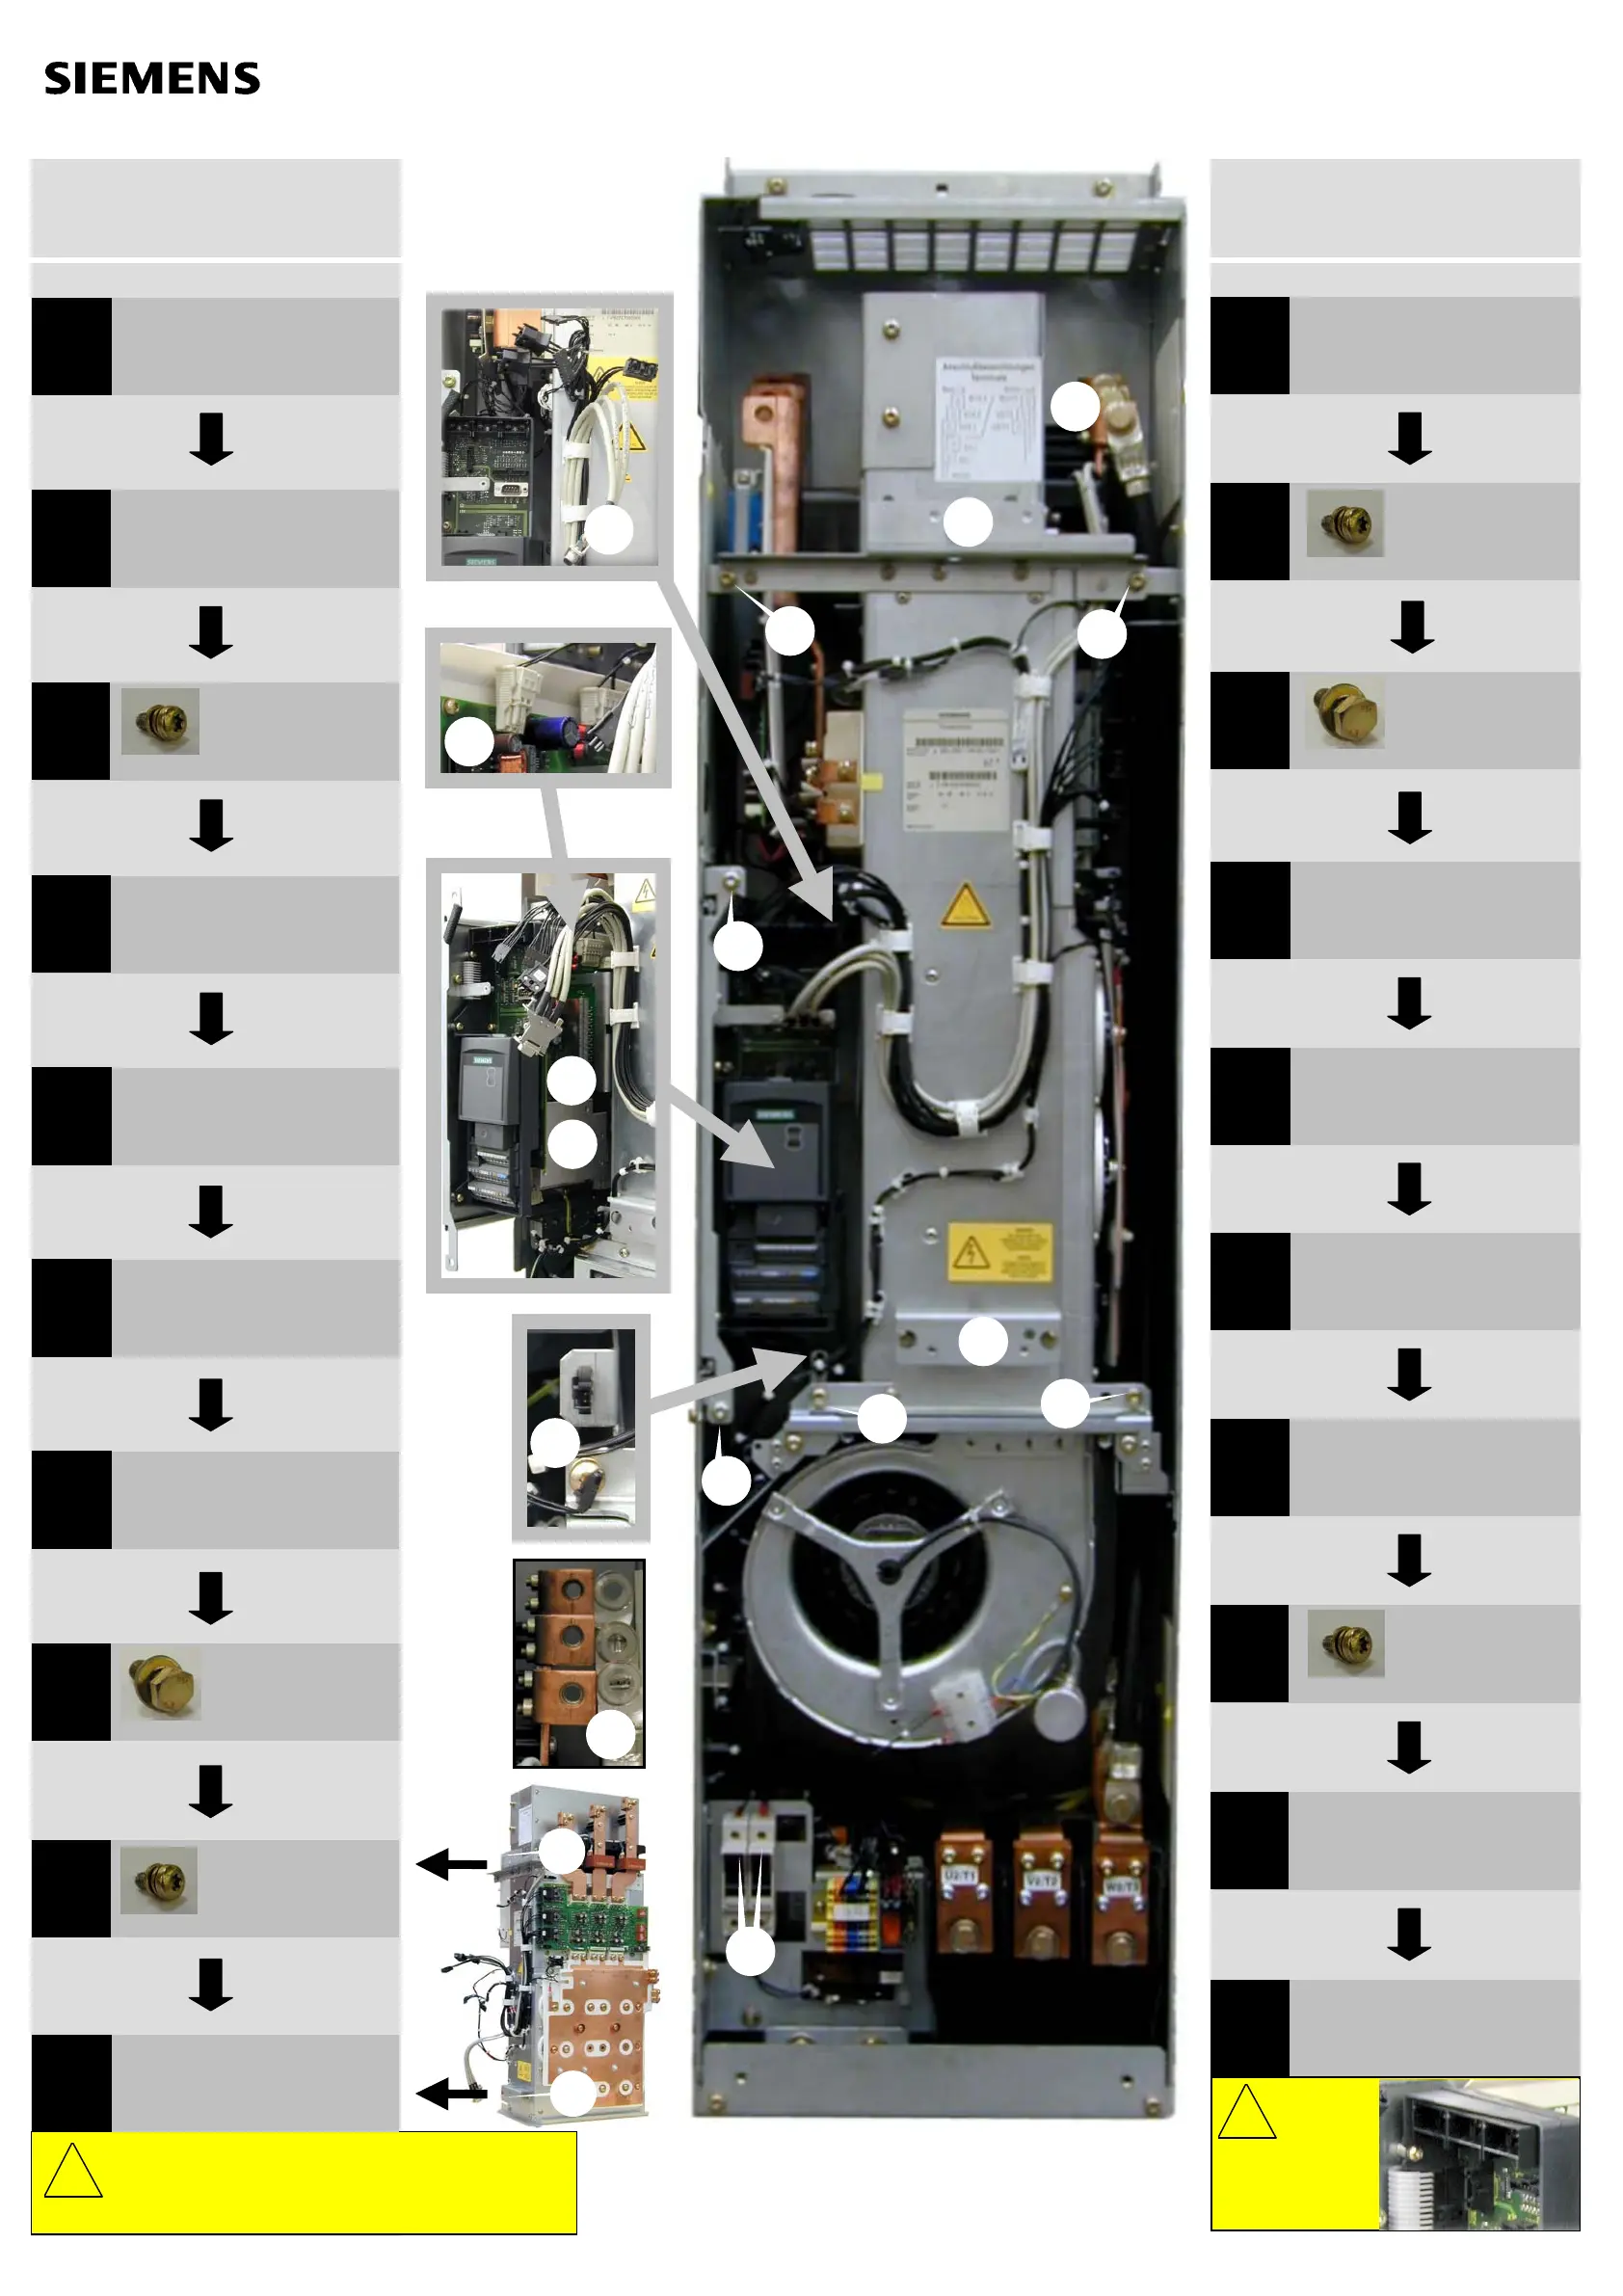
Maintenance Instructions
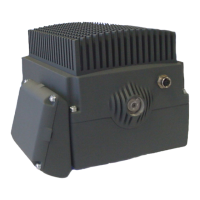
Powerblock
Pull out carefully and secure against falling!
Vorsichtig herausziehen und gegen Hinunterfallen sichern!
Extraire avec précaution ; le cas échéant, protéger contre la chute!
¡Extraer con cuidado y asegurar contra caída!
Estrarre con cautela e assicurarsi che non possa cadere a terra!
!
40 kg
8
3
7
10
10
9
9
9
9
1
4
6
2
3
5
Edition 05/09
© Siemens AG, 2009, Subject to change without prior notification
8
10
10
Ausbau
Démontage
Desmontaje
Smontaggio
Unscrew (2x)
Aufschrauben (2x)
Dévisser (2x)
Destornillar (2x)
Svitare (2x)
3
Torx M6
1
Undo plug and pull out (6x)
Stecker lösen und abziehen (6x)
Desserrer/enlever le connecteur (6x)
Soltar y sacar enchufe (6x)
Sbloccare ed estrarre i connettori (6x)
5
Pull out plug (2x)
Stecker abziehen (2x)
Retirer le connecteur (2x)
Sacar enchufe (2x)
Estrarre i connettori (2x)
7
Undo cable and pull off (2x)
Kabel lösen und abziehen (2x)
Desserrer/enlever le câble (2x)
Soltar y sacar cable (2x)
Sbloccare ed estrarre i cavi (2x)
2
Pull out plug (1x)
Stecker abziehen (1x)
Retirer le connecteur (1x)
Sacar enchufe (1x)
Estrarre il connettore (1x)
M10
Unscrew (3x)
Aufschrauben (3x)
Dévisser (3x)
Destornillar (3x)
Svitare (3x)
8
4
Pull insertion forward
Einschub vorziehen
Sortir le tiroir
Jalar hacia afuera unidad enchufable
Tirare avanti il pannello
10
Pull out power block
Powerblock herausziehen
Sortir le bloc de puissance
Sacar bloque de potencia
Estrarre il Powerblock
6
Push insertion in
Einschub hineinschieben
Rentrer le tiroir
Meter unidad enchufale
Inserire il pannello
Unscrew (4x)
Aufschrauben (4x)
Dévisser (4x)
Destornillar (4x)
Svitare (4x)
Torx M6
9
REPLACEMENT
Einbau
Montage
Montaje
Montaggio
Screw (2x)
Festschrauben (2x)
Visser (2x)
Atornillar (2x)
Avvitare (2x)
3
Torx M6; 10 Nm
5
Plug the plug in (2x)
Stecker stecken (2x)
Enlever le connecteur (2x)
Enchufar enchufe (2x)
Inserire i connettori (2x)
7
Mount cable (2x; 1,2 Nm)
Kabel montieren (2x; 1,2 Nm)
Monter le câble (2x; 1,2 Nm)
Montar cable (2x; 1,2 Nm)
Montare i cavi (2x; 1,2 Nm)
2
Plug the plug in (1x)
Stecker stecken (1x)
Enficher le connecteur (1x)
Enchufar enchufe (1x)
Inserire il connettore (1x)
M10; 25 Nm
Screw (3x)
Festschrauben (3x)
Visser (3x)
Atornillar (3x)
Avvitare (3x)
8
4
Push insertion in
Einschub hineinschieben
Rentrer le tiroir
Meter unidad enchufable
Inserire il pannello
10
Push in power block
Powerblock hineinschieben
Rentrer le bloc de puissance
Insertar bloque de potencia
Inserire il Powerblock
6
Pull insertion forward
Einschub vorziehen
Sortir le tiroir
Jalar hacia afuera unidad enchufable
Tirare avanti il pannello
Screw (4x)
Festschrauben (4x)
Visser (4x)
Atornillar (4x)
Avvitare (4x)
9
Torx M6; 10 Nm
1
Mount plug (6x; 0,5 Nm)
Stecker montieren (6x; 0,5 Nm)
Monter le connecteur (6x; 0,5 Nm)
Instalar enchufe (6x; 0,5 Nm)
Montare i connettori (6x; 0,5 Nm)
Do not kink!
Nicht knicken!
Ne pas tordre!
¡No torcer!
Non piegare!
LWL
!
U11
U21
U31
DISASSEMBLY
 Loading...