FM 351 First Steps in Commissioning
Getting Started, 07/2007, A5E01092707-01
15
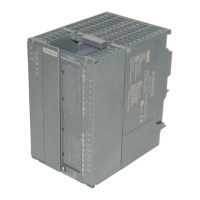
FM 351, testing
6
FM 351, testing
1. In HW Config, once again double-click the FM 351 to open the "Positioning module –
[FM 351 FIX. SPEED (
slot
) (parameter assignment) – –
Project name\station name
]".
2. Open the commissioning screen [FM 351 FIX. SPEED (
slot
) (Commissioning) – –
Projectname\Stationname
] with Test > Commissioning.
3. Select "Mode", then select "Jog" to enter the required velocity (rapid speed or creep
speed.)
4. Click "On" at "Drive enable." This action highlights the "Start enable" entry in green color
on the commissioning screen. If you have not wired the enable input at FM 351, select
"Additional Test functions", set the "Function switch" option "Do not evaluate enable
input", and then click "Apply."
5. Click DIR_M or DIR_P: The drive will keep moving as long as you press the mouse
button. You can now monitor the setpoint and actual value of the velocity.
Note
The actual value changes according to the directional input DIR_M (move in minus
direction) or DIR_P (move in plus direction.) If the count direction is not correct, select
"Edit parameters" to open the "Encoder" dialog box, then change the count direction from
"Normal" to "Inverted." Download your changes to the CPU and FM 351 by selecting PLC
> Download channel > 1. The actual values of the rapid speed and creep speed indicate
whether or not the digital outputs of FM 351 are properly wired.
Any errors detected in this test are reported at the "Error" display. Acknowledge those
operating errors by selecting "Test > Error evaluation" and continue testing. In the next step,
adapt the switchover / switch-off differences to correct your positioning parameters.
6. Select "Mode", then select "Incremental Absolute Approach", and then enter the value
255 at "Incremental Dimension Number": The view shows you the "incremental
dimension," "switchover difference" and "switch-off difference" fields.
7. Enter a positive positioning target value at the "Incremental Dimension" field. Enter the
value set in the drive screen form at the "switchover difference" and "switch-off
difference" fields. Make sure the incremental dimension is higher than the switchover and
switch-off difference.
8. At "Additional Test Functions", select "Set Reference Point", enter the reference point
0.000 mm, and then click "Apply." This action synchronizes the axis. The system returns
the message "Channel Synchronized."
9. Select "Additional Test Functions > Function Switches > Do Not Evaluate Enable Input",
and then click "Apply".
 Loading...