Getting Started with Silhouette Alta®
18
Inserting the Filament
To load the filament in your Alta 3D printer, start by opening Silhouette 3D®, and power on your Alta. In
the software, click on the 3D Print tab. In the upper right-hand corner, ensure that your machine has been
selected. With the Alta selected, click on the Filament button. Next, click on Load Filament and go through
the following steps to load your filament properly.
Place your filament spool on top of your machine and put the roll of filament on the spool. When using
filament that comes in either a loose roll or a reel, it is important to make sure that you keep a hold of the
leading end because the filament can become tangled.
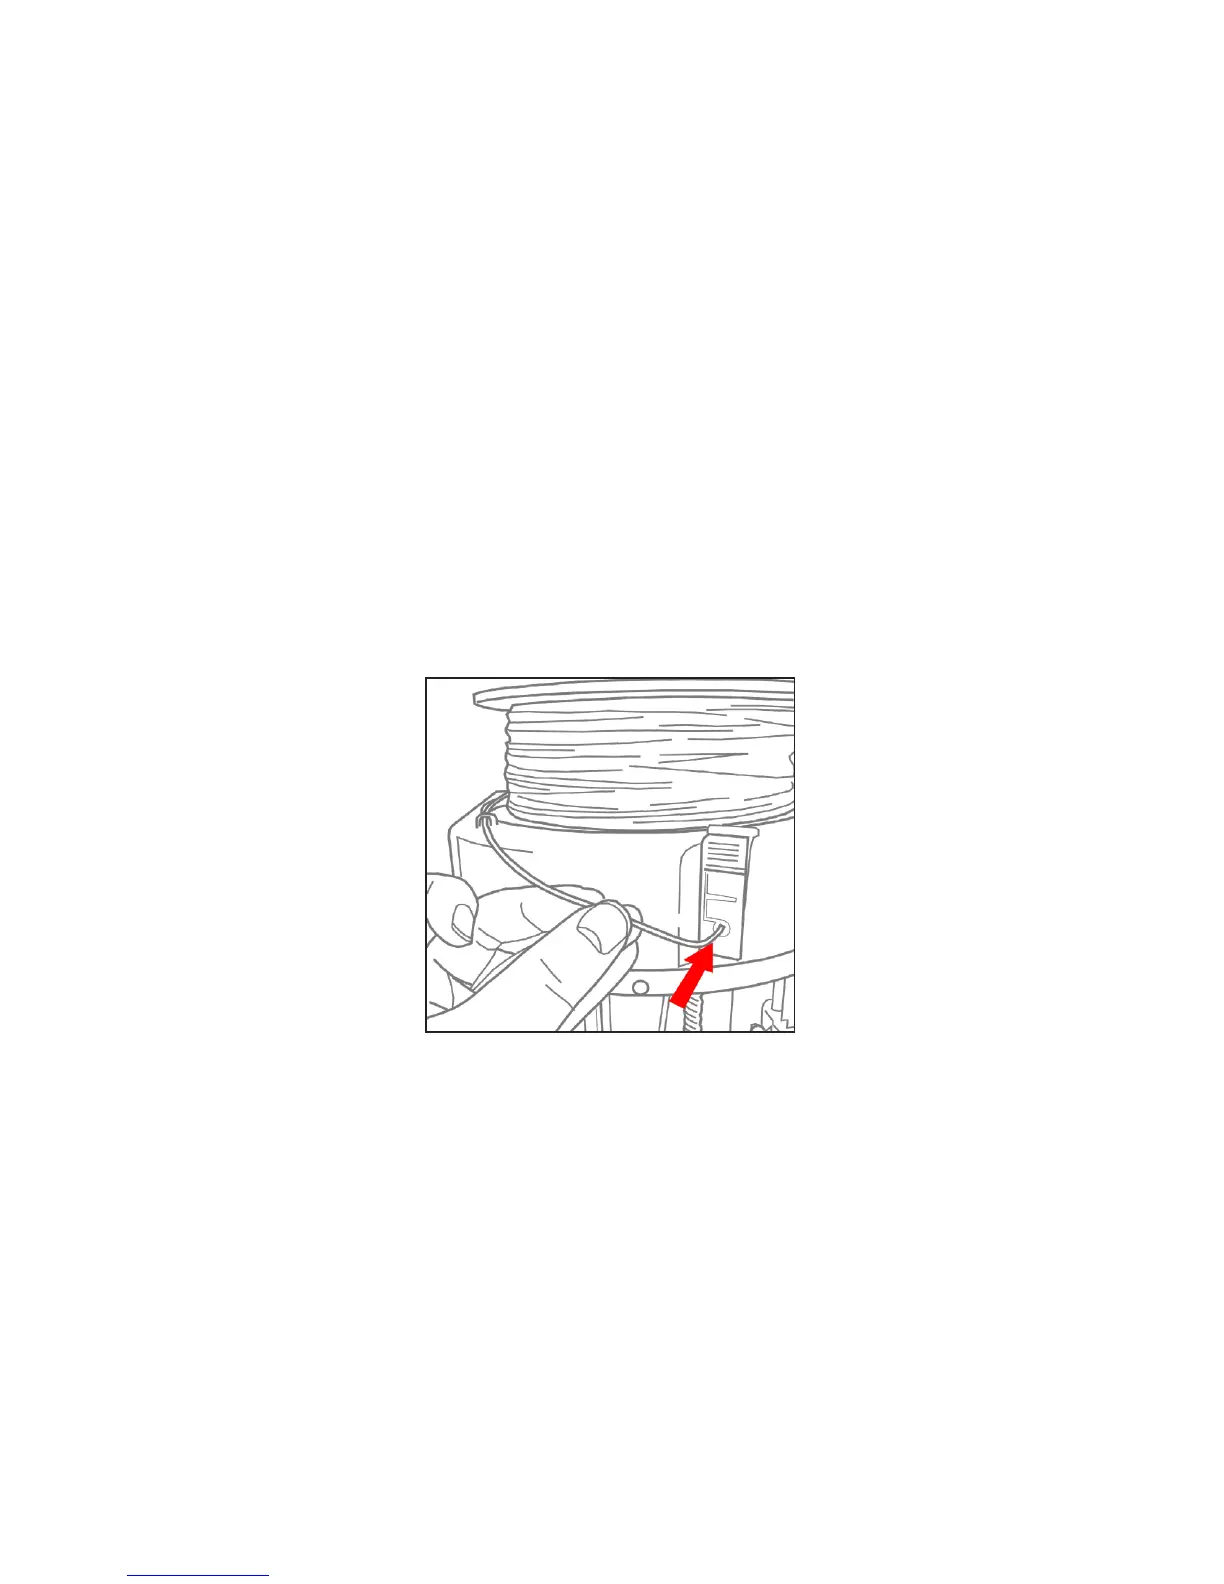
On top of the machine, there is an eye and the filament clip. Feed the filament through the eye and then
the filament tube. This will help prevent the filament from becoming tangled and jamming the machine.
Once the filament has been fed through the filament tube, press the tab on the filament clip to open the
hole where you can insert the filament. Push the filament in about an inch or until you see it in the filament
hose near the top of the machine. Then release the clip.
Click Next in Silhouette 3D®, and then click Load. The machine will feed the filament through the inner
print tube and heat up the print head. The print head will then move down and print a small amount of
filament once the filament is warmed up.
Make sure you store any filament you are not currently using in a watertight container to maintain its
quality. Humidity will cause the filament to become brittle and render it unusable.
 Loading...