Getting Started with Silhouette Alta®
17
3D P Tb
Preparing to Print
When you click the 3D Print tab, the software will automatically center your object in the print space. Be
sure your design is small enough to fit within the red circle, which is the print margin.
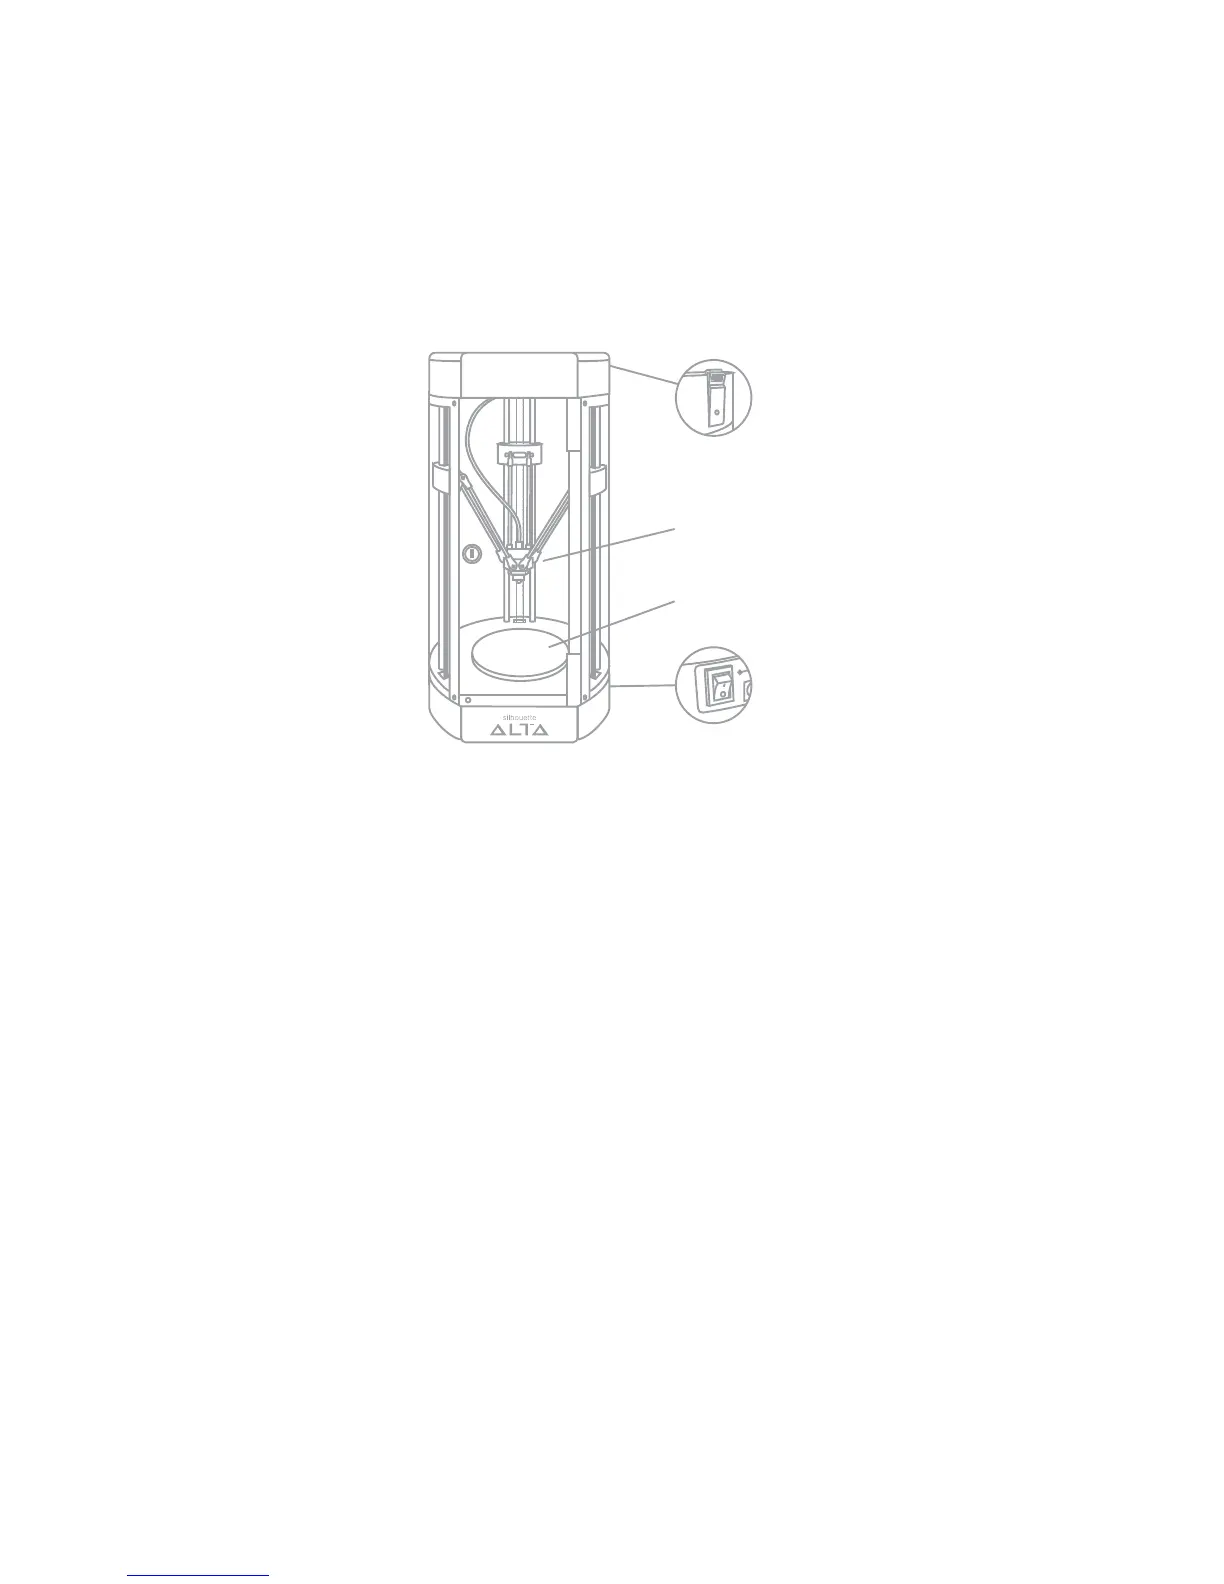
Turn the Silhouette Alta® on by pressing the power button on the side of the machine and waiting for the
machine to start up. Make sure the printer is connected to your computer with the USB cable.
Applying Platform Tape
The platform, also known as a build plate, is what your 3D object will be built on, so it’s important that you
prepare it. Using platform tape protects the platform and helps the filament to adhere properly.
The liner for the platform tape is perforated down the middle to make it easier to apply. Start by taking off
the liner half without the notch and line up the top half of the platform tape (with the liner still on) with the
platform’s notch. Rub the bottom half of the tape in place. You can use your hand or the spatula tool, but
the most important thing is to make sure there are no air bubbles or creases in the platform tape when it is
applied to the platform.
Then remove the other half of the liner and rub the remaining tape in place. Again, make sure there are
no air bubbles or creases. If your platform tape is not lying completely flat against the platform, your 3D
object won’t print properly.
After the tape is adhered, place the platform under the print nozzle with the tape side facing up. Make sure
the notch of the platform lines up with the notch at the bottom of the machine.