Getting Started with Silhouette Alta®
3
If you would like to change the orientation, you will find the cube in the upper right-hand
corner of the page. By moving this cube around, you can look at your 3D designs from
all angles. To zoom in or zoom out on the print area, you can use the scroll bar on your
mouse or click the magnifying glasses at the top of the Silhouette 3D® window.
Opg S 3D® Sofw
Locate the Silhouette 3D® icon on the desktop, in the Start Menu on your PC, or in the
Applications folder on your Mac®. Double-click the icon to run the application.
Once Silhouette 3D® has loaded, you will notice a circle with a grid on your screen. This is
your print bed.
3
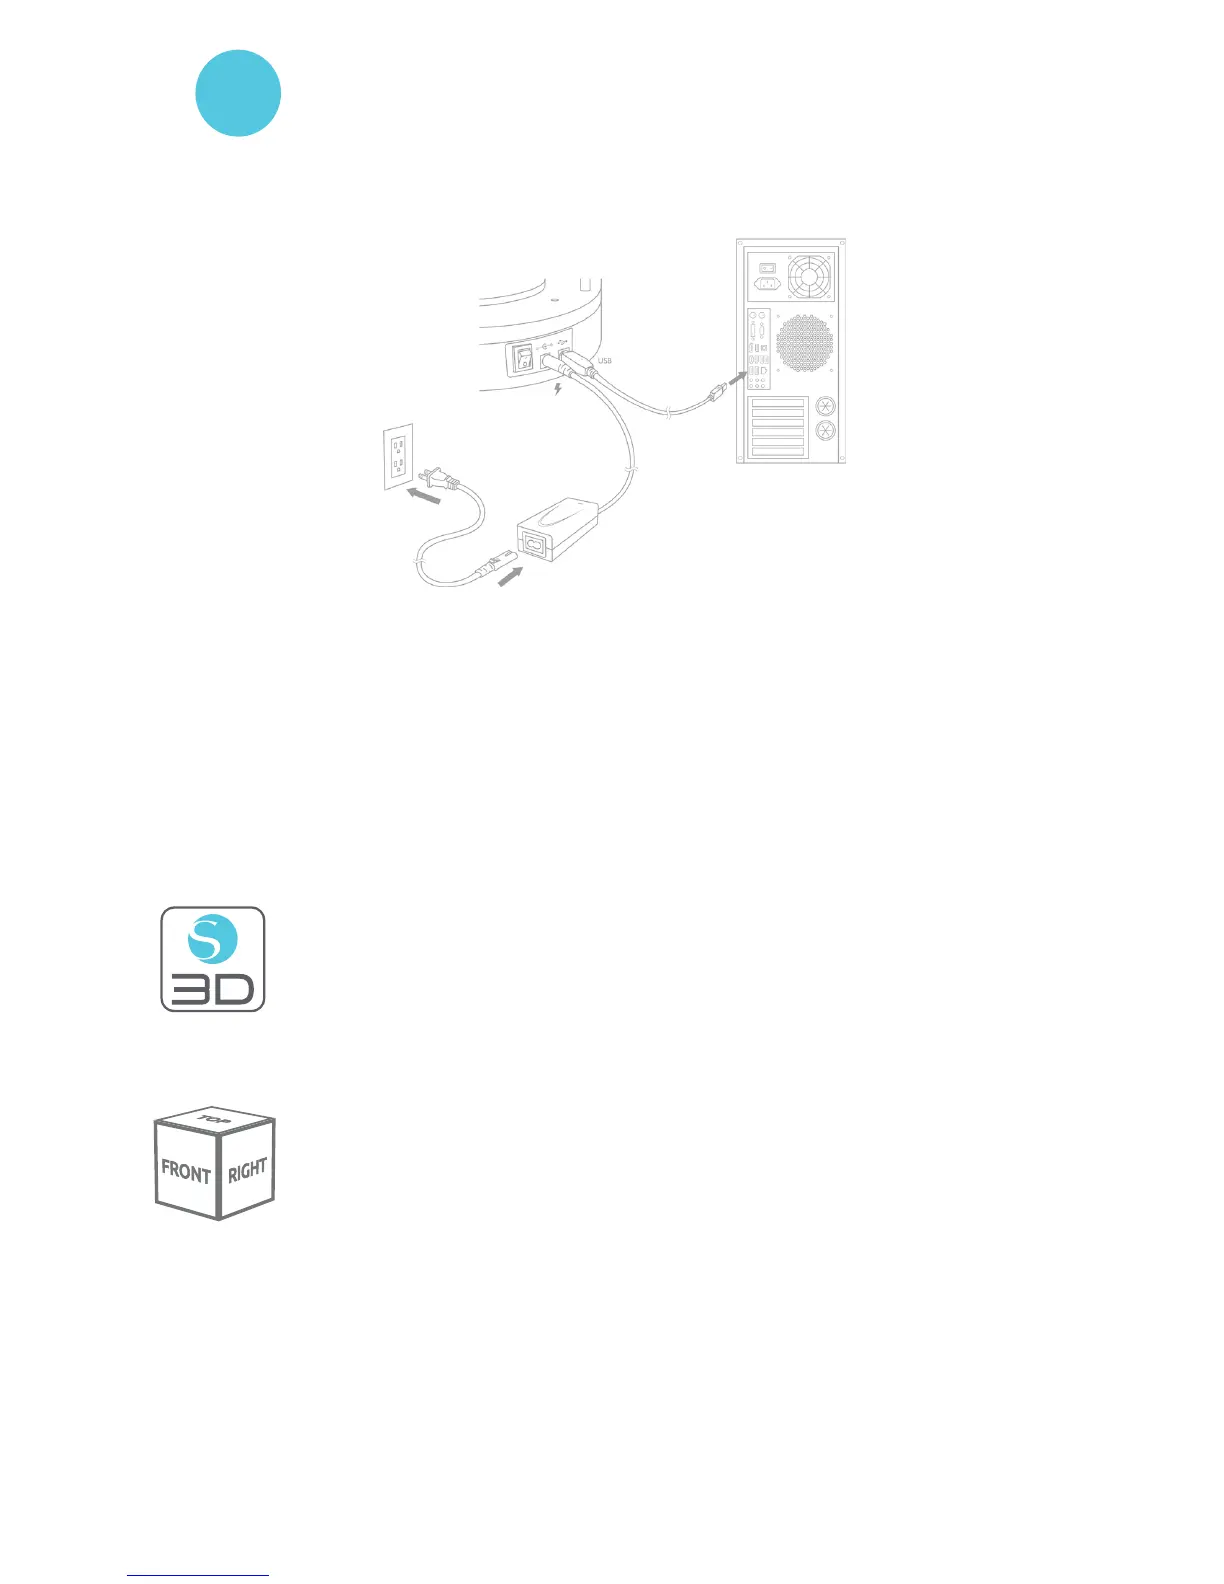
Connect the Silhouette Alta®
Once the Silhouette 3D® software is installed, connect the Silhouette Alta® to the power supply.
Then connect the Silhouette to your computer with the included USB cable as shown in the diagram.
Turn the machine on by pressing the power button. If your computer displays a “New Hardware
Found” dialog box, follow the recommended instructions to accept your system’s installation of the
Silhouette driver.