SGR 150 B2■ 64
│
GB
│
MT
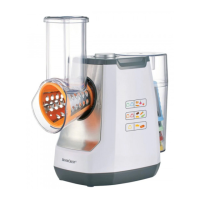
♦ Place the desired drum 2 3 4 5 0 onto the drive shaft 8 in the drum
housing 9. Try to grip only the plastic part of the drum 2 3 4 5 0.
If necessary, turn the drum 2 3 4 5 0 clockwise a little way until the
recesses lock onto the appropriate latches on the drive shaft 8.
To remove a drum 2 3 4 5 0, proceed as follows:
♦ Unplug the appliance from the mains socket (if necessary).
♦ Turn the drum 2 3 4 5 0 carefully anticlockwise until it can be
removed from the drive shaft 8.
Preparing food
Choose a suitable food before processing and prepare it appropriately:
■ Foods with a firm structure are ideal. The firmer the food, the better the result.
However, particularly hard or fibrous foods, such as ice cubes or meat, are
not suitable and can irreparably damage the appliance!
■ Wash and dry fruit and vegetables before processing.
■ Food with thick skins, such as kohlrabi or pumpkins, must be peeled before
processing. Nut shells must be removed.
■ Before processing, cut the food so that it can pass easily through the feed
tube q.
Operation
WARNING! RISK OF INJURY!
► Always remove the plug from the mains socket before fitting/changing
accessories! Wait until the motor stops completely.
► Never press food into the feed tube q with your bare hands.
Always use the pusher w!
CAUTION! PROPERTY DAMAGE!
► The appliance is designed for a maximum continuous operating time of
2minutes (CO time). Afterwards, the appliance must be switched off until
the motor has cooled down.
♦ Place a bowl or other container under the drum housing 9.
♦ Press and hold down the start button e. The drum 2 3 4 5 0 begins
to rotate.
♦ Gradually pour the prepared food into the feed tube q and push it along
with the pusher w so that it is chopped by the drum 2 3 4 5 0. The
chopped food falls from the front of the drum housing 9 into the container
placed underneath.