14
GB
touch the blades|6 with your bare
hands, to avoid cuts.
~ When washing manually, the water
should be sufficiently clear that you can
see the blades|6 easily, so that you do
not injure yourself on them.
CAUTION:
~ Never use any abrasive, corrosive or
scratching cleaning agents. These might
damage the device.
NOTE: certain foods or spices (e.g. curry,
carrots) can discolour the plastic (e.g. the
splash guard|21 or the lid of the refill open-
ing|1). This is not a defect with the device
and harmless to health.
11.1Cleaning the base unit
1. Clean the base unit|19 with a damp
cloth. You can also use some detergent.
2. Use clear water and wipe with a clean
cloth.
3. Do not use the base unit|
19 until it is
completely dry again.
11.2Cleaning in the dish-
washer
The following parts are dishwasher-safe:
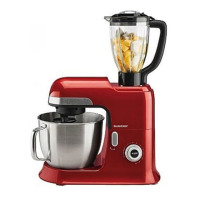
- Mixing bowl|15
- Blender jug|5
-Lid|2 of the blender jug
- Lid of the refill opening|1
- Dough hook|14
-Whisk|16
- Beater|17
The following parts must never be cleaned
in a dishwasher:
- Base unit|19
- Splash guard|21
11.3Cleaning the accessories
1. Rinse the blender jug|5 or the mixing
bowl|15 with warm water and pour
away the water.
2. Clean all accessories by hand in a sink
with dishwater or in the dishwasher.
3. When cleaning by hand, rinse all parts
with clean water.
4. Allow the parts to dry completely before
using them again.
11.4Cleaning the blender jug
1. Place the blender jug|5 onto the device.
2. Fill it approximately half-full with warm
water containing detergent.
3. Mount the lid|2.
4. Check that the speed control|11 is set
to 0.
5. Plug the mains plug|13 into a suitable
wall socket.
6. Set the speed control|11 to 1.
7. Press the PULSE button|12 several
times.
8. Remove the blender jug|5 from the de-
vice.
9. Pour out the dishwater.
10.Rinse the blender jug|5 under clear wa-
ter.
11.Allow the blender jug|5 to dry com-
pletely before you use it again.
11.5Storage
• Allow all parts to dry completely before
placing them in storage.
• Store the device protected against dust
and dirt and out of the reach of chil-
dren.
• Figure B: you can wind up the power
cable in the cable spool|24 on the un-
derside of the base unit|19.
__288190_Kuechenmaschine_Profi_B6.book Seite 14 Montag, 7. August 2017 11:09 11
 Loading...
