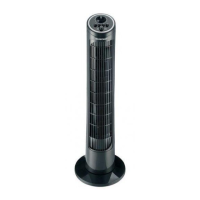
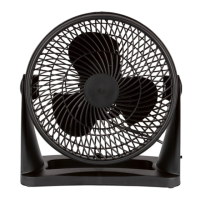
SilverCrest STVS 50 A1
English - 33
9. Getting started
This chapter describes operation from the fan (8) itself. Alternatively, some of the functions also
be controlled from the remote control (19) supplied.
If the fan (8) is switched on, the display (9) goes out if no buttons are pressed for 15 minutes.
9.1 Switching the fan (8) on and off
Proceed as follows to use the fan (8):
• Select a location according to the safety instructions.
• Place the fan (8) on a level, even surface.
• Insert the power plug into a properly installed power socket. A long beep sounds and the symbol
(23) and the room temperature are shown on the display (9). The symbol (25) flashes for approx.
3 minutes to indicate that the fan (8) is ready to connect.
• Pressing any button on the fan (8) or remote control (19) brings up the room temperature display again.
A beep sounds to indicate a button has been pressed, but the actual function of the button is not carried
out. The exception is the POWER button (5, 16), this button switches the fan (8) on if pressed.
• Switch the fan (8) off by pressing the POWER button (5, 16) again.
9.2 SPEED - Setting the fan speed
• Fan speed 1 (low): Press the SPEED button (3) once.
• Fan speed 2 (medium): Press the SPEED button (3) twice.
• Fan speed 3 (high): Press the SPEED button (3) three times.
• Stop the fan (8) by using the POWER (5, 16) button to switch it off.
9.3 MODE - Selecting the fan mode
Press the MODE button (1, 18) to select from the following fan modes:
• normal
• natural
• sleep
The mode selected (26, 27, 28) is lit up on the display (9).
9.4 Setting the TIMER
You can use the TIMER button (2) to set a run time of between 1 and 12 hours. Press the TIMER button
(2) multiple times until you get to the time you want. When the display (9) is activated, it shows the
remaining run time.
 Loading...