14
The TIC (except for the Network Audio Riser Controller Module) must be connected to the host
panel via RUI cabling. This section explains how to wire the two together, and how to set up a
system with multiple transponders connected to the same host panel.
RUI cabling can be accomplished either through Class A or Class B wiring.
Class A wiring allows transponder cabinets to communicate with the FACP even in the event of
an open circuit somewhere in the loop. Class A wiring requires that two wires are routed from the
CPU motherboard to each TIC, and then back again to the CPU motherboard.
Class B wiring allows “T” tapping, and therefore requires less wiring distance per installation than
Class A. Additionally, Class B wiring does not require end-of-line resistors, because each TIC
communicates directly to the CPU.
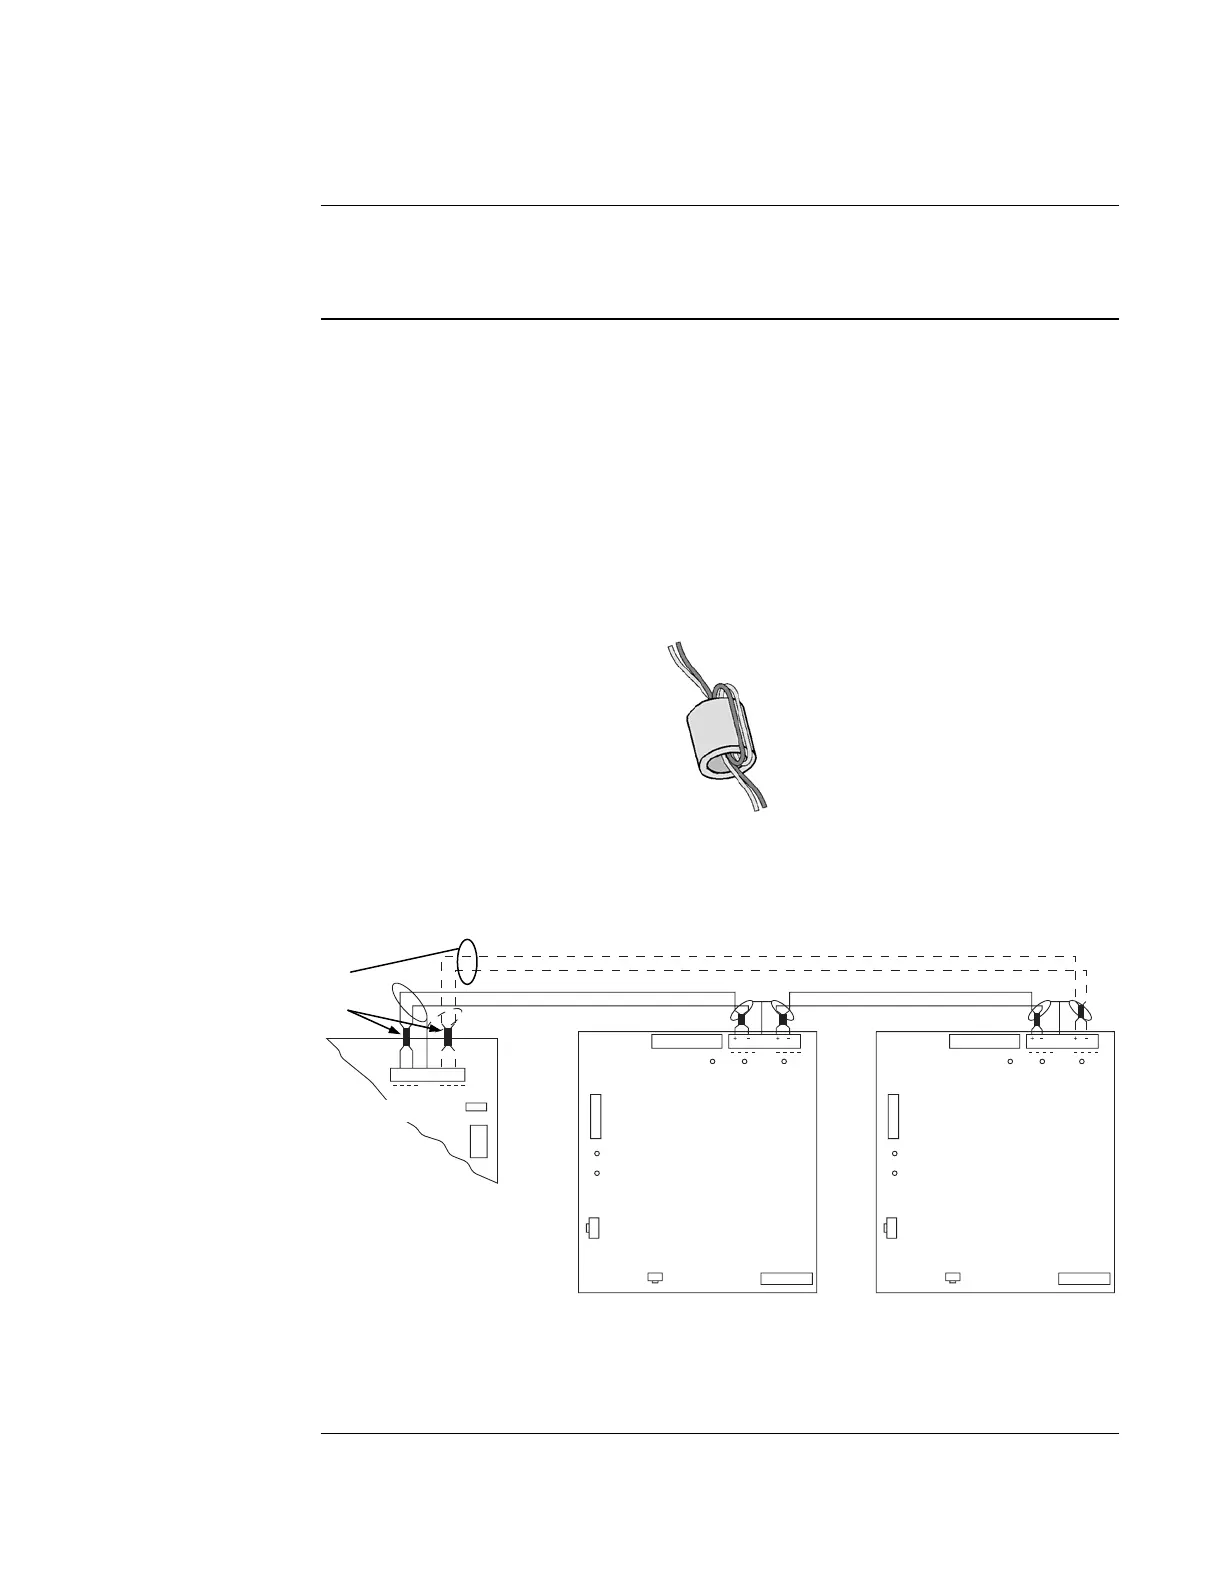
Note: Use supplied ferrite beads with TICs. Loop wires once through the supplied
ferrite bead(s) as shown in Figure 6.
Figure 6. Loop Wiring Through Bead as Shown
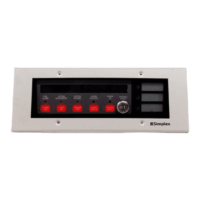
Figure 7 shows both types of wiring.
TRANSPONDER INTERFACE
ASSY 566-094
MSB
LSB
LED1
ADDRESS
LED3
PRI
B+ B- SHLD A+ A-
SEC
RUI
SHLD
LED4 LED5
LED2
P1
P2 P3
RUI
P9
P1
123
TRANSPONDER INTERFACE
ASSY 566-094
MSB
LSB
LED1
ADDRESS
LED3
PRI SEC
RUI
SHLD
LED4 LED5
LED2
P1
P2
Figure 7. TIC Wiring to the Host Panel
Continued on next page
Wiring,
Continued
Overview
RUI Wiring
Configurations
DASHED LINES ARE FOR
CLASS A OPERATION
FERRITE BEADS (required)
• Wire size must be
between 18 AWG (0.8231 mm
2
)
and 12 AWG (3.309 mm
2
).
• Maximum wiring distance: 2,500 feet
(762 m).
• Maximum “T” tapping length:
10,000 feet (3,048 m).
• Maintain correct polarity on terminal
connections.
• Do not loop wires under terminals.
• Use ferrite beads as shown.
CPU
MOTHERBOARD
566-227