7 - 37
7 Transmission Repair
7C Hydro-Gear 216-3010L
Axle Carrier Assembly
Note: Replacement of the axle carrier assembly can be
accomplished without complete transaxle removal. Axle
bolts, front torque strap hardware and tractor linkages
may need to be loosened. If the transaxle is removed, oil
loss is minimized by situating the transaxle with the axle
assembly i n the upright position.
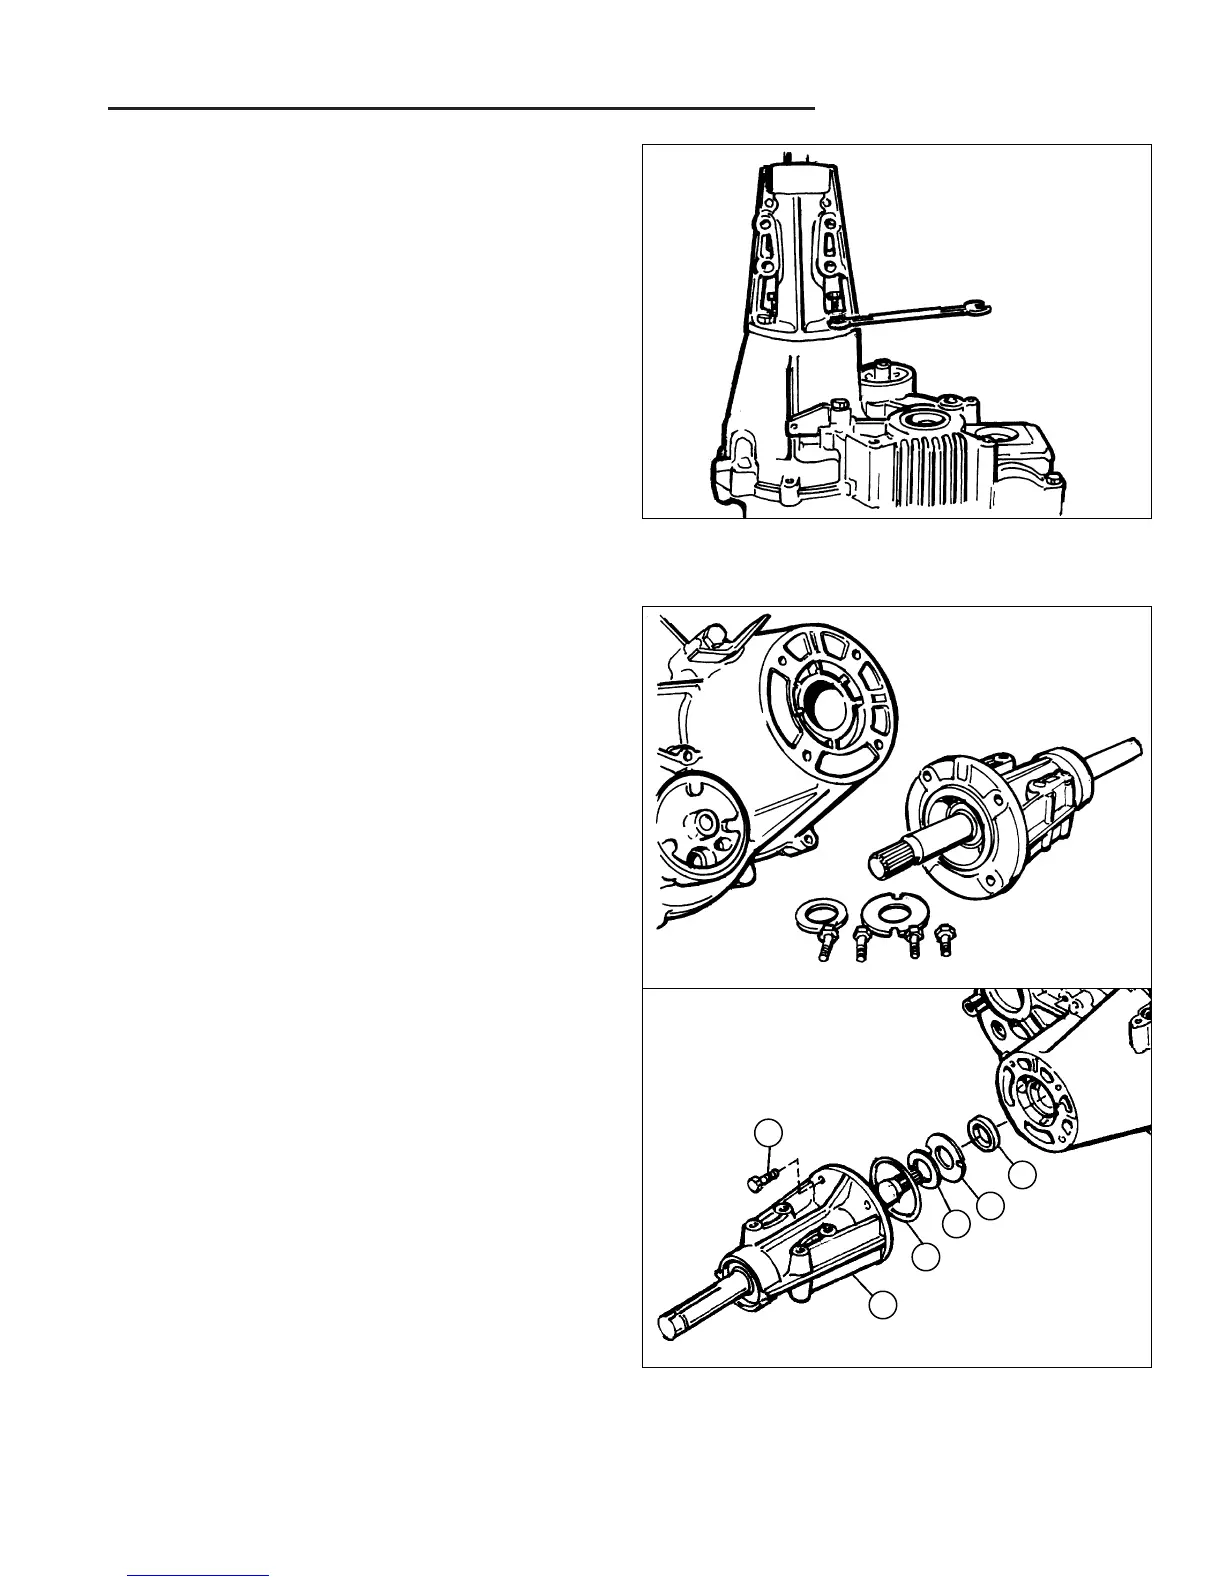
REMOVAL
1. Using a 1/2 inch wrench (or socket) remove the four
fasteners (4 bolts used on LH side - 3 bolts and 1 nut
used on the RH side) securing the assembly to the
main housing.
2. Make note or mark the orientation of the axle mount-
ing horn before removal.
3. Remove the axle mounting horn assembly and two
washers from the axle.
4. Carefully pull the seal out of the housing bore. A
“hook” type tool may be used to grasp the seal and
pull it out, or a slide hammer type puller may be used
to remove the seal. Care must be taken so as not to
damage the housing bore, shaft sealing surface, or
bearing. Once removed, the seal is not reusable.
5. Inspect the sealing area on the shaft for rust, wear, or
contamination. Polish the sealing area on the shaft if
necessary.
INSTALLATION
1. Lubricate the new seal with petroleum jelly.
2. Fill the washer pocket area with Rykon Premium
Grease or an equivalent product such as Chemplus
1-LP.
3. Install washer aligning notches with ribs in pocket of
main housing. Install washer on top of "notched"
washer.
4. Install O-ring onto axle mounting horn assembly.
5. Use caution while installing the replacement axle
mounting horn assembly to avoid damaging the new
seal. Pull back on axle and hold in this position during
installation to make sure the notched washer remains
engaged to the tabs in the carrier assembly.
6. Rotate the axle as you are installing the assembly to
allow the splined end of the axle to engage into the
splined gears of the differential assembly. When
properly aligned it should slide in freely and the axle
carrier should seat down onto the main housing and
engage into an anti-rotational slot.
7. Install four new fasteners or apply Loctite #242 (or
equivalent) to the original fasteners and torque to 13-
15 ft. Ibs.
Figure C-16. Axle Carrier Removal
Figure C-17. Axle Carrier Components
B
A
C
D
E
F
A. Axle Carrier
B. Capscrew
C. O-ring
D. Washer
E. Washer (Notched)
F. Oil Seal