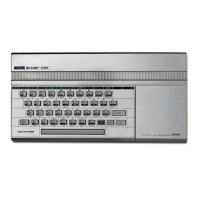
Sinclair ZX Spectrum Service Manual
Spectrum For Everyone https://spectrumforeveryone.com/
22
2 DISASSEMBLY/ASSEMBLY
Disassembly
Assembly
2.1 DISASSEMBLY
Unplug all input/output connectors and turn the computer upside down to reveal eight fixing screws.
Release the screws (noting the position of two countersunk screws for re-assembly), turn the computer
right side up and separate the case halves. To disassociate the case halves, carefully disconnect the
keyboard ribbon cables from the PCB.
To remove the PCB from the lower case half, remove the board fixing screws and the fixings securing the
voltage regulator to the finned heatsink.
CAUTION: If the PCB is to be powered-up when separated from the case, the PCB, with heatsink
attached, should be removed as a complete assembly. The heatsink is secured to the case by
two screws. Take care not to damage the electrical connections to the regulator.
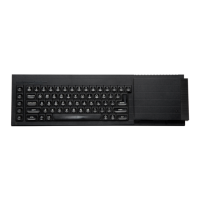
To change the keyboard membrane, bubble mat or any of the keys, remove the membrane tail clamps
followed by ten screws securing the keyboard reaction plate. Lift the plate clear followed by the
membrane and bubble mat below. Individual keys can be removed for cleaning by pressing the key and
gently prising the retaining sleeve off the underside of the key using a small screwdriver inserted under
the rim.
2.2 ASSEMBLY
Assembly is generally carried out using the reverse procedure to that of disassembly. Do not overtighten
the self-tapping fixing screws.
When replacing the keyboard components support the upper case half face down so that the keys are
clear of the work surface. Position the bubble mat, membrane and reaction plate so that the hole at
either end engages with the locating peg. Secure the fixing screws starting with the centre row. Tighten
fully and back off a 1/4 turn.
When clamping the membrane tails ensure that there is good electrical contact between the middle,
upper and lower tracks. This is achieved by correctly positioning the packing pieces (extensions of the
bubble mat) and ensuring that the ends of the middle tracks protrude 1mm beyond the clamps. On new
membranes, to prevent the possibility of short circuits, bond the upper and lower tracks together, close
to the edge connector end, using double sided tape.
 Loading...