TO
SET
THE
LEFT
LOOPER
IN
RELATION
TO
THE
NEEDLE
-------------
Using
Gauge
164592
on
Machines 246K42
and
246K43
and
Gauge
164460
on
Machine 246K45
(See Figs.
35
and
36)
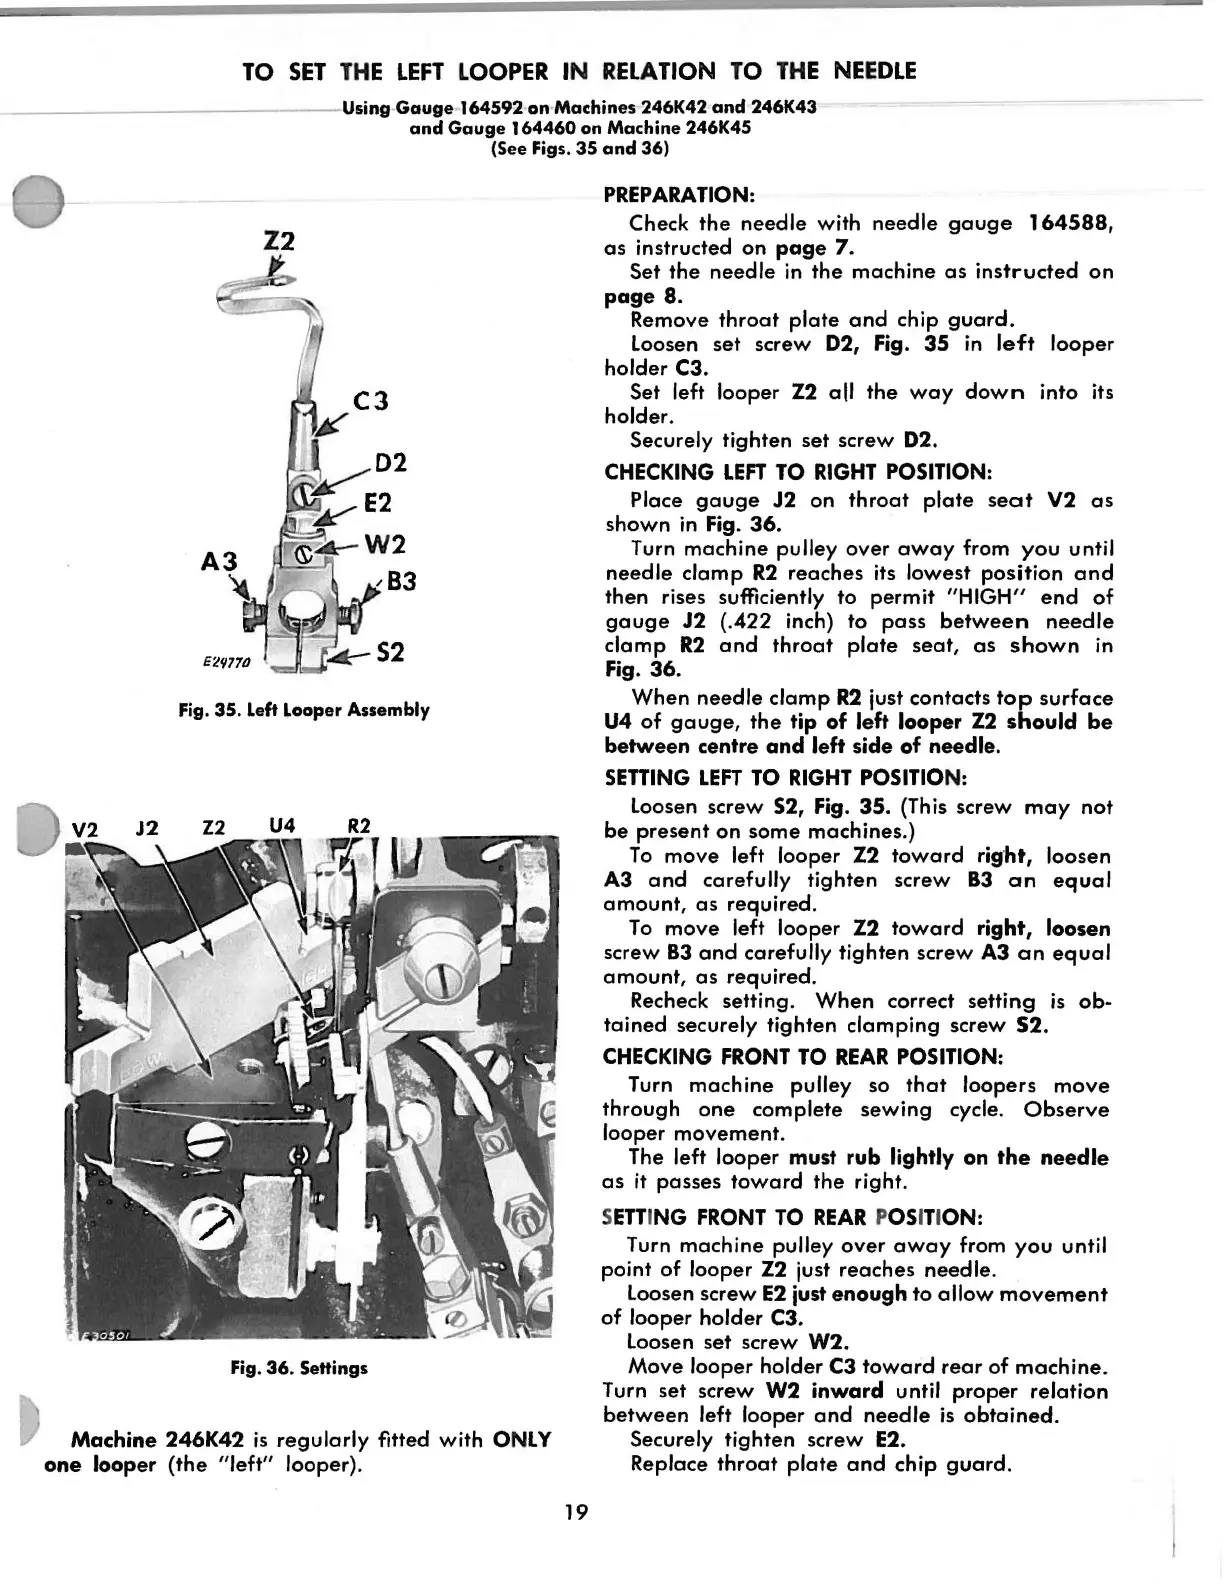
Z2
Fig. 35.
left
looper
Assembly
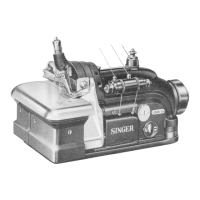
Fig.
36.
Settings
Machine 246K42
is
regularly
fitted with
ONLY
one
looper (the "left" looper).
19
PREPARATION:
Check
the
needle
with needle
gouge
164588,
as
instructed on
page
7.
Set
the
needle
in
the
machine
as
instructed
on
page
8.
Remove
throat
plate
and
chip
guard.
loosen
set screw
02,
Fig.
35
in
left
looper
holder
C3.
Set left looper
Z2
all
the
way
down
into its
holder.
Securely tighten set screw
02.
CHECKING
LEFT
TO
RIGHT
POSITION:
Place
gouge
J2
on
throat
plate
seat
V2
as
shown
in
Fig.
36.
Turn machine pulley over
away
from
you
until
needle
clomp
R2
reaches its lowest position
and
then rises sufficiently to permit
"HIGH"
end
of
gouge
J2
(.422 inch) to
pass
between
needle
clomp
R2
and
throat
plate
seat,
as
shown
in
Fig.
36.
When needle clomp
R2
just contacts
top
surface
U4
of
gouge,
the
tip
of
left looper
Z2
should
be
between
centre
and
left side
of
needle.
SETTING
LEFT
TO
RIGHT
POSITION:
loosen
screw 52, Fig.
35.
(This screw
may
not
be
present on some machines.)
To
move left looper Z2
toward
rig·
ht,
loosen
A3
and
carefully tighten screw
83
an
equal
amount,
as
required.
To
move left looper Z2
toward
right, loosen
screw
83
and
carefully tighten screw A3
an
equal
amount,
as
required.
Recheck setting.
When
correct setting
is
ob-
tained
securely tighten clamping screw
52.
CHECKING
FRONT
TO
REAR
POSITION:
Turn machine pulley so
that
loopers
move
through
one
complete
sewing
cycle.
Observe
looper movement.
The left looper must
rub
lightly on
the
needle
as
it
posses
toward
the right.
S
ETT
ING
FRONT
TO
REAR
POSITION:
Turn machine pulley
over
away
from
you
until
point
of
looper
Z2
just reaches needle.
loosen
screw
E2
just
enough
to
allow
movement
of
looper holder C3.
loosen
set
screw W2.
Move looper holder
C3
toward
rear
of
machine.
Turn set screw W2
inward
until proper relation
between
left looper
and
needle
is
obtained.
Securely tighten screw
E2.
Replace
throat
plate
and
chip
guard.
From the library of: Superior Sewing Machine & Supply LLC