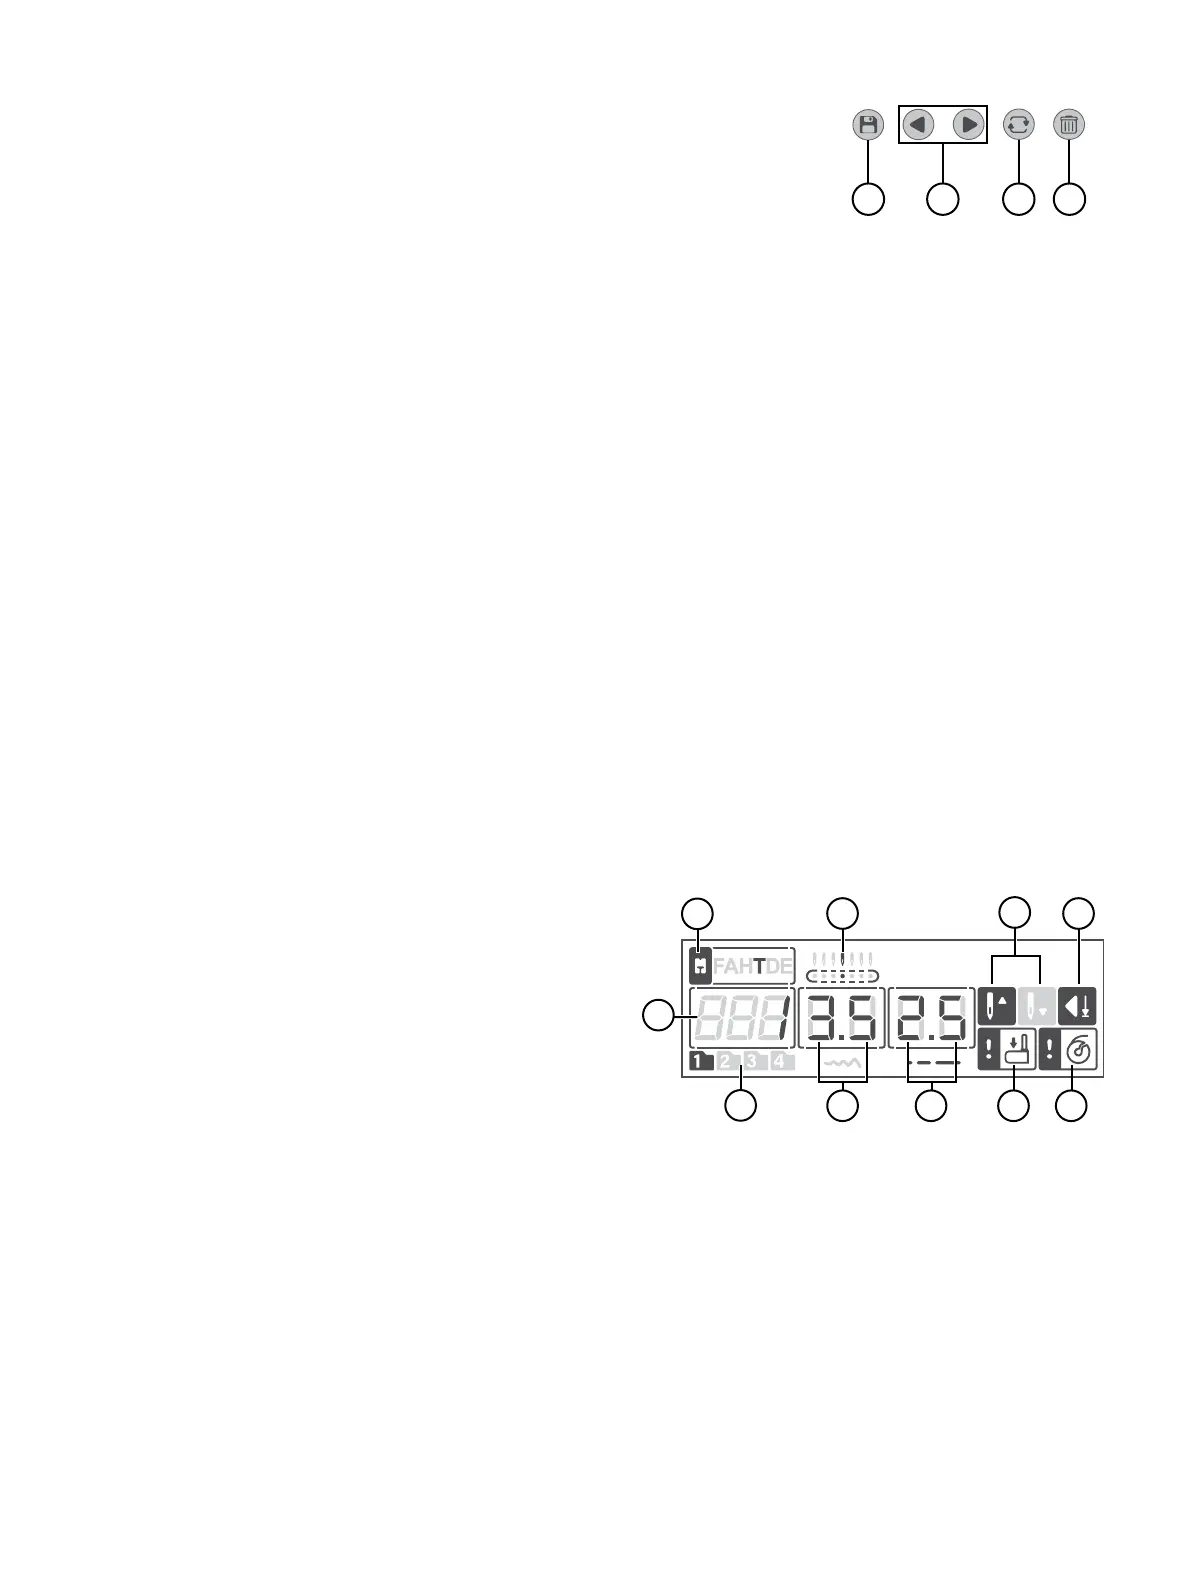
2
3
4
1097 8
6
1
5
1 2 3 4
Operating Your Machine – 19
English
Operating Your Machine – 19
English
Sewing Mode
Sequence Controls
Automatic Stop Setting
Needle Up/Down Setting
Display in Sewing Mode
1. Sequencing — Press to enter Sequence mode.
2. Navigation Arrows — Use these buttons to move back and forth in your sequence.
3. Repeat — Press to sew your sequence repeatedly.
4. Delete — Press to delete the selected stitch in a sequence.
Press this button to activate the Automatic Stop setting. When active, the icon is lit on the display. Use “Auto Stop” together with the
“Tie-Off”. If you press the tie-off button when “Auto Stop” is activated, your machine will nish the current stitch, then tie-off and
stop automatically.
Press the needle stop up/down to set the position of the needle when you stop sewing. The needle will move up or down when you
press the button. When the needle stop down is set, a needle icon with an arrow pointing down is shown on the display. If needle stop
up is set, the arrow on the display is pointing up. The default setting is Needle Up, and it will be activated each time the machine is
turned on.
Sewing Mode is the rst view on the display after you turn on the machine. Here you will nd all the basic information you need to
start sewing. This is also where you adjust the settings of your stitch. Straight stitch is selected by default.
Note: When the values/settings shown on the display are set to default, their corresponding gures/icons will be framed. If you change
the values/settings the frame around the gures/icons will be will be removed.
1. Stitch number — the currently selected stitch
2. Recommended presser foot — indicates what presser foot
is recommended to use for the selected stitch to obtain the
best stitch result
3. Needle position — if the needle position is adjusted, the active
one is shown here
4. Needle stop position — indicates if needle “UP” or
“DOWN” is active
5. Auto-Stop is activated
6. Active stitch menu — what stitch menu is active
7. Stitch width — the current width for the selected stitch
8. Stitch length — the current length for the selected stitch
9. Buttonhole lever indicator — indicates that a buttonhole is
selected
10. Bobbin winding indicator — indicates that the bobbin win-
ding motor is activated