D
C
B
A
22 – Operating Your Machine
English
22 – Operating Your Machine
English
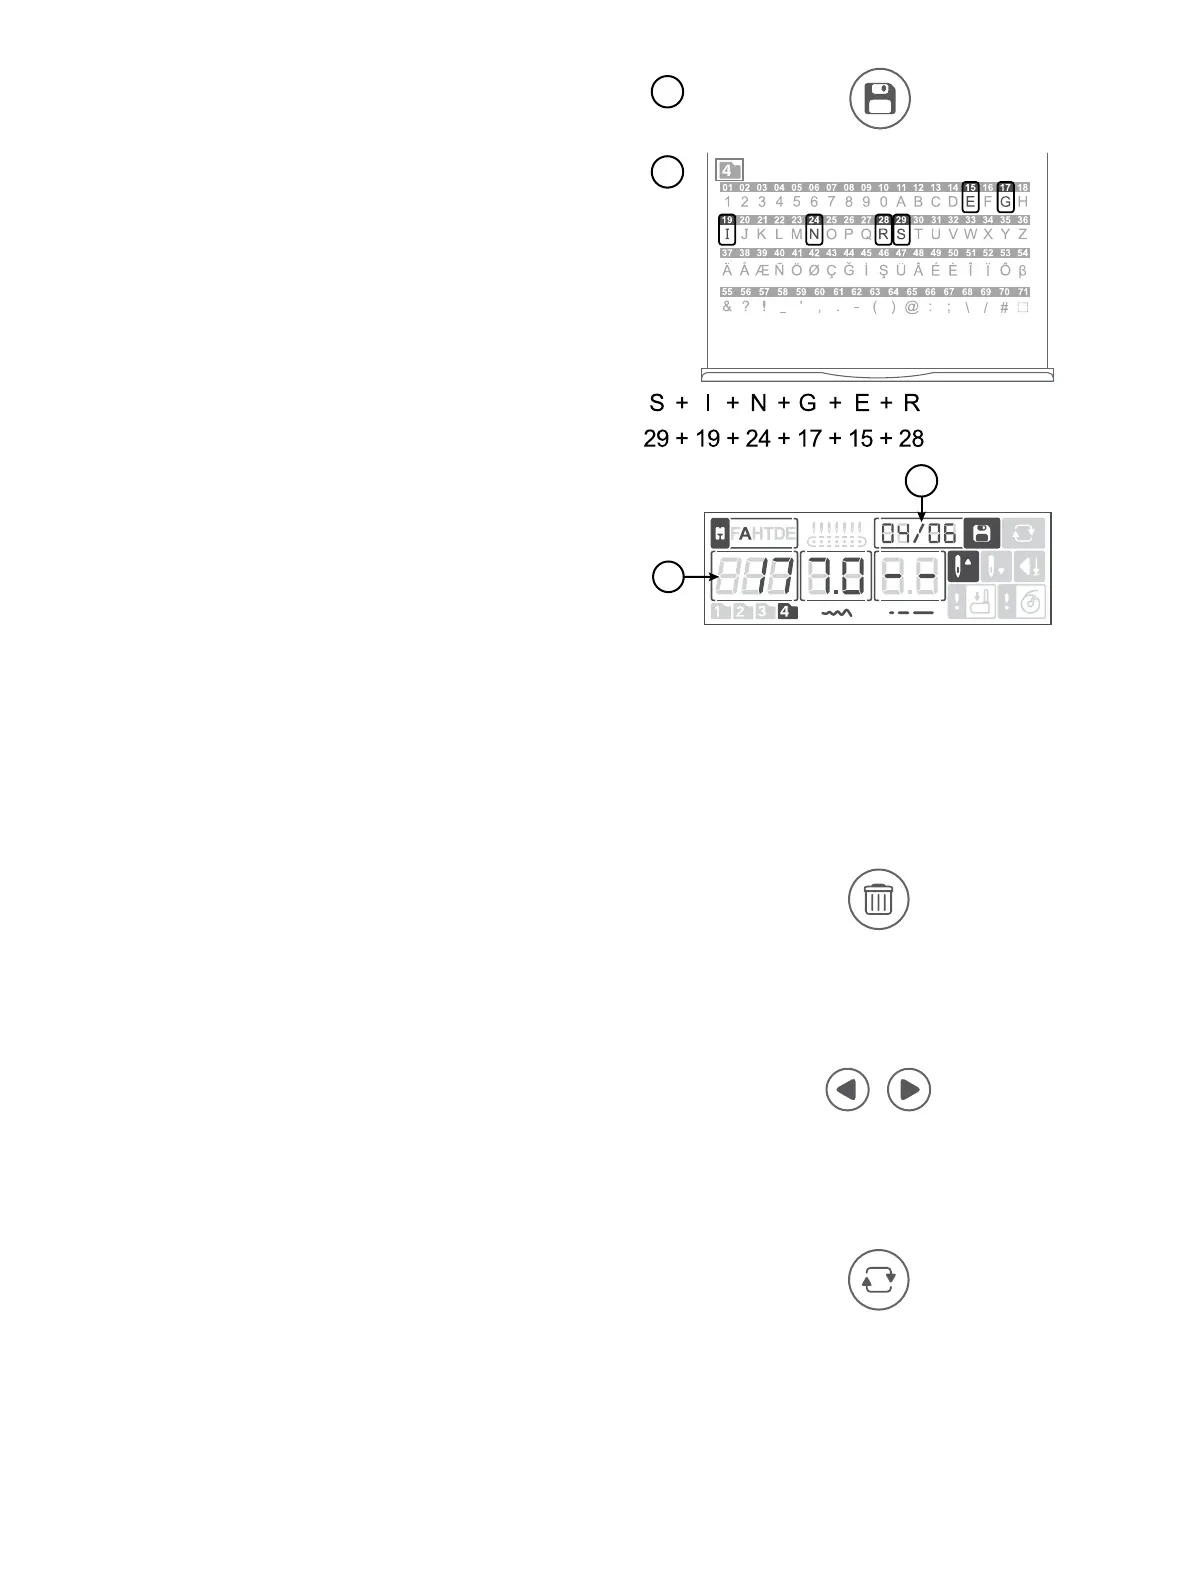
1. Press the Sequence button (A) to enter Sequence mode. Stitch
Menu 4 is selected automatically.
2. Pull out the Stitch Chart to see which stitch number refers to
which letter/number.
To program “SINGER”, would be stitch number 29, 19, 24,
17, 15, 28 (B).
3. Select the stitch you will use. On the display, you can see the
selected stitch number (C) and what position it has in the
sequence (D).
4. Select another stitch and it will appear as the next stitch in the
sequence.
5. Continue until your sequence is complete.
You can step through the sequence with the navigation arrows.
The selected stitch number is highlighted on the display (C).
When you start sewing, the machine will sew one repetition of
your sequence, sew 3 tie-off stitches and then stop automatica-
lly. Press the repeat button before starting to sew, to repeatedly
sew the sequence.
Edit a Sequence
To delete a stitch in the sequence, select the stitch with the
navigation arrows and press “Delete”. Press “Delete” and keep
it depressed for three seconds to delete the whole sequence.
To add another stitch to the sequence, go to the position where
to add the stitch. Enter the stitch number and the new stitch will
be added in succession.
Adjust a Stitch in the Sequence
Use the navigation arrows to select the stitch to be adjusted.
Adjust the stitch width and stitch length using the + and —
buttons.
Create a Sequence
Sew Out a Sequence
Delete Button
Navigation Arrows
Repeat Button