© May 2023 52 GTZZ14EJ&16EJ Maintenance Manual
BOOM AND PLATFORM ASSEMBLY
Main Boom Lift Cylinder
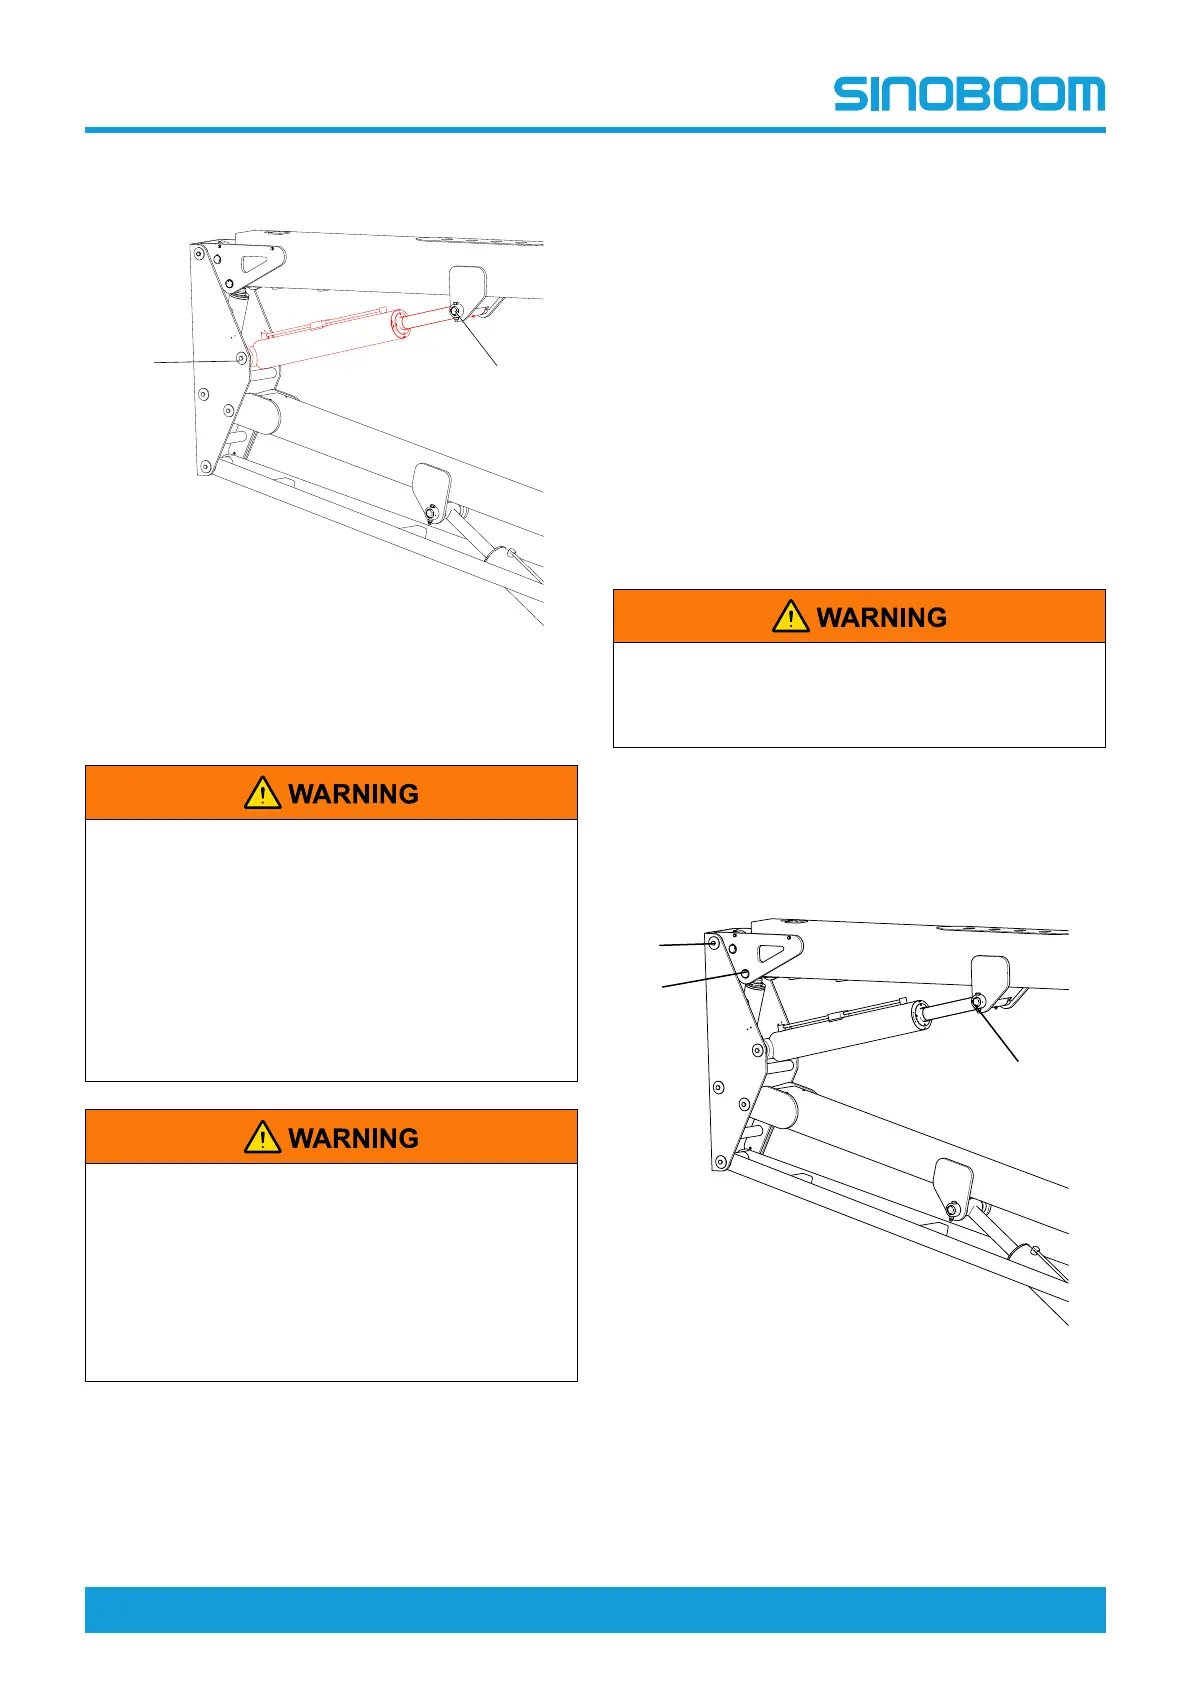
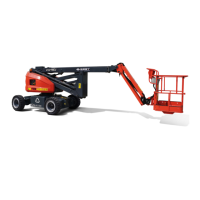
Fig 5 Main boom lift cylinder
Disassembly
• Before disassembling the lift cylinder, rotate
the boom tube to be parallel to the travel direc-
tion of the chassis, and make sure the turnta-
ble is locked (if equipped with a rotary pin,
make sure the rotary pin is locked).
• Before disassembling the lift cylinder, place
solid and reliable rigid brackets under the
counterweight for support, otherwise the ma-
chine may tip over, causing serious personal
injury and machine damage.
• Before loosening or disassembling the hy-
draulic parts (especially the counterbalance
valve on the cylinder), the hydraulic pressure
of all hydraulic lines should be released and
the hydraulic oil should cool down completely.
• Disassemble the hydraulic components
slowly to prevent the hydraulic oil from splash-
ing and injuring people.
1. Raise the boom tube slightly until the main boom lift
cylinder is accessible and can be removed easily.
2. Support the main boom with suitable lifting equip-
ment (with the lifting capacity not less than 5t/
11023lb) to prevent it from falling during
disassembly.
3. Mark and disconnect the hydraulic pipelines on the
main boom lift cylinder and collect the hydraulic oil
in the pipelines with a suitable vessel. Then seal the
pipelines and ports.
4. Support the two ends of the main boom lift cylinder
with suitable lifting equipment.
5. Remove the bolt and nut at the pivot pin #1 connect-
ing the lift cylinder with the boom tube, and knock
out the pivot pin #1 with a brass rod and mallet.
6. Remove the retaining bolt and the stop at the pivot
pin #2, and knock out the pivot pin #2 with a brass
rod and mallet.
7. Slowly remove the main boom lift cylinder with the
aid of the lifting equipment.
8. Slowly lower the boom tube to stowed position with
the aid of the lifting equipment.
When disassembling the cylinder, take care to
prevent the cylinder from falling and impacting,
and also prevent the high-pressure oil leakage
due to impacting.
Installation
Follow the reverse order of the disassembly procedures.
Main Boom Assembly
Fig 6 Main boom assembly