20
OPERATING INSTRUCTIONS
Changing / fitting the blade:
• Remove the rip-fence.
• Loosen the thumbscrews that secure the rip-fence rail and remove it.
• Release the tension on the blade by turning the blade tension quick release
lever.
• Turn the blade tension fine adjustment hand-wheel to fully release the tension
(if needed).
• Remove the blade (if fitted).
• Fit the new blade around both top and bottom drive-wheels, taking care that the
correct size of blade is being fitted and that the direction of the blade is also cor-
rect.
Note: The teeth of the blade should be pointing downwards if the blade
has been fitted in the correct direction.
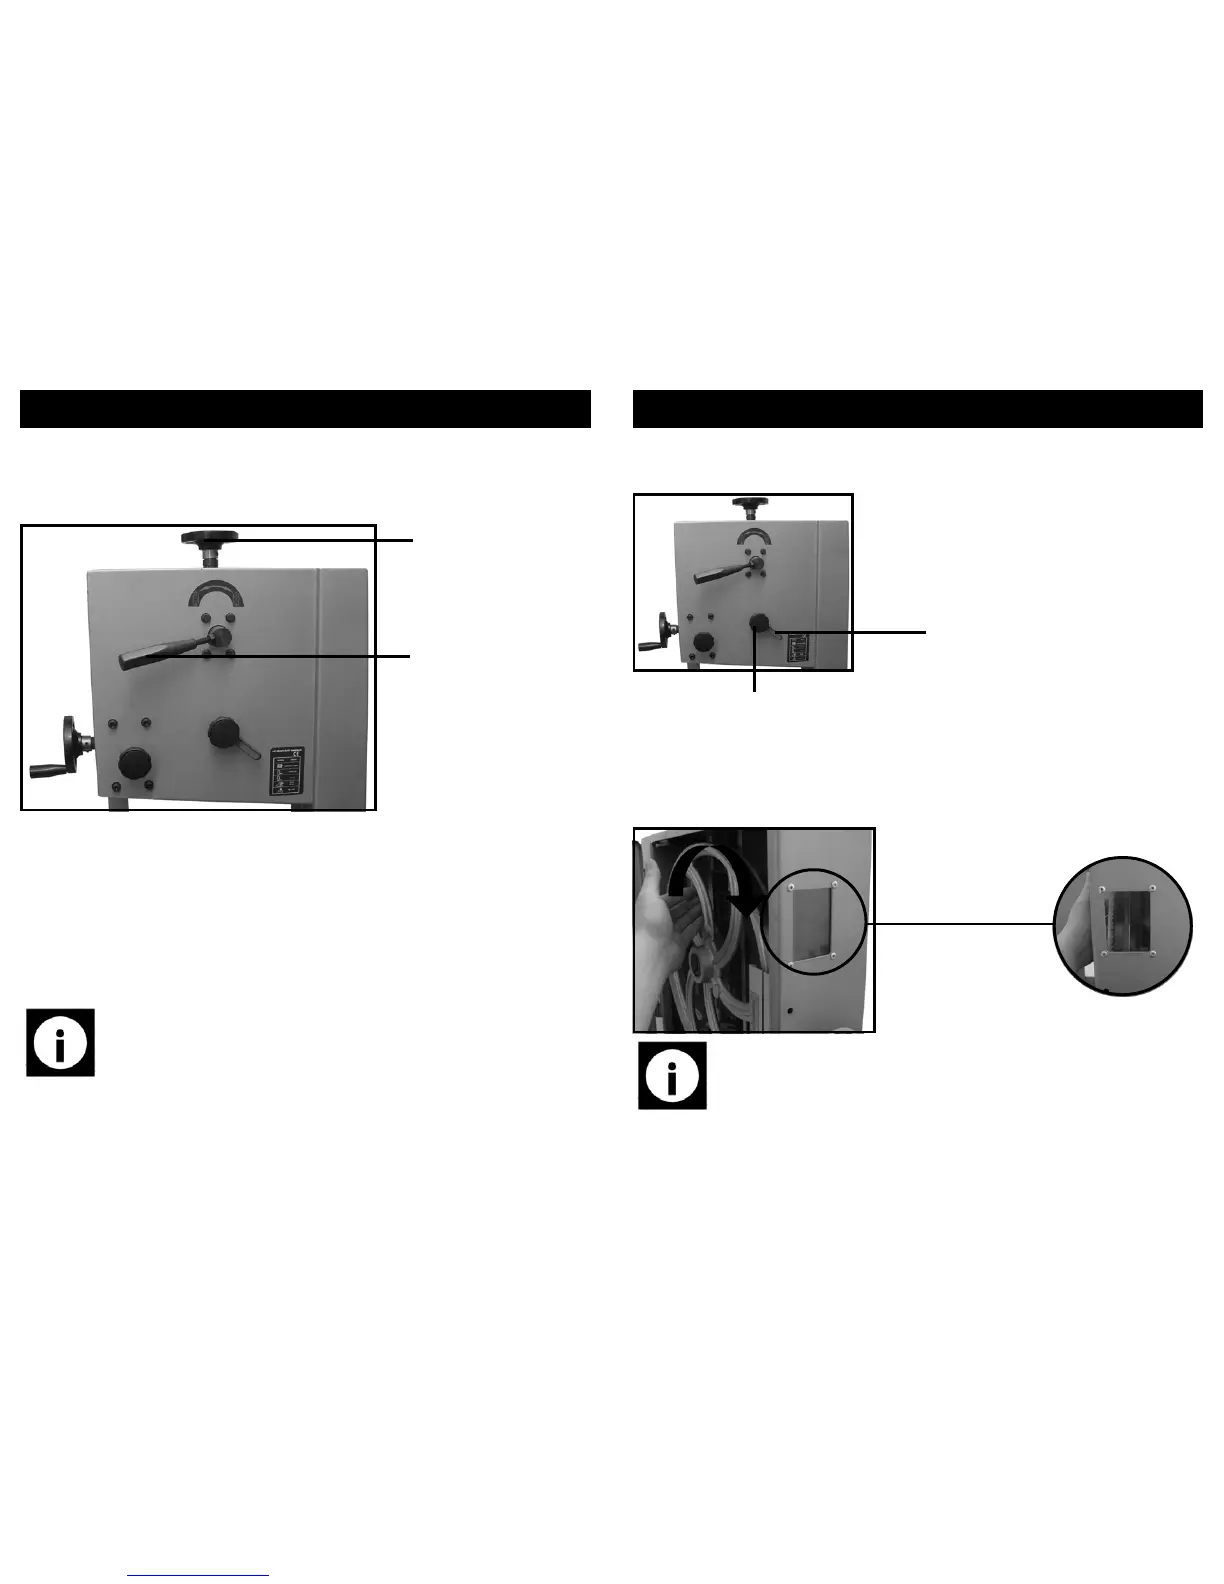
Blade tension fine ad-
justment hand-wheel
Blade tension quick
release lever
• Return the pressure to the blade by turning the blade tension quick release lever
back to its original position.
• Continue to tension the blade fully by turning the fine adjustment hand-wheel
until the red arrow points to the correct blade thickness through the blade ten-
sion indicator window.
21
OPERATING INSTRUCTIONS….cont
Tracking the saw-blade:
• Release the blade tracking lock lever by turning it clockwise.
• With the top door open, turn the drive-wheel by hand.
• Continue to turn the drive-wheel and at the same time turn the blade tracking
knob.
• Turn both the drive-wheel and the blade tracking knob until the blade is sitting
on the centre of the drive-wheel.
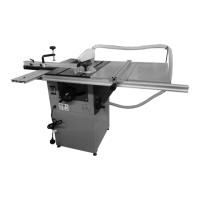
Blade tracking lock lever
Blade tracking knob
Note: Use the blade tracking window to see where the blade is sitting
on the drive-wheel.
• Once the blade has been correctly set, Turn the lock lever clockwise to lock into
position.
• Follow the instructions on page 15 and 16 to re-fit the rip-fence.