12
GB
12
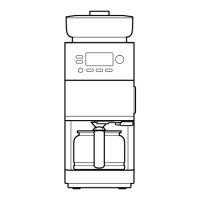
How to use
How to Use
Prepare
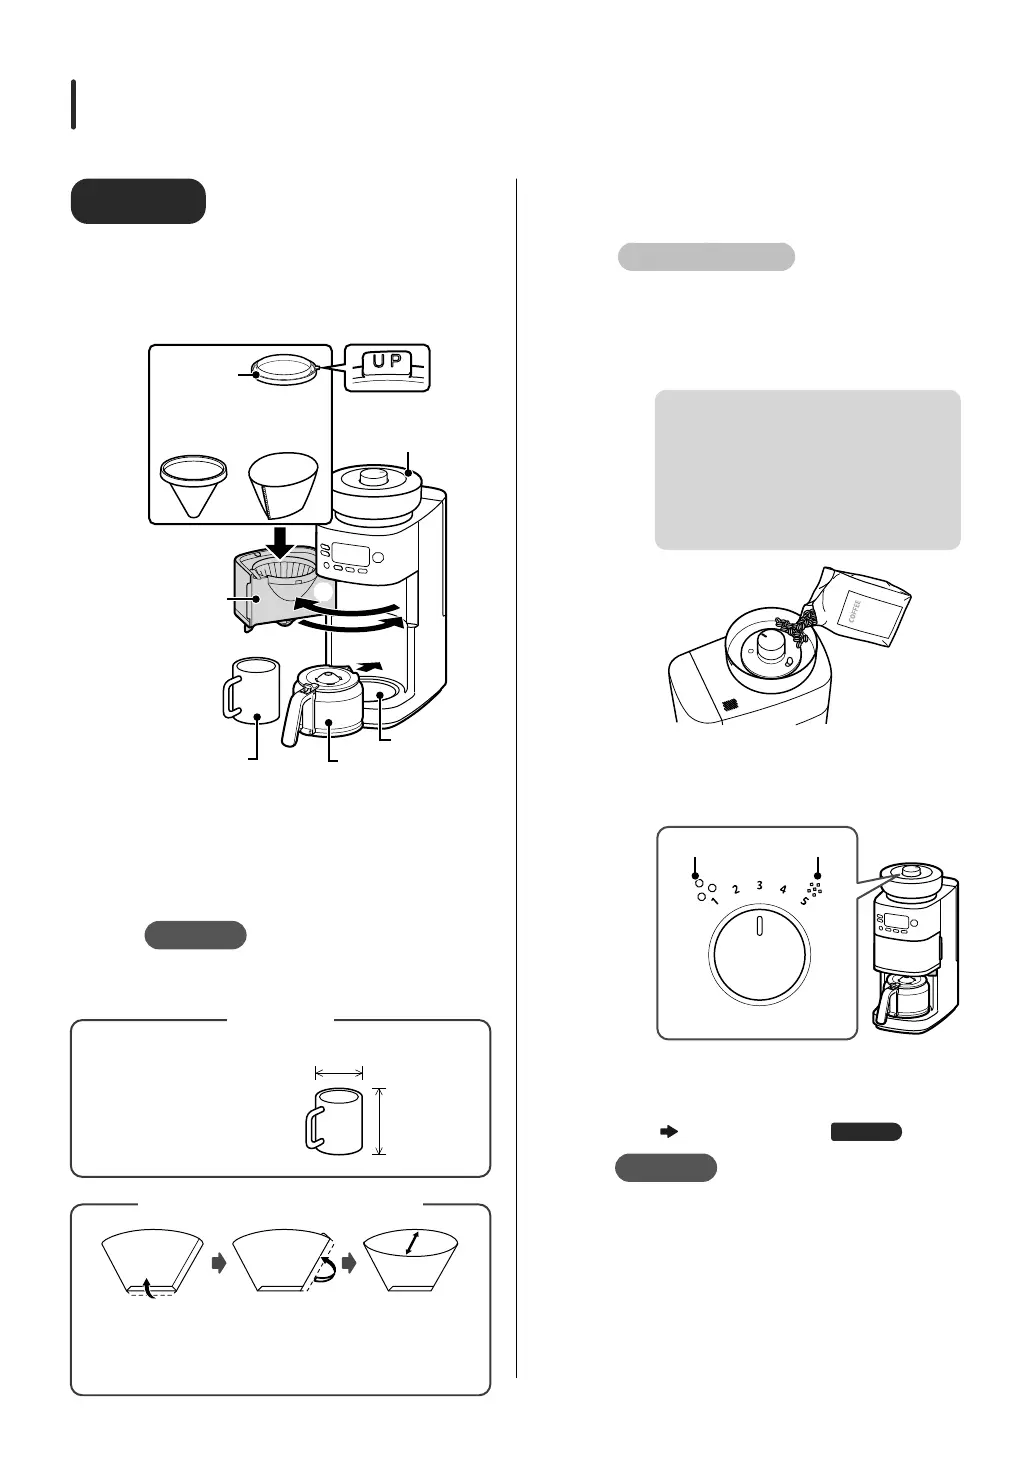
1 1
Attach filter to basket and
place server or normal mug on
warming plate
①①
②②
③
③
④
④
Hopper lid
Warming plate
Server
Stainless filter or paper
filter (not included)
Mug cup
(not included)
Basket ring
Basket
①
Open the basket
②
Attach filter to basket and secure with
basket ring
③
Close the basket
④
Place server or mug on warming plate
Note
Be sure to set the filter.
Coffee cannot be brewed without setting.
Please use the following
size mug.
Diameter: approx. 6 to 9 cm
Height: approx. 9 cm or less
Capacity: 250 ml or more
Approx. 9 cm
or less
Approx. 6-9 cm
Mug cup
Fold the side seal
part to the
opposite side of
the bottom
Fold the sealed
part at the
bottom
Open up the
inside
Use size “1 x 2” or “102” for 2 to 4 cup trapezoidal filters.
How to fold the paper filter
2 2
Add coffee beans or coffee
grounds
For coffee beans
①①
Detach the hopper lid
②②
Put coffee beans in the hopper
It can hold up to approximately 200 g of
coffee beans.
Depending on the amount of beans in the
hopper and the size of the beans, the amount
of beans drawn may be less or may not be
evenly distributed.
If the beans are light or oily (because
they will not fit inside the mill)
If beans are very hard
③③
Attach the hopper lid
④④
Turn the GRIND LEVEL dial to set the
grain coarseness
GRIND LEVEL dial
Coarse
ground
Fine
ground
⑤⑤
Press and hold the COURSE button
(about 2 seconds) to set the grinding
time
“Set the grinding time”
Page
16
Note
If the inside of the hopper lid or hopper
is wet, thoroughly wipe off any oil or
moisture.
This can cause coffee beans to stick and remain
in the hopper.
Do not put in damp or moist coffee
beans.