35
4. Properly position workpiece 5. Make sure workpiece is clamped 6 rmly against the table
and the fence.
5. Make sure all controls are locked before cutting.
WARNING
Use clamping position that does not interfere with operation. Before
switching on, lower head assembly to make sure clamp clears guard and
head assembly.
6. Activate the switch. Lower the head assembly and make your cut.
7. Wait until blade comes to a complete stop before returning head assembly to the raised
position and/or removing workpiece.
Please note: the inch-marking on the fence is for reference only. There is an off-set of the
zero-point while miter cutting.
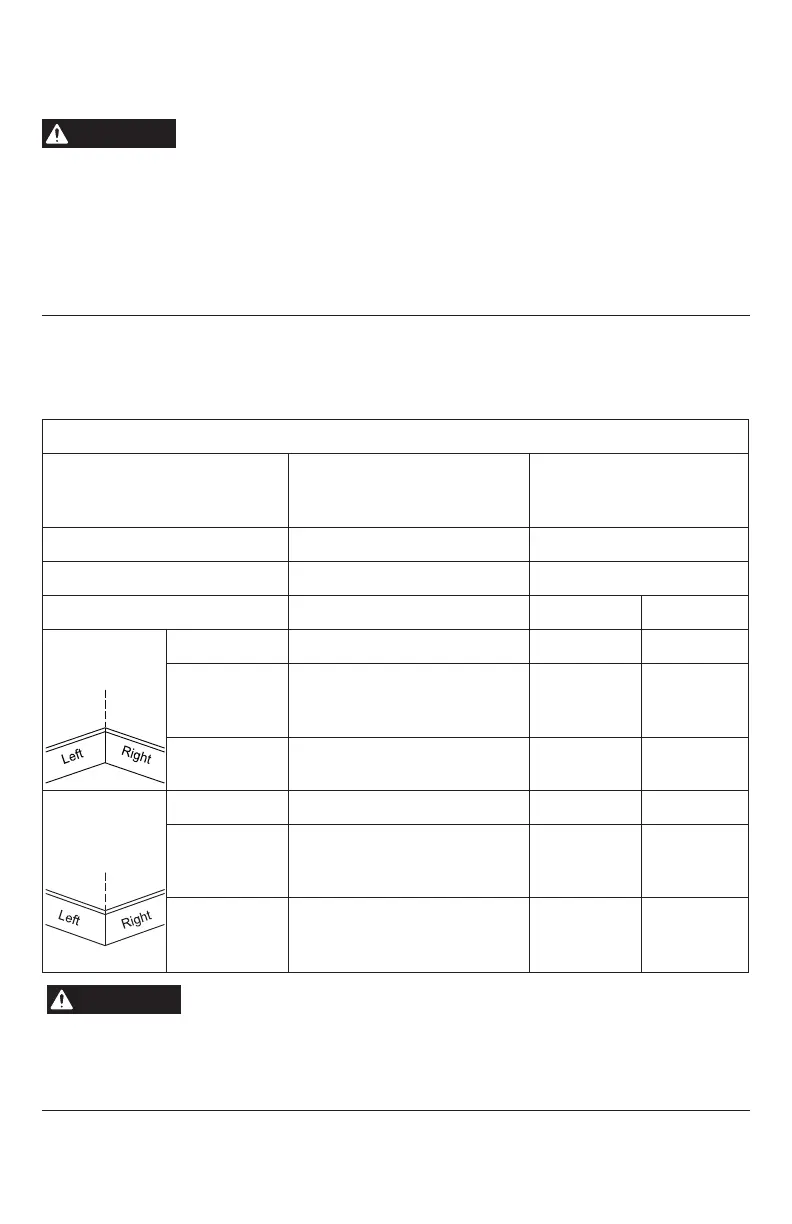
Base Molding
•
Base molding can be cut vertical against fence or at on the table.
•
Follow the table for helpful hints on cutting base molding.
BASE MOLDING CUTTING INSTRUCTIONS
SETTINGS
/
INSTRUCTIONS
Vertical Position Back of
molding is against the fence
Horizontal Position Back of
molding is at on the table
Sliding Fence Far Right Position Move to proper position
Bevel Angle 0° 45°
Molding position Left Side Right Side* Left Side Right Side*
Inside corner
of wall
Miter Angle Left at 45° Right at 45° 0° 0°
Molding
position
Bottom
against table
Bottom
against table
Top against
fence
Bottom
against
fence
Finished side Keep left side
of cut
Keep right
side of cut
Keep left
side of cut
Keep left
side of cut
Outside
corner of
wall
Miter Angle Right at 45° Left at 45° 0° 0°
Molding
position
Bottom
against table
Bottom
against table
Bottom
against
fence
Top against
fence
Finished side Keep left side
of cut
Keep right
side of cut
Keep right
side of cut
Keep right
side of cut
WARNING
Check for interference between workpiece and saw head components by
performing a dry cut. Interference can prevent proper saw operation and
cause injury and/or tool damage.
* If a piece of the saw head interferes with the workpiece while cutting it on the right side; it is
recommended to ip the workpiece and cut it to the left.