44
Appendix 4 — Loading Tips
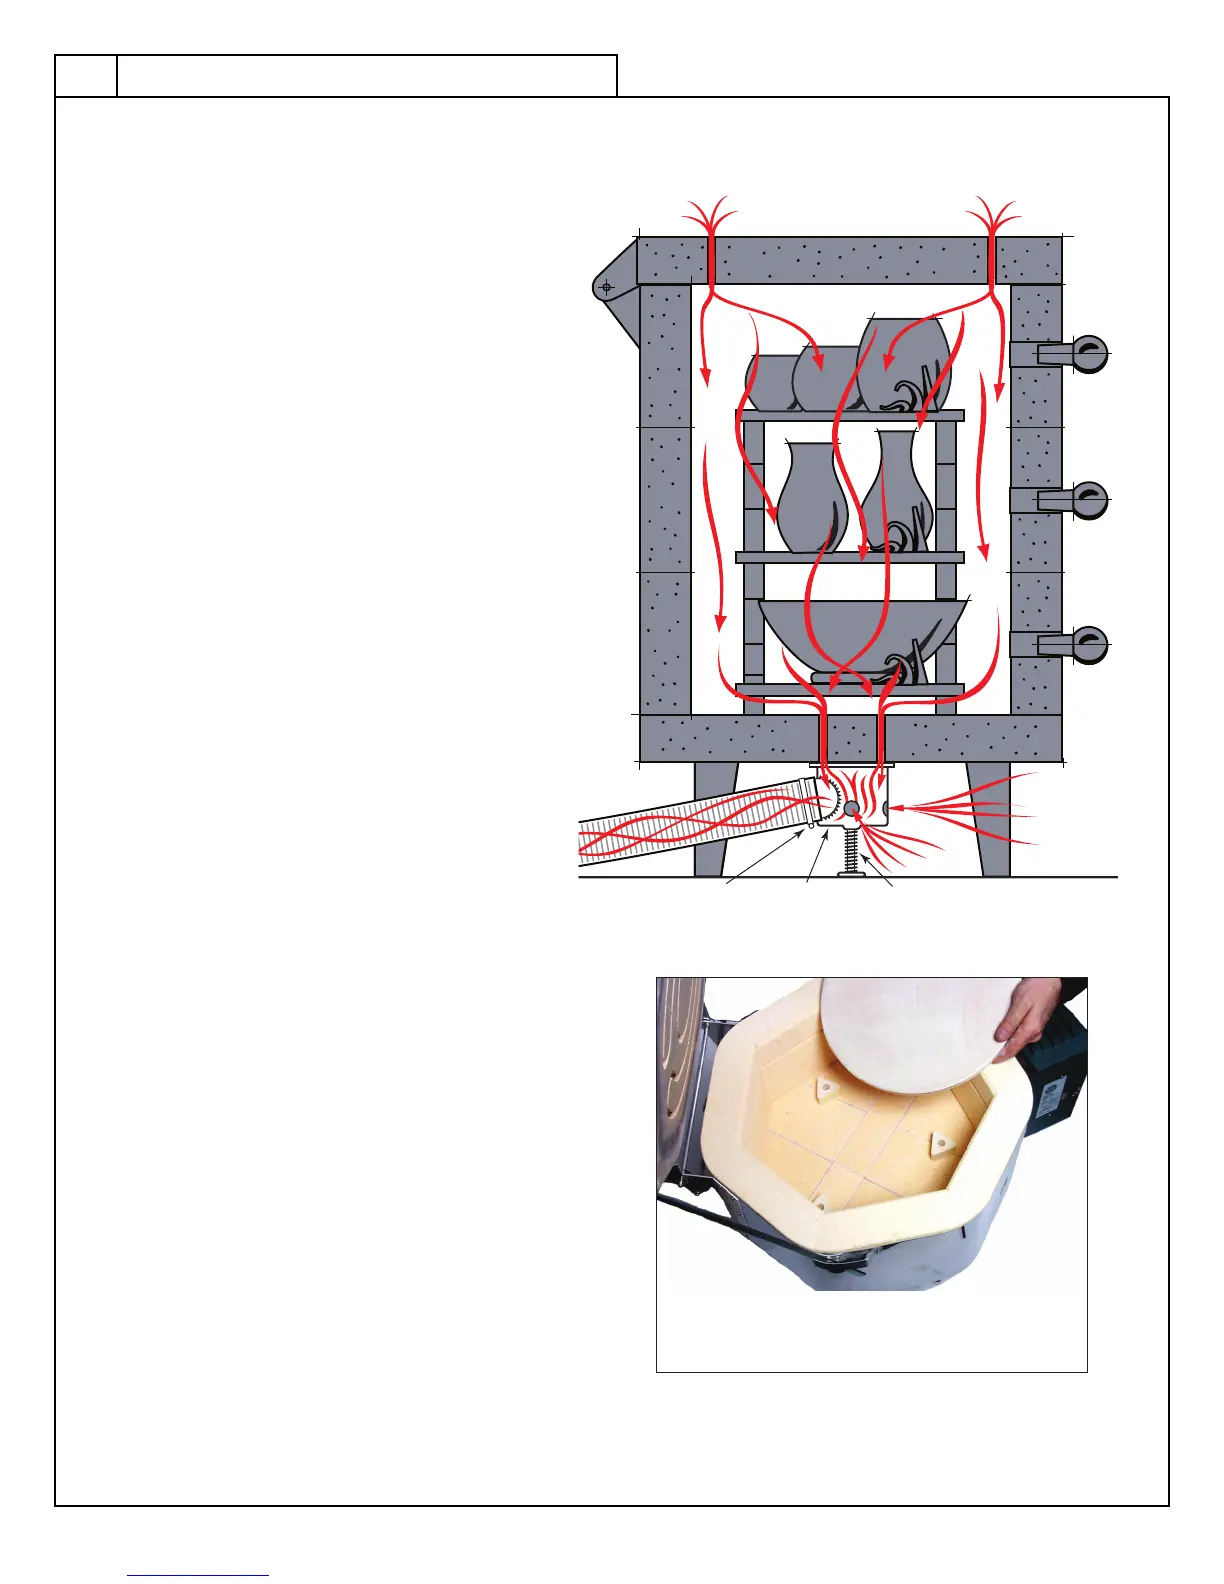
● Balance the Load.
● When planning how to load your kiln, keep in
mind that the center of the kiln is generally the
hottest. Therefore, you will want to distribute
the load with the larger, thicker pieces towards
the middle and the smaller, thinner pieces
towards the top and bottom.
● Allow the Kiln to breathe.
● Many studios work with glazes that require
space between items to allow them to “breath.
Using half shelves with a .25 inch space gap
when used in combination with an EnviroVent.
● Allow for proper clearances.
● Kilns lose most of their heat from the lid and
the slab. Ideally, there should be at least
two inches of space between the lid and the
up one inch from the bottom slab.
● Do not place shelves or ware directly on the
holes drilled for the EnviroVent and will not
● Items placed too close to the thermocouple
can bias the reading. Be sure to leave a 2”
clearance around the thermocouple when
loading shelves, ware and cones.
● Nothing directly under the EnviroVent holes.
●
allow air to be drawn into the kiln chamber. If a
piece of ware is sitting directly under one of these
holes, it could leave a spot in the glaze. If it is not
inch radius on the shelf directly below each hole.
● Do not rush.
●
Check each piece to ensure that too much glaze or
unsteady placement will not cause disaster during
frustration.
Rain Hood
or Vent
5“ Cutout
in Wall
8“ Discharge
Tube, Cut
as Necessary
Blower
W/Motor
Radiator
Clamp
3“ Diameter
Flex Tube
115 volt
Cordset
W/Switch
Negative PressureNegative Pressure
 Loading...