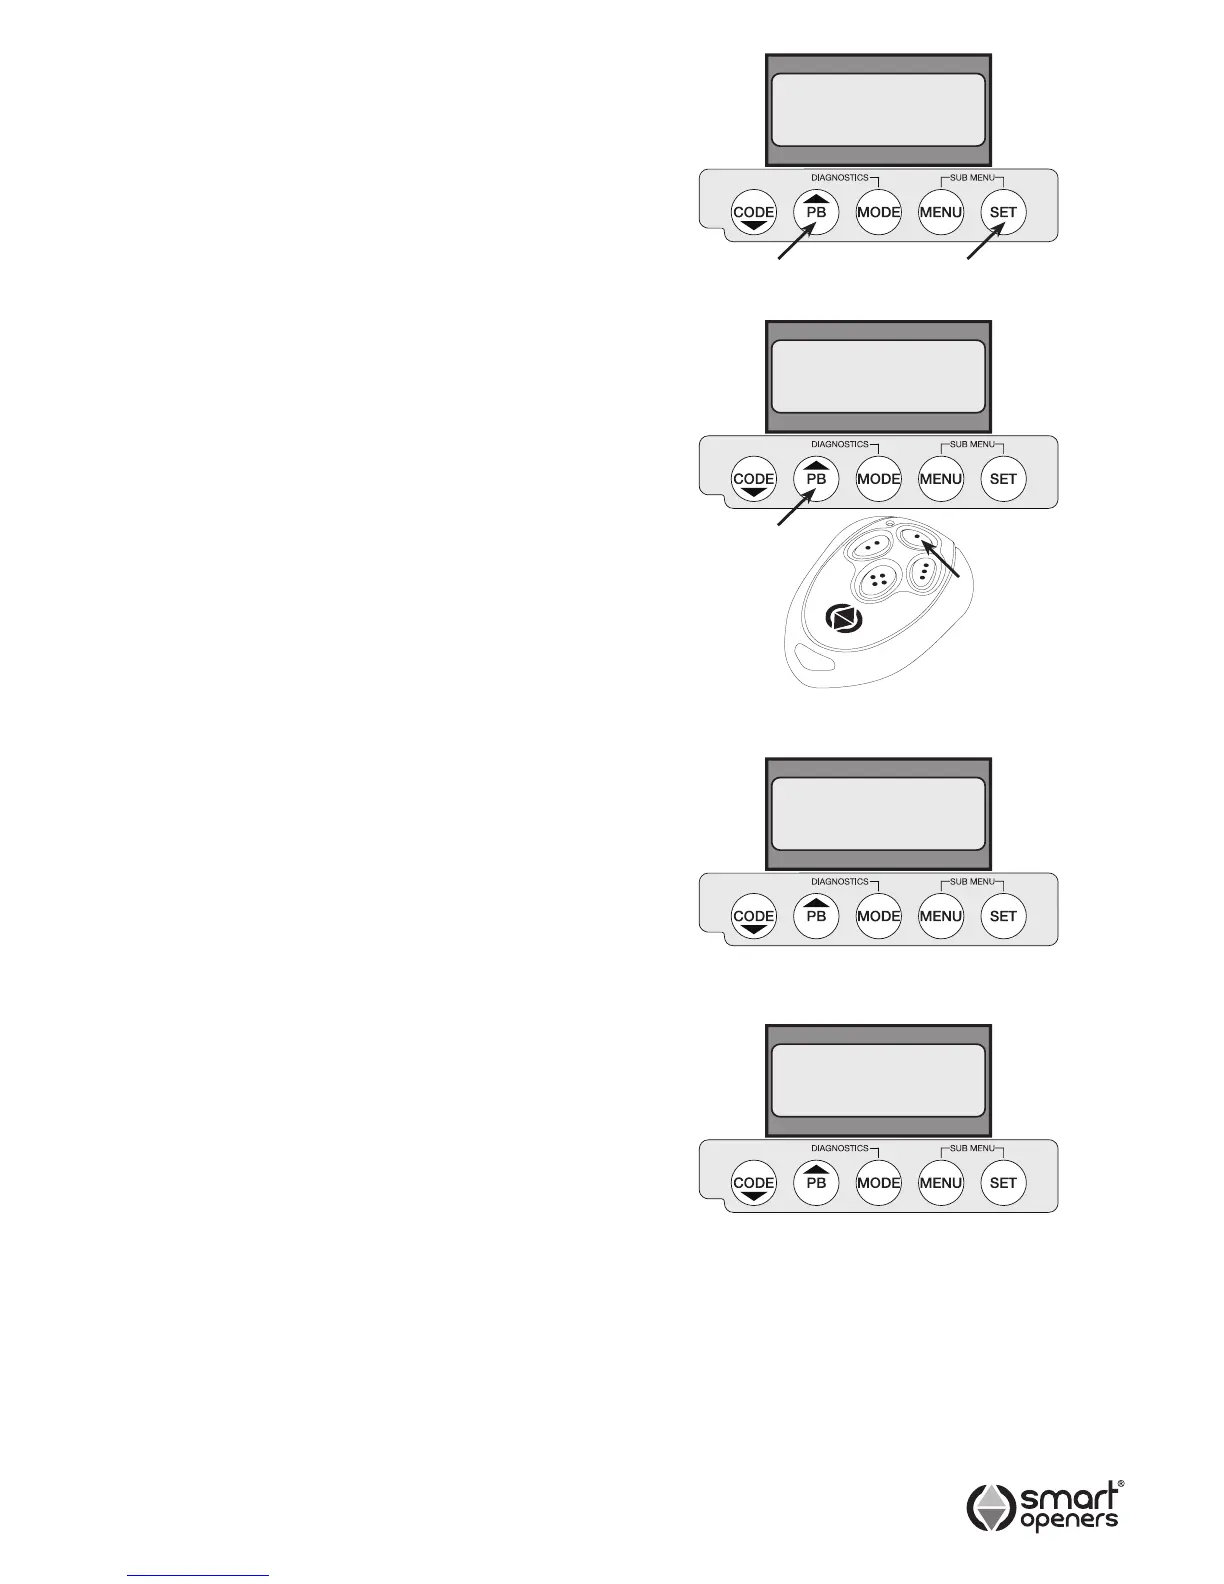
1. Press SET for 3 secs to enter Limits Set Up. The
display will show Motor Extend Press PB.
2. Press PB. The motor should already be full wound out
and the gate fully closed from the initial set up as per
Pg 7 - if the motor is not already wound out as done
previously it will wind out to the fully closed position.
If they are fully wound out the display will now show
MODE = EXIT SET = SETUP.
3. Press SET to enter setup. The display will show Dual
Motor (default). Press MENU to change to Single
Motor then press SET (Fig. 18).
4. The opener should already be full wound out and the
gate fully closed from the initial set up as per Pg 7 -
The display will show Motor 1 Set Up (Fig. 19). Press
PB (or TX Button 1) to drive the gate to the desired
open position - release button when this position is
reached.
Note: Adjust if required by pressing CODE (or TX Button
4) to move in close direction.
5. Pause for 5 secs (do not press anything) to conrm
open position set. The controller will beep to conrm.
6. The display will show Set Up Complete (Fig. 21) for 2
secs and is ready for normal use.
Aborting Limits Set Up
To abort limits set up press MENU to exit. To return to set
up mode press SET for 3 secs and repeat as per above.
Setting Limits – Single Leaf Gate
-13-
© November 2011 Smart Openers Pty Ltd
Fig. 19
Single Motor
Current
Mode
Set Up
Complete
Motor 1
Set Up
Fig. 18
Fig. 20
Fig. 21