-6-
Installation
1. Read the instructions carefully.
2. Make sure the gate and fence structure is solid and
suitable to be motor driven. A strong base on the
gate is required for securing the gate bracket and an
appropriate mounting surface (on the pier or post) for
the Smart Swing opener.
Note: Do not use this opener on solid clad gates. Wind
load can damage the drive system. 1m
2
of cladding
area = 400kg wind load at pivot point at 40 knots.
3. Make sure that the gate moves smoothly and there
are no friction points.
4. The gate must be properly balanced and must be
easily moved by hand.
5. Make sure that a 240V, adequately protected 3-pin
power outlet is installed within 1m of where the Smart
Swing opener control box is going to be tted.
Important: Ensure that the Smart Swing Linear opener
is not positioned too low on the gate. The
cable must not drag on the ground. This will
damage the cable and the opener which may
also cause irreparable damage to the control
board and will void the warranty.
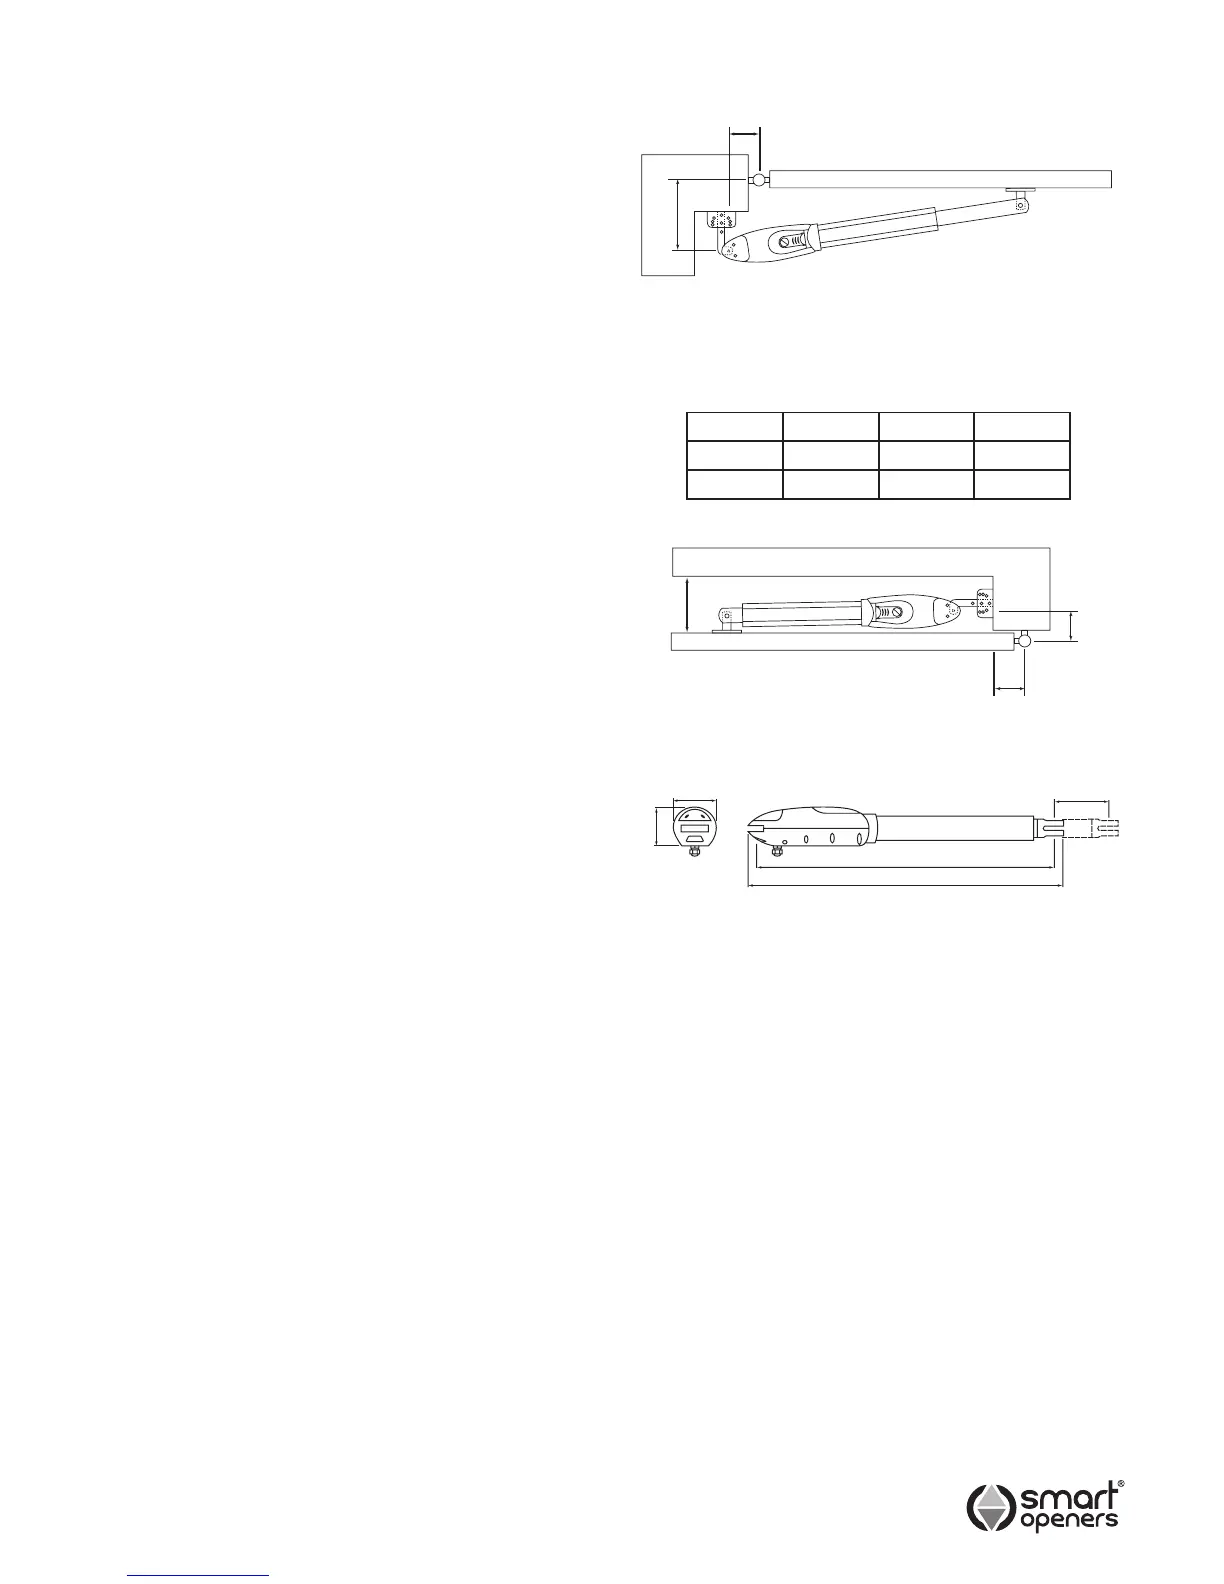
Winding Out The Opener
IMPORTANT: The Smart Swing opener is supplied
fully retracted. Before mounting the gate bracket on
the main stay of the gate make sure the opener is
wound out to the full extent of its travel as per below.
1. Connect the drive unit cable to the control box.
2. Connect the control box to power. The controller will
perform a software check and then display Positions
Not Set (Fig. 8 on Pg 9).
3. Press SET the display will show Motor Extend Press
PB.
4. Press and release PB to wind out the drive unit.
The controller will beep when maximum extension is
reached. The display will then show MODE = EXIT
SET = SETUP.
5. Press MODE to exit.
Note: For a dual leaf gate installation, repeat above
procedure for the second drive unit then disconnect
from power and then disconnect the motor cable..
Table 1 - Gate Geometry
A (mm) B (mm) TRAVEL
Min 70 150 220
Max 190 160 350
B
A