17 | CHAPTER 2 – INSTALLING AND SECURING YOUR SMART BOARD
INTERACTIVE WHITEBOARD
IMPORTANT
Be aware that security cable locks are not designed to be a solid protection
measure because the lock can be torn out. However, potential thieves might be
reluctant to try to sell a product with a broken security cable lock hole, which
would readily identify it as a stolen item.
To lock the pen tray
to your interactive
whiteboard
1. Before you secure your pen tray brackets to the wall as shown in step 3 on
page 15, loop your security cable behind the brackets.
2. Thread the lock end of the cable through the loop end of the cable.
3. Verify that the cable is tight enough that you can’t remove the pen tray while the
lock is in place, and then install the pen tray.
4. Insert the prong end of the security cable into the lock slot, and then complete
the pen tray installation by securing it to the wall.
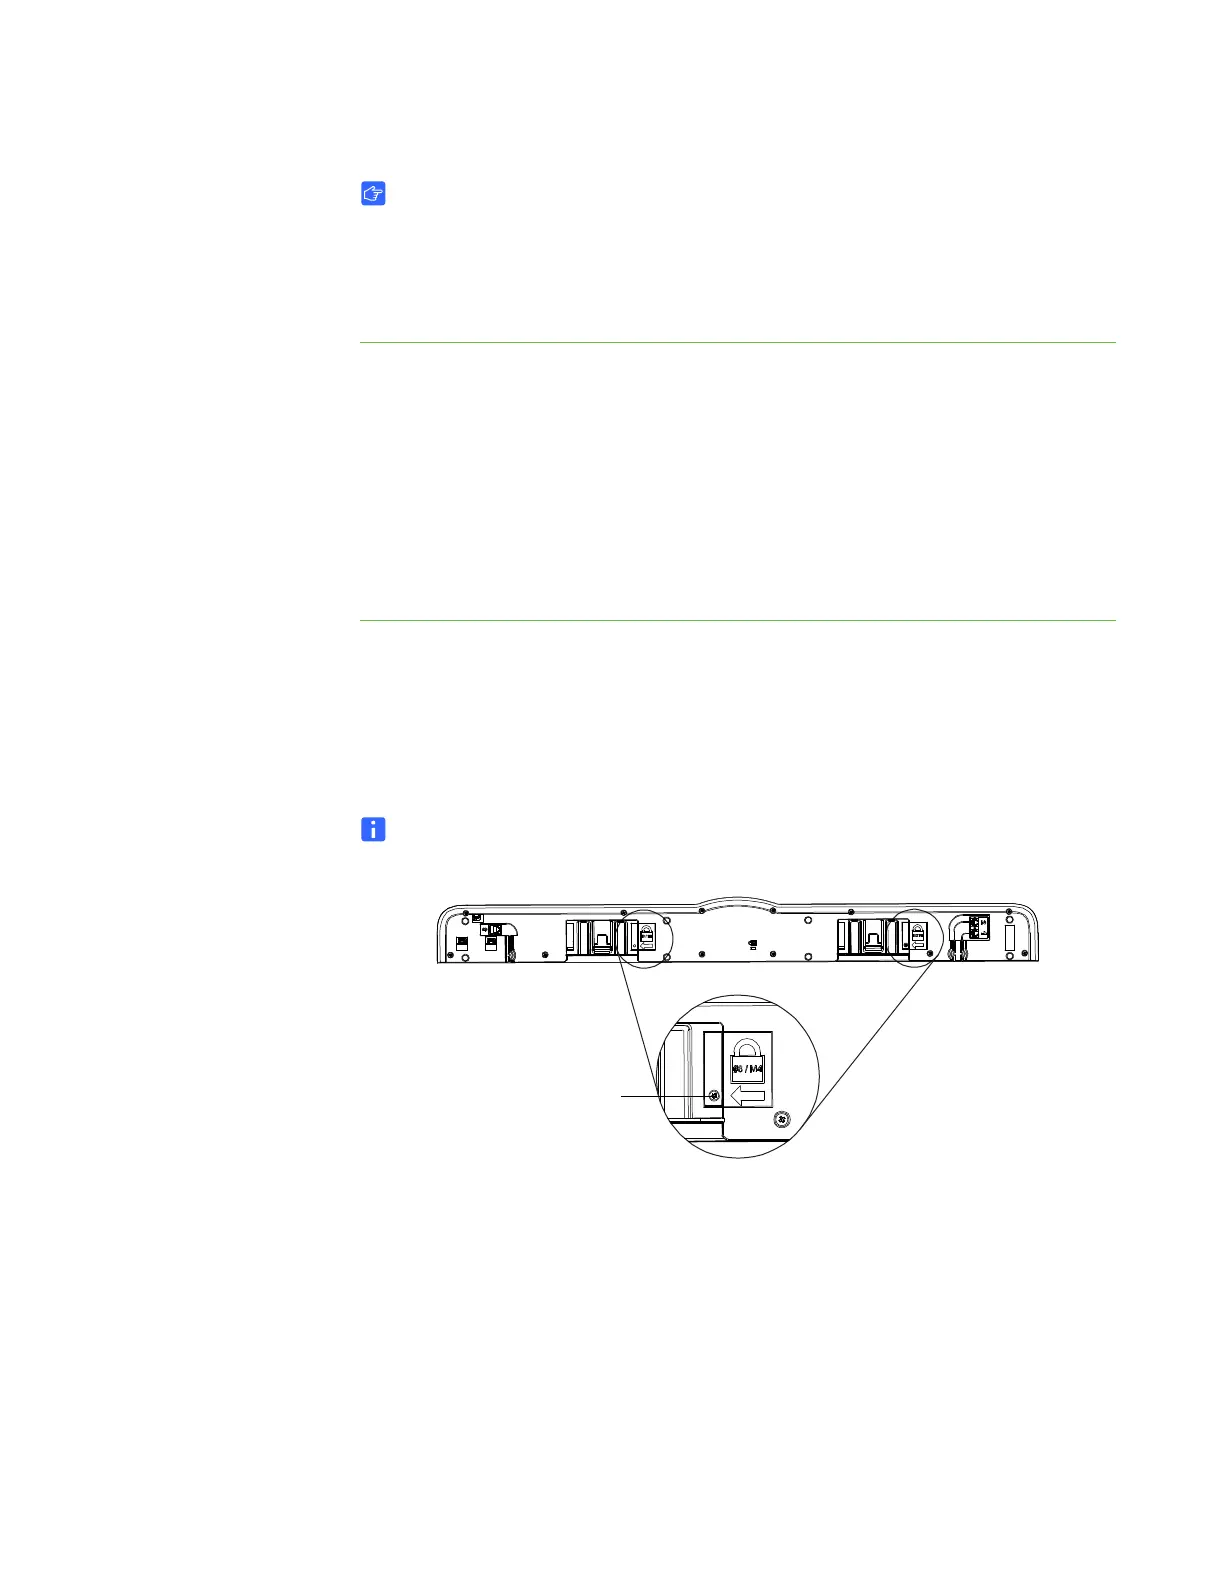
Securing the Pen Tray to the Pen Tray Brackets
Since you can remove the pen tray without tools, you might want to securely attach it
to its brackets. To do this, insert two No. 8/M4 screws (not included) into the holes
indicated in the following illustration.
NOTE
Older units don’t include this feature.