42
Instructions for the installer
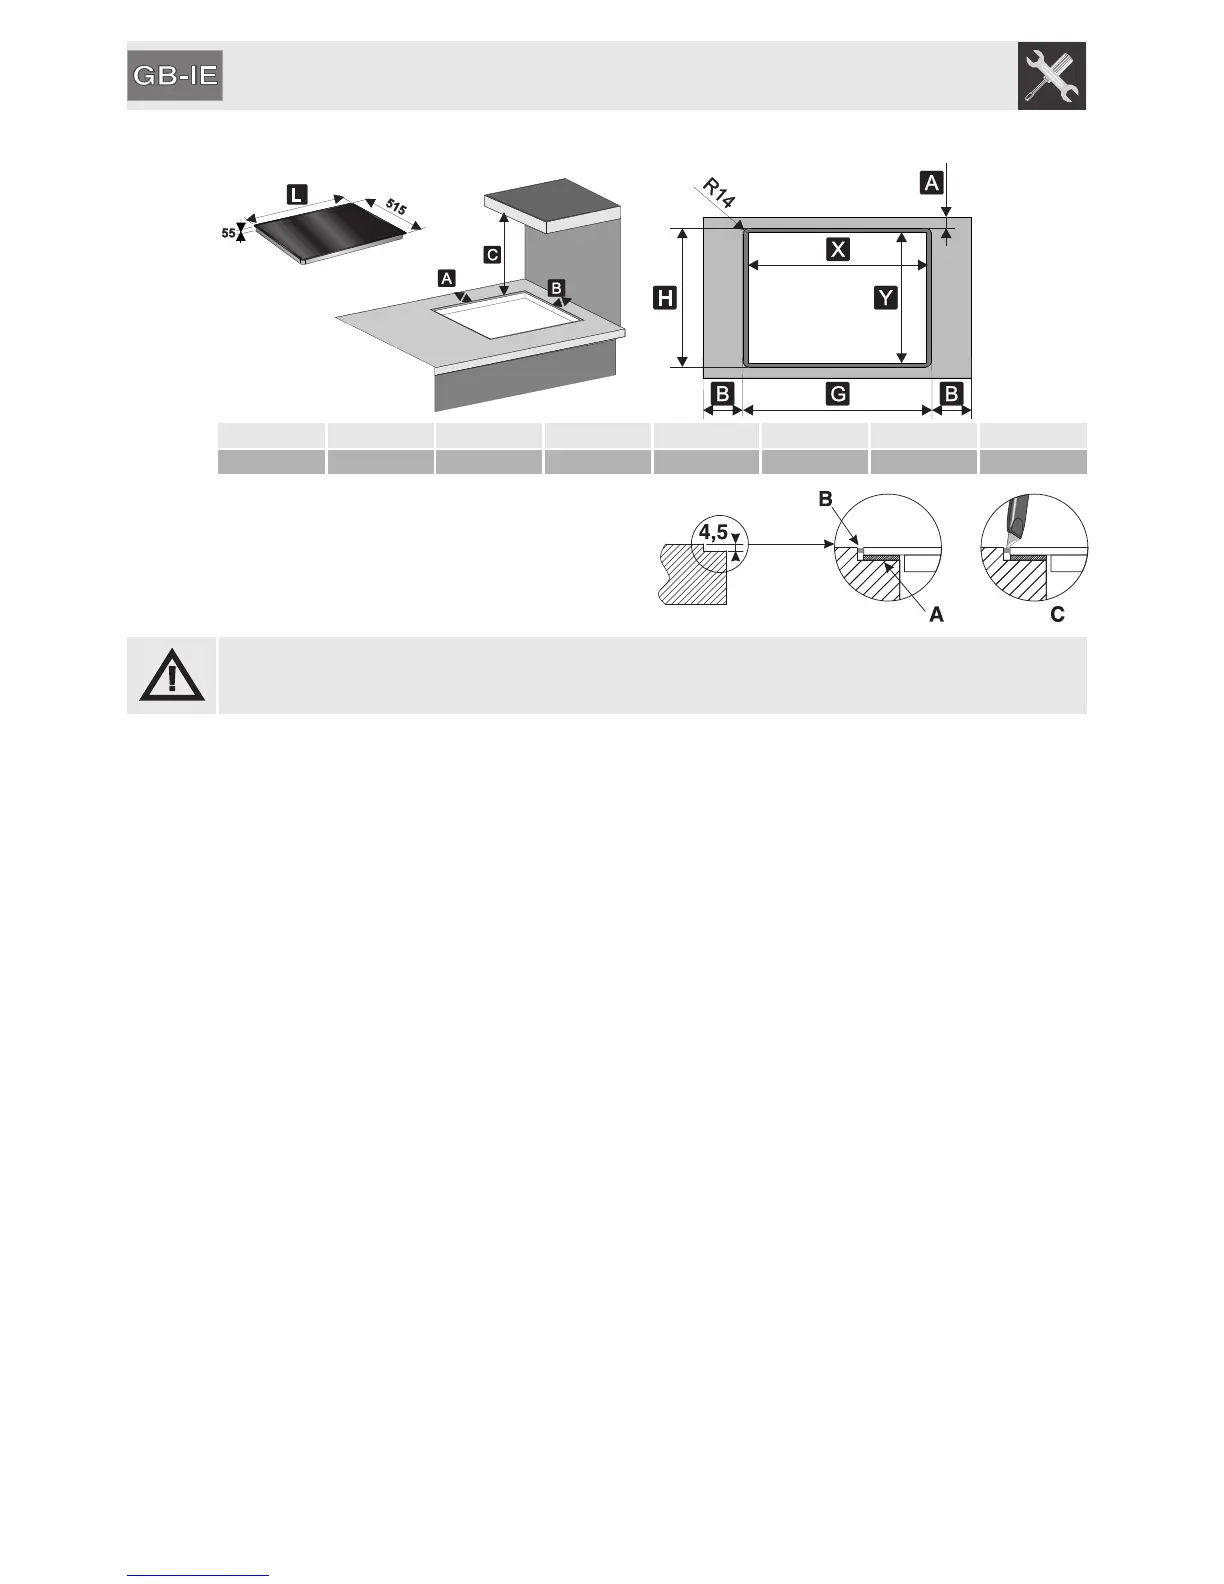
8.2.2 Dimensions for mounting flush with the top
L (mm) X (mm) Y (mm) G (mm) H (mm) A (mm) B (mm) C (mm)
600 560 480 604 519 50 min. 50 min. 750 min.
After laying the adhesive sponge (A) on the glass
surface (see 8.5 Hob seal) and after positioning and
securing the hob, fill the edges with insulating
silicone (B) and wipe away any excess. In the event
the glass surface has to be removed, cut the
silicone using a cutter before attempting to remove
it (C).
Enough silicone must be used to create a seal between the hob and the counter top, but not so much as
to fasten the appliance to the counter top. To fasten the appliance see “8.6 Fixing using brackets”.