SPS8
SMITH Manufacturing 1-800-653-9311 www.SmithMfg.com
8
1/2009
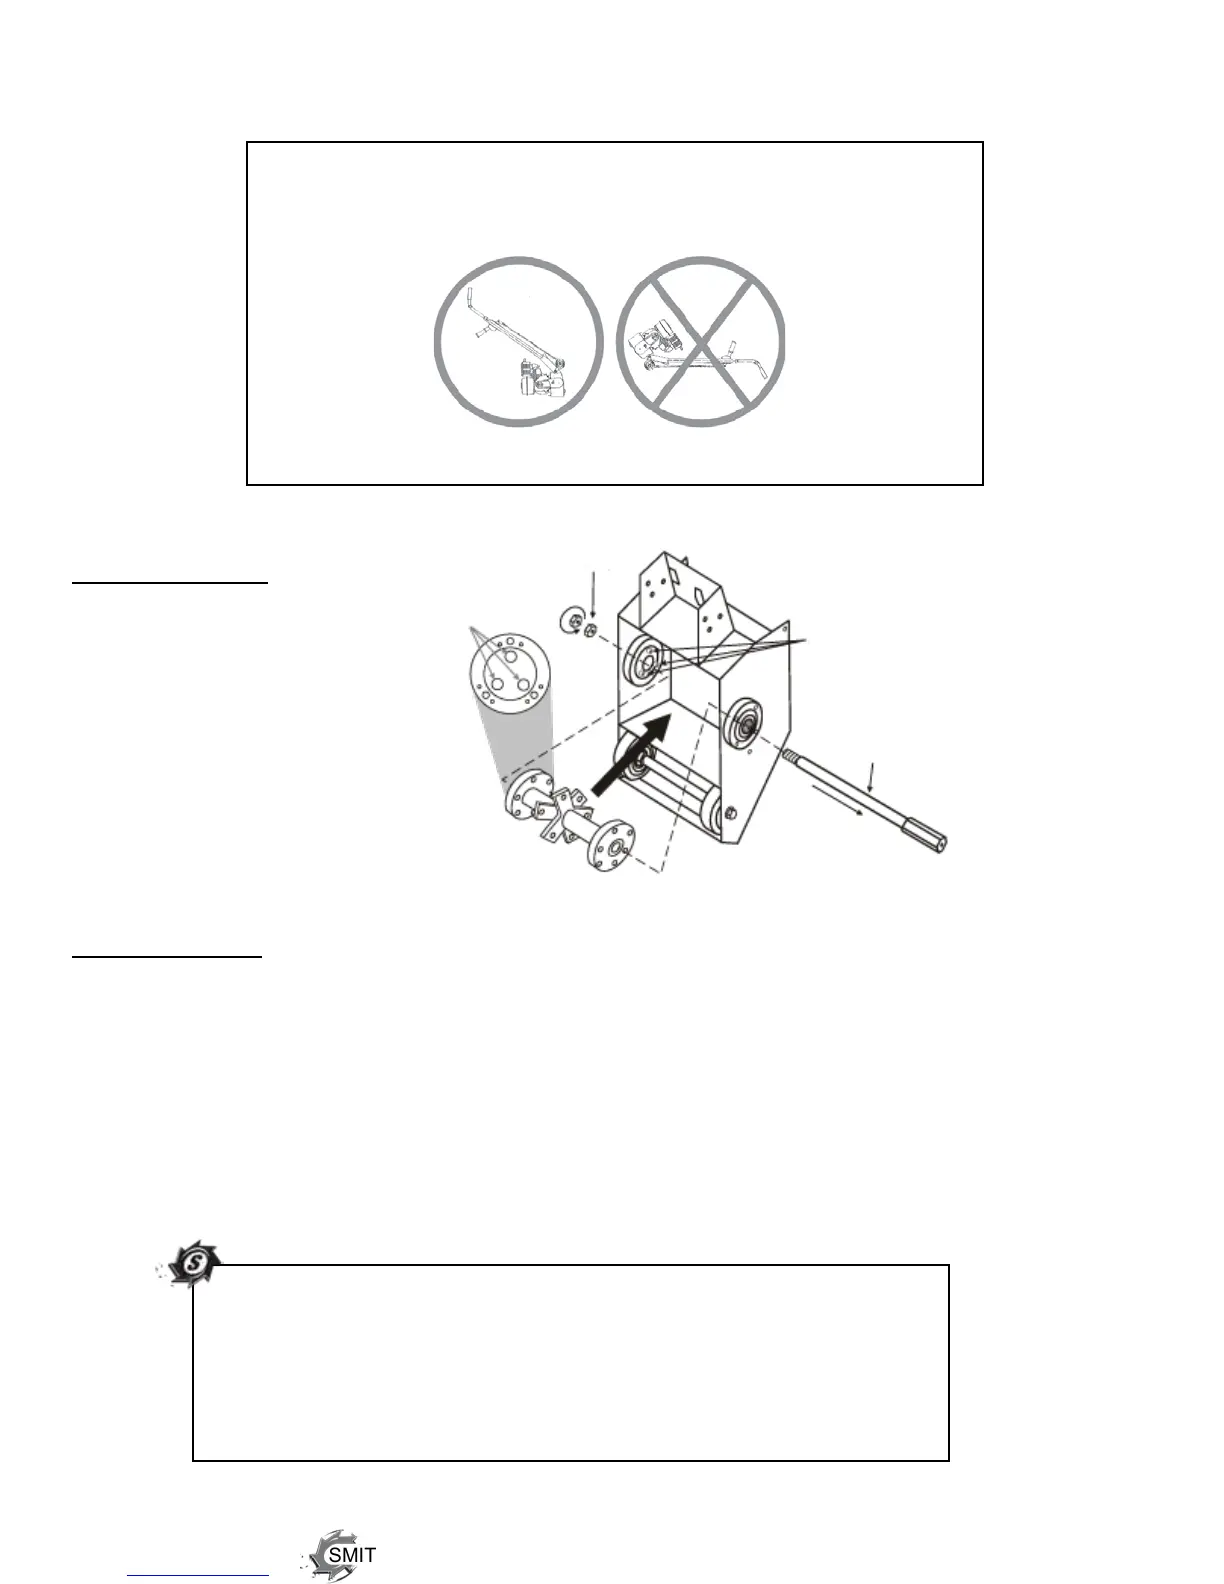
Warning: When tilting the machine, always tilt forward.
Tiltingthemachinebackwardsatanytimewilloodthesparkplug
with oil and may cause damage to your engine! (Read pg. 8)
RIGHT WRONG
DRUM REMOVAL
With a socket wrench,
remove the two,
Left-Handed hex nuts
(located behind the
belt guard).
Tilt the machine forward
only to prevent the engine
cylinders from being
oodedwithoil.
Slide out the drive shaft
and take the drum to a work-
bench for cutter loading.
CUTTER SET-UP
Remove one retaining plate (ILL# 2, pg. 15, or ILL# 3, pg. 16) and load the cutters and spacers on
each shaft using the cutter charts (pg. 13-14) as a guide.
Make certain that the drum is balanced. An unbalanced drum is unsafe and may cause excessive
vibration, damage bearings, break shafts and reduce cutter life.
After loading the cutters, re-fasten the retaining ring and load the drum onto the machine. Lube the
driveshaftandpositionthecutterdrumrmlyonthedriverstudswhileslidingthedrumshaftcarefully
back into position. Fasten the two Left-Handed nuts securely.
TIP:Loadcutterswithoutspacersforasmoothnish.
Offset or align carbide-spiked cutters for grooving, surface leveling,
or removing. And ALWAYS load the special milling cutters in the
samedirection,withthecarbideedgecuttingrst,andspacedwith
at least one spacer (see page 13 for details). There should be
1/8” - 1/4” play on each section of cutter shaft.
Left-HandedHexNuts
(P/N:65039)
Driver Studs
Drum Axle Shaft
(P/N:65037)
(P/N:65050)
(P/N:65050
side view)
Position Driver Studs
in these holes